16
emax-usa.com
Binding Procedure
Binding is the process of uniquely associating a receiver to a transmitter module. A
transmitter module can be bound to multiple receivers (not to be used
simultaneously). A receiver can only be bound to one transmitter module.
1.Hold the bind button for 2 seconds while the flight controller is already on. When
the RED LED is flashing, it means the receiver is in BIND MODE
2.Turn on the transmitter, make sure it is set to D8 mode, and then set it into bind
mode. When the BLUE LED on the flight controller starts flashing, it means bind
successful.
3.Power cycle the flight controller and take your radio out of bind mode.
Alternate Binding Method
It is possible to place the receiver into Bind Mode via the Betaflight configurator.
In the CLI tab type in this command:
bind_rx_spi
Hit enter and your receiver should be in bind mode. Follow steps 2-3 from
above to complete the binding process.
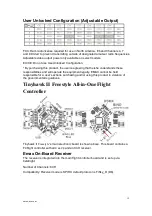
Emax Tinyhawk II Freestyle Flight Controller (FC)
This flight controller has a F4 MCU with a MPU6000 gyro. Tinyhawk II
Freestyle
flight
controller comes pre-programmed and properly tuned for optimal flight. For a full tune
and configuration setting file (CLI dump file) please visit
for
the CLI dump file.
Stock Flight Controller Settings
Tinyhawk II
Freestyle
is configured to take a channel map of the TAER1234
convention. That is the channel map is in the respective order: throttle, aileron,
elevator, rudder, AUX 1, AUX 2, AUX 3, and AUX 4. The arm switch on Tinyhawk II
Freestyle
is set on AUX 1 and armed with the highest value. AUX 2 is configured for
a 3 stage switch to select flight modes: Acro, Horizon, and Angle activating in an
increasing order. AUX 3 is configured for the beeper. In a high state the motors will
beep. AUX 4 is set to Flip Over After Crash mode (often referred to as turtle mode).
Turtle mode is set when AUX 4 is in a high state. Please configure your radio as
described above or change these settings in Betaflight Configurator.
PID profiles:


