www.timberk.com • Electric drier for changing of air humidity
8
2. Continuous draining
• Water can be automatically emptied into a floor drain by attaching the
unit with a water hose (Id≥ 5/16 , not included) with a female threaded end
(ID:M=1 , not included) 8
• Remove the plastic cover from the back drain outlet of the unit and set
aside, then insert the drain hose through the drain outlet of the unit and
lead the drain hose to the floor drain or a suitable drainage facility. (See.
Fig.9 and Fig.10)
• When you remove the plastic cover, if there is some water in the back
drain outlet of the unit you must dry it. Make sure the hose is secure so
there are no leaks and the end of the hose is level or down to let the water
flow smoothly.
• Direct the hose toward the drain,making sure that there are no kinks that
will stop the warter flowing.
• Select the desired humidity setting and fan speed on the unit for
continuous draining to start.
NOTE:
When the continuous drain feature is not being used,
remove the drain hose from the outlet and attach the
rubber plug back to the drain outlet.
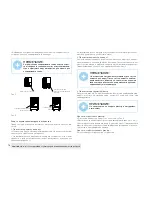
Fig. 7
Fig. 8
NOTE:
• When you remove the bucket, do not touch any parts
inside of the unit. Doing so may damage the product. Be
sure to push the bucket gently all the way into the unit.
Banging the bucket against anything or failing to push it
in securely may cause the unit not to operate.
• If the pump hose drops when you remove the bucket
(see Fig.7),you must reinstall the pump hose properly
to the unit before replace the bucket into the unit (see
Fig.8).
• When you remove the bucket,if there is some water in
the unit you must dry it.
• When the unit is on, if the bucket is removed, the
compressor and the fan turn off, then the unit will beep
8 times and the digital display shows Eb.
• When the unit is off, if the bucket is removed, the unit
will beep 8 times and the digital display shows Eb.
Care and cleaning of the dehumidifier
Turn the dehumidifier off and remove the plug from the wall outlet before
cleaning.
1. Clean the Grille and Case
• Use water and a mild detergent. Do not use bleach or abrasives.
• Do not splash water directly onto the main unit. Doing so may cause an
electrical shock, cause the insulation to deteriorate, or cause the unit to rust.
• The air intake and outlet grilles get soiled easily, so use a vacuum
attachment or brush to clean.
2. Clean the bucket
Every few weeks, clean the bucket to prevent growth of mold, mildew
and bacteria. Partially fill the bucket with clean water and add a little mild
detergent. Swish it around in the bucket, empty and rinse.
Содержание DH TIM 30 E9
Страница 11: ...1 1 11 2 12 3 12 4 13 5 14 6 15 7 15 8 19 9 20 1 TIMBERK www timberk om 11...
Страница 13: ...4 1 2 3 4 5 1 2 3 4 3 5 6 7 20 40 1 2 1 1 4 3 www timberk om 13...
Страница 14: ...2 20 20 20 20 20 40 5 41 F 35 95 F 220 240 50 5 41 F 5 41 F 5 1 1 1 www timberk om 14...
Страница 15: ...3 6 1 2 250 3 4 5 6 35 85 5 0 0 24 7 8 35 85 0 24 5 30 90 AS NOTE www timberk om 15...
Страница 16: ...ES P2 P2 EC EC E3 Eb 3 3 3 250 0 5 10 1 24 5 0 0 P2 www timberk om 16...
Страница 17: ...7 1 P2 4 2 5 16 1 6 5 8 Eb 8 Eb www timberk om 17...
Страница 18: ...1 6 5 2 3 30 4 7 www timberk om 18...
Страница 19: ...4 7 8 5 41 F ES AS P2 EC Eb E3 www timberk om 19...
Страница 20: ...www timberk om 20 www timberk com 24...
Страница 22: ...www timberk om 22 TIMBERK TIMBERK ID 171 21 12 2004 18 5 TIMBERK ID...
Страница 25: ...www timberk om 25...
Страница 26: ...www timberk om 26...
Страница 27: ...www timberk om 27...
Страница 28: ...www timberk om 28...
Страница 29: ...Timberk Timberk www btpart ru www timberk com Timberk www btpart ru Timberk www btpart ru www timberk om 29...
Страница 30: ...Timberk c 10 www timberk om 30...
Страница 32: ...www timberk com...


