


47
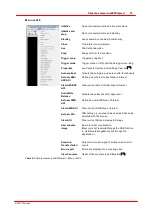
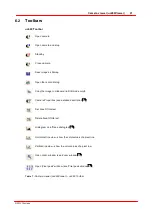
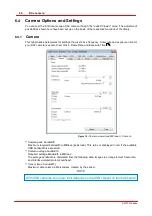
Camera viewer (uc480Viewer)
© 2010 Thorlabs
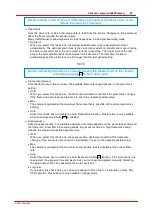
USB card and on the number of USB devices connected. If transfer errors occur,
reduce the pixel clock frequency.
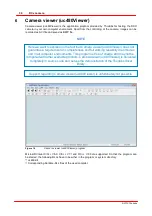
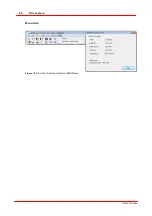
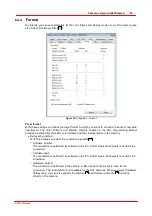
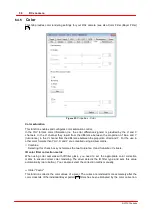
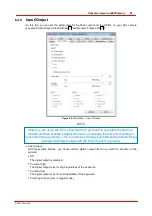
Pixel Clock
Sets the clock rate at which the image data is read from the sensor. Changes to this parameter
affect the frame rate and the exposure time.
Many CMOS sensors allow higher pixel clock frequencies in binning/subsampling mode.
Optimum
When you select this check box, the highest possible pixel clock is determined and set
automatically. The optimum pixel clock is the clock rate at which no transfer errors occur during
the time (in seconds) set in the
Auto pixel clock test period
box. The longer you set the test
period, the more reliable the determined pixel clock becomes. The total time it takes to
automatically set the pixel clock is a bit longer than the test period setting.
NOTE
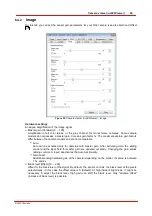
Before optimizing the Pixel clock please check if the Master Gain on the "Image"
is NOT set to auto.
Frame rate (Freerun)
Sets the frame rate in freerun mode. The available frame rate range depends on the pixel clock
setting.
Hold
When you select this check box, the frame rate will remain constant if the pixel clock changes.
If the frame rate cannot be maintained, it is set to the nearest possible value.
Max
The camera is operated at the maximum frame rate that is possible at the current pixel clock
setting.
Auto
Select this check box to activate the Auto Frame Rate function. This function is only available
when Auto Exposure Shutter
is enabled.
Exposure time
Sets the exposure time. The available exposure time range depends on the pixel clock setting and
the frame rate. A low frame rate setting allows long exposure times. A high frame rate setting
reduces the maximum possible exposure time.
Hold
When you select this check box, the exposure time will remain constant if the frame rate
changes. If the exposure time cannot be maintained, it is set to the nearest possible value.
Max
The camera is operated at the maximum exposure time that is possible at the current frame
rate.
Auto
Select this check box to activate the Auto Exposure Shutter
function. If the Auto check box
is selected, the exposure time and pixel clock can no longer be adjusted manually. Selecting
the
Hold
or
Max
check box deselects the Auto check box.
Long-term
If you select this check box, you can set an exposure time of up to 10 minutes on many
DCx
CCD cameras. This function is only available in trigger mode.
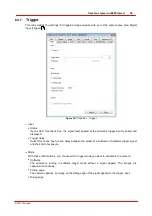
49
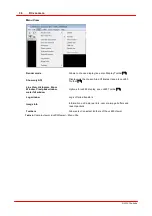
63
63
Содержание DCC1 45 Series
Страница 5: ...Version Date 3 5 2 22 09 2010 2010 Thorlabs 2010 Thorlabs ...
Страница 13: ......
Страница 15: ......
Страница 16: ...Introduction DCx camera Part I ...
Страница 18: ...General Information DCx camera Part II ...
Страница 21: ......
Страница 22: ...Getting Started DCx camera Part III ...
Страница 24: ...Installation DCx camera Part IV ...
Страница 30: ...uc480 Camera Manager DCx camera Part V ...
Страница 38: ...Camera viewer uc480Viewer DCx camera Part VI ...
Страница 45: ...40 DCx camera 2010 Thorlabs Menu Help Figure 15 Info about Camera viewer uc480Viewer ...
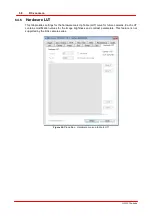
Страница 53: ...48 DCx camera 2010 Thorlabs Default Click this button to reset all parameters to the model specific defaults ...
Страница 87: ......
Страница 88: ...SDK Software development Kit DCx camera Part VII ...
Страница 101: ...96 DCx camera 2010 Thorlabs Flowchart Single Capture Figure 44 Flowchart Capturing a single frame 1 of 2 ...
Страница 102: ...97 SDK Software development Kit 2010 Thorlabs Figure 45 Flowchart Capturing a single frame 2 of 2 ...
Страница 103: ...98 DCx camera 2010 Thorlabs Flowchart Sequence Capture Figure 46 Flowchart Capturing a frame sequence 1 of 2 ...
Страница 104: ...99 SDK Software development Kit 2010 Thorlabs Figure 47 Flowchart Capturing a frame sequence 2 of 2 ...
Страница 109: ...104 DCx camera 2010 Thorlabs Figure 52 Flowchart Handling events messages ...
Страница 113: ...108 DCx camera 2010 Thorlabs Flowchart AVI Capture Figure 53 Flowchart Capturing AVI using DCx cameras ...
Страница 120: ...115 SDK Software development Kit 2010 Thorlabs Flowchart Digital input Figure 56 Flowchart Digital input ...
Страница 121: ...116 DCx camera 2010 Thorlabs Flowchart Digital output Figure 57 Flowchart Digital output ...
Страница 161: ...156 DCx camera 2010 Thorlabs Related Functions is_GetCameraType is_CameraStatus 159 121 ...
Страница 175: ...170 DCx camera 2010 Thorlabs is_GetExposureTime 167 ...
Страница 238: ...233 SDK Software development Kit 2010 Thorlabs is_SetImagePos is_SetPixelClock 271 277 ...
Страница 243: ...238 DCx camera 2010 Thorlabs Related Functions is_GetColorConverter is_SetColorMode is_ConvertImage 163 241 127 ...
Страница 261: ...256 DCx camera 2010 Thorlabs is_SetTriggerDelay 289 ...
Страница 271: ...266 DCx camera 2010 Thorlabs is_SetGainBoost is_SetAutoParameter 261 221 ...
Страница 278: ...273 SDK Software development Kit 2010 Thorlabs Example Figure IMAGE Examples for is_SetImagePos ...
Страница 283: ...278 DCx camera 2010 Thorlabs is_SetSubSampling is_SetAOI 284 219 ...
Страница 291: ...286 DCx camera 2010 Thorlabs is_SetAOI is_SetImagePos is_SetPixelClock 219 271 277 ...
Страница 361: ......
Страница 362: ...Maintenance and Service DCx camera Part VIII ...
Страница 370: ...365 Maintenance and Service 2010 Thorlabs ...
Страница 371: ......
Страница 372: ...Camera Basics DCx camera Part IX ...
Страница 389: ......
Страница 390: ...Appendices DCx camera Part X ...
Страница 397: ...392 DCx camera 2010 Thorlabs Figure 90 Securing the adjusting ring ...
Страница 405: ...400 DCx camera 2010 Thorlabs Figure 106 Rev 2 0 Flash Strobe output as Open Emitter OE ...
Страница 408: ...403 Appendices 2010 Thorlabs Figure 108 Filter curve GL Figure 109 Filter curve BG 40 Figure 110 Filter curve HQ ...
Страница 420: ......


