11
10
•
Press the AUTO key again after the main unit has paused and it will repro-
gram its path. It may clean the areas it has cleaned before once again.
•
The main unit would enter the sleep mode when it has stopped operating
for more than 10 minutes. Please quick-press the main unit’s AUTO key or
the remote controller’s ‘Clear’ key first to awaken it in order to use it again.
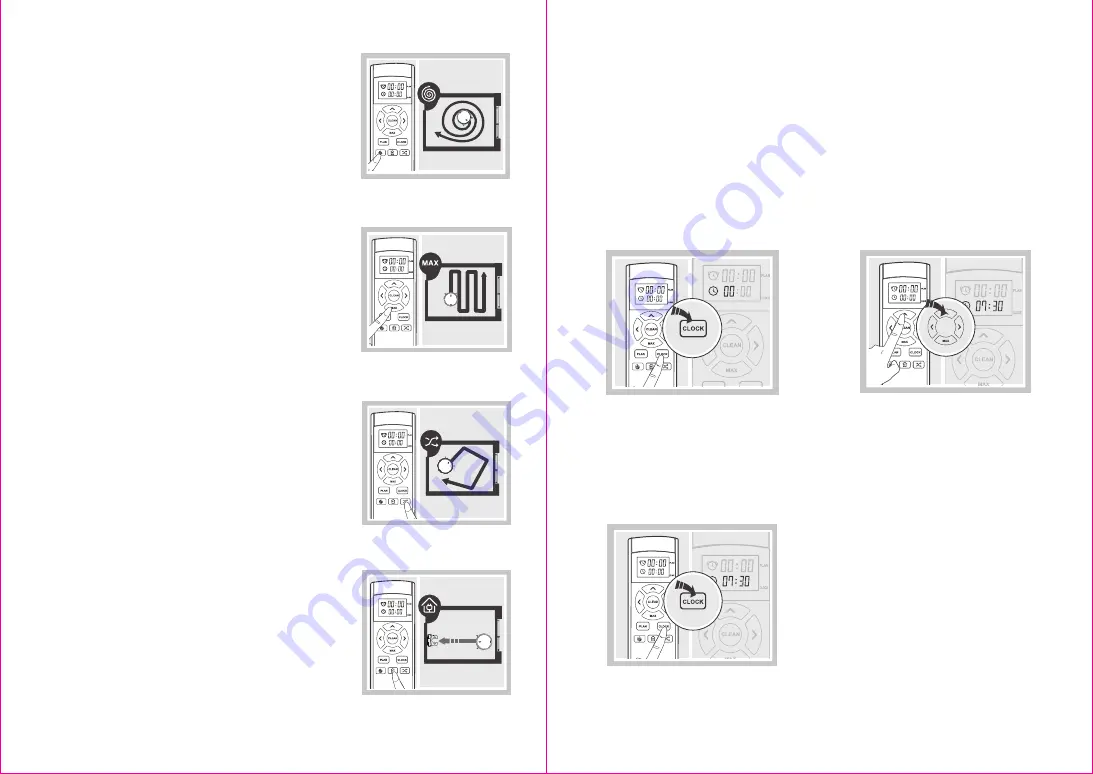
2. Spot mode
3.4 Preset Settings
•
Applicable for ground environments where trash is
more concentrated. The main unit carries out
concentrated cleaning in a “spiral” path at a desig-
nated area. It returns to the starting point once the
cleaning is completed and stops working.
3.MAX mode
•
Applicable for overall ground conditions that are
dirtier and have a greater amount of dust. Press the
‘MAX’ key on the remote controller to increase the
main unit’s suction power for deeper suction. Press
the ‘MAX’ key again to switch back to the normal
suction power.
4.Classic mode
•
The classic random cleaning mode in which the
main unit carries out random cleaning and changes
its direction of operation on its own when it encoun-
ters obstacles.
5.Return to Charging mode
•
The main unit is able to detect that its power is
insufficient during cleaning and activate the ‘Return
to Charging’ mode on its own to search automatical-
ly for a charger to charge itself.
•
The main unit can also be commanded to activate
the ‘Return to Charging’ mode via the ‘Charge’ key
on the remote controller.
The product has a ‘Preset’ function to facilitate more convenient cleaning.
Commands for the time and preset settings have to be sent to the main unit via
the remote controller. Once the preset setting is successful, the main unit will
carry out the cleaning tasks automatically every day according to the time set.
•
Make sure that the green AUTO light on the main unit is flashing before setting
the current and preset times, and that the main unit is in the awakened state. If
the main unit is not awakened, quick-press the AUTO key on the main unit or the
‘Clean’ key on the remote controller first to awaken it.
1. Setting the current time
Quick-press the ‘Clock’ key and the
remote controller’s display displays the
clock icon, and the 88:88 clock flashes.
Once the setting of the time is completed,
press the ‘Clock’ key to save the current
time setting. The setting of the time is
successful when the prompt sound is
heard.
•
The saving of the current time is not
successful if the ‘Clock’ key is not pressed.
Increase or decrease the numbers
using the up and down arrow keys.
Switch between the hour and minutes
using the left and right arrow keys to
set the current time. (Image)


