3
GB
Check of
the programming
-
For a television or a satellite receiver: switch on and,
for example, press 2 to change channels, etc...
-
Video recorder: load a tape and then press
B
.
-
DVD player: load a DVD and then press
B
.
Try other remote control keys to find out the range of
functions you can control. If you think that not all of the
keys are active, try the programming
Method B
or
C
.
When you have retrieved the code of
Learning function
If the make of the device you wish to control is not in
the separate code list or if some functions are missing
in the code you have programmed, you can copy
the key functions of the original remote control of
the device into your ROC4411. Depending on the
format of the transmission codes of the original remote
control, your ROC4411 remote control can memorise
up to 150 keys.
Global delete – Delete all the keys copied
(this is recommended the first time you use
this function)
1. Hold down the
SETUP
key until the indicator lamp
remains lit.
2. Release the
SETUP
key.
3. Press twice on the
LEARN
key. The indicator lamp
goes out and then relights.
4. Press once on the
SETUP
key. The indicator lamp
goes out after several seconds.
5. All the copied keys are now deleted.
Before starting
• The batteries in the 2 remote controls must be in
good condition; change them if necessary.
• First copy 2 or 3 keys from the original remote
control in order to check the compatibility of the
codes of both remote controls. Then carry out a
global delete of these keys before starting the full
learning procedure.
• Lay out the original remote control and your
ROC4411
end to end so as to align the LED
diodes on the 2 remote controls. Where necessary
adjust the height of both remote controls so that the
LED diodes are properly aligned.
• Place the remote controls with the infrared diodes
on a table so that they point each other at a
distance between 15 and 50 mm.
• Do not move the remote controls during the
learning procedure.
• Ensure that the room is not lit by fluorescents tubes
or low consumption lamps since such light sources
can interfere with the copying.
• The 2 remote controls must be at least one metre
away from any light source.
• Avoid copying
VOL
and
H
keys codes and the
play keys since depending on the remote controls
the codes of these keys do not necessarily control
the same devices.
• When the memory of your
ROC4411
is full,
the mode key will blink for 3 seconds. It is then
not possible to copy any more codes without first
carrying out a global delete.
• When you copy a key, it is possible that the mode
key will blink feebly. In this case, do not release the
key and wait until the blinking stops.
Note 1: if the learning procedure does not seem to
work correctly, try the following:
1. End the learning procedure by pressing SETUP.
2. Check that the LEDs of the two remote controls
are properly aligned. Carry out the alignment
procedure.
3. Modify the distance between the remote controls, in-
creasing or reducing the distance from 1.5 cm to 5 cm.
4. Restart the procedure from the beginning.
5. If the problem persists and always with the same
key, check that the original remote control is
actually operating: is it sending IR signals? (check
batteries; is it correctly aligned in relation to the
diode on your ROC4411?)
Note 2:
• You cannot copy keys to the LEARN SETUP and
MODE keys.
• All the keys copied to a mode will be deleted if a 4
figure code is entered for this mode (and likewise
for direct entry of a code, search of a code or
make).
Identifying the position of the diode on the
original remote control (keys to copy)
If the Infrared LED of the original remote control is not
visible (for example, if hidden behind a dark plastic
plate), the instructions below will help you to locate
it precisely.
1. Place the front of the original remote control (the
part you point at the device to control) around
2.5 cm from the LED of your ROC4411 (see
LEARNING diagram above).
2. Hold down the
SETUP
key until the indicator lamp
remains lit.
3. Release the
SETUP
key.
4. Press once on a mode key (
TV
,
DVD
, …). The
indicator lamp goes out and then relights.
5. Press once on the
LEARN
key.
6. Hold down one of the keys on the original remote
control while moving the remote control from left
to right. As soon as the 2 remote controls are
correctly aligned, the indicator lamp blinks rapidly.
7. To copy the key functions from your original
remote control into your
ROC4411
, go to step 5
of “To copy keys”.
Note: Some original remote controls don’t transmit
continuous IR signals when a key is held down. If this is
the case, press several times on one of the keys while
moving the remote control from left to right.
To copy keys
1. Hold down the
SETUP
key until the indicator lamp
remains lit.
2. Release the
SETUP
key.
3. Press once on the mode key (
TV
,
DVD
, ...).The
indicator lamp goes out then relights.
4. Press the
LEARN
key once.
5. Press once on the key of your
ROC4411
to which
you want to copy one of the keys of your original
remote control.
6. Hold down the key of the original remote control
you wish to copy until the indicator lamp goes
out and then relights (2 to 3 seconds). In case
of problems, the indicator lamp will blink for 3
seconds but will remain in learning mode. Try
again or try another key.
7. For the other keys, repeat the procedure from step
5 onwards.
8. Press the
SETUP
key once when all the desired
keys have been copied. The mode key goes off.
To delete all keys copied under a mode
1. Hold down the
SETUP
key until the indicator lamp
remains lit
2. Release the
SETUP
key.
3. Press once on a mode key (
TV
,
DVD
,
SAT
,...).
The indicator lamp goes out then relights.
4. Press twice on the
LEARN
. key. The indicator lamp
goes out then relights.
5. Press once on the
SETUP
key. The indicator lamp
goes out. All the keys copied under this mode are
deleted.
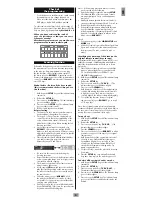
SAT/STB CODE
AMP CODE
TV CODE
DVD CODE
your set, jot it down so that you can use it
whenever needed.
After battery replacement, you may have to
programme the remote control again.
Содержание ROC4411
Страница 2: ......
Страница 3: ...ROC4411 00131898 1 3 15 5 7 9 11 13 17 19 2 4 18 6 8 12 14 20 21 AAA 10 16 ...
Страница 73: ...69 ...


