4
5
GB
F
4. Press once on the mode key (
TV
,
DVD
, …)
corresponding to the device whose volume will
always be controlled by the
VOL
and
H
keys.
5. Press the
H
key once. The mode key goes off.
6. All other mode will now punch-through to your
chosen mode for Volume and Mute control.
Adjustment of the volume controls for EACH
mode.
You can decide that the volume control is functional
for each mode selected on condition that the volume
control exists on the corresponding device (e.g. control
of the television set sound in TV mode, the control of
the sound of the SAT receiver in STB mode, …).
1. Hold the
SETUP
key down until the key
corresponding to the last selected mode blinks and
then remains lit.
2. Release the
SETUP
key
3. Press the
H
key until the mode key blinks once.
4. Press once on the mode key (
TV
,
DVD
, …)
corresponding to the device whose volume will
always be controlled by the
VOL
and
H
keys.
5. Press the
VOL-
key once.
6. Press the
H
key once.
7. The chosen mode key will now use its own Volume
and Mute functions
Restoring the universal Volume/Mute functions
If you have changed the universal volume and mute
functions, as described in the previous two sections,
you can reset the functions back to the factory settings:
1. Hold the
SETUP
key down until the key
corresponding to the last selected mode blinks and
then remains lit.
2. Release the
SETUP
key
3. Press the
H
key until the mode key blinks once.
4. Press and release the
H
key. The mode key light
will go out completely. The volume and mute
functions are now restored to their factory defaults.
Replacing the batteries
Use 2 CR2032 Lithium batteries
1. Open the cover on the back of the remote control.
2. Remove the old batteries.
2. Check the +/– polarity on the batteries and inside
the compartment.
3. Insert the batteries.
4. Close the cover.
When exchanging the batteries, it may be necessary to
reprogram the unit. Hence it is advisable to record the
codes needed for your devices.
Used batteries do not qualify as household waste. The
batteries must be disposed of at a special collection
point for used batteries.
Note on environmental protection:
After the implementation of the European
Directive 2002/96/EU in the national le-
gal system, the following applies:
Electrical and electronic devices may not
be disposed of with domestic waste.
Consumers are obliged by law to return electrical and
electronic devices at the end of their service lives to the
public collecting points set up for this purpose or point
of sale. Details to this are de
fi
ned by the national law
of the respective country. This symbol on the product,
the instruction manual or the package indicates that a
product is subject to these regulations. By recycling,
reusing the materials or other forms of utilising old
devices, you are making an important contribution to
protecting our environment.
A
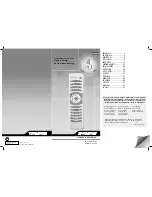
Cette télécommande universelle (4 en 1) est compatible avec la plupart des téléviseurs, lecteurs
DVD, magnétoscopes ainsi que la plupart des boîtiers numériques tels que les récepteurs satellite
ou câble, les récepteurs TNT, les décodeurs ADSL, ...
Pour programmer votre télécommande, suivez une des méthodes A, B, C, D ou E détaillées dans
ce manuel. Mais avant tout, mettez la télécommande en service en enlevant la languette de
protection des 2 piles CR2032.
Conservez cette notice et la liste des codes séparée afi n de pouvoir reprogrammer ultérieurement
la télécommande.
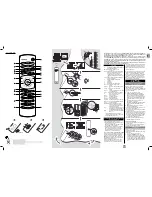
1: Marche/Veille ou Veille uniquement selon les
appareils..
2 Touches de Modes: Touches de mode. Sélection de
l
ʼ
appareil à commander (TV, DVD, …).
3 Setup: Cette touche vous permet de programmer
la télécommande. Elle vous permet aussi
d
ʻ
accéder aux fonctions secondaires de
certains équipements. Appuyez et relachez la
touche „Setup“ suivi de la touche
correspondant à la fonction désirée.
4 Learn: utilisée pour la procédure d
ʼ
apprentissage de
codes (copie de touches) (voir page 7).
5: Af
fi
che des informations de l
ʻ
appareil sélectionné.
6: Mise en marche télétexte.
7: Arrêt du télétexte.
8: Arrêt de l
ʼ
alternance des pages (télétexte).
9 Exit:
Sortie du menu de l
ʻ
appareil sélectionné.
10 (Mute): Coupure du son de l
ʻ
appareil sélectionné.
11 Menu: Af
fi
chage du menu de l
ʻ
appareil sélectionné.
12 V-, V+: Permet d
ʻ
augmenter (+) ou de diminuer (-)
le volume sonore de l
ʻ
appareil sélectionné.
13 P+, P-: Touches Pro ou Programme -.
14: Touches de direction. Elles vous permettent de
naviguer horizontalement et verticalement dans les
menus.
15 OK: Con
fi
rmation d
ʻ
une selection.
16 (lecture): Lecture d
ʻ
un disque (DVD)*.
17 (avance rapide): Permet d
ʻ
avancer rapidement (DVD)*.
18 (retour rapide): Permet de revenir en arrière (DVD)*.
19 (pause): Arrête la lecture et arrêt sur image (DVD)*.
20 (enregistrement): Pour lancer l
ʻ
enregistement,
appuyez 2 fois sur la touche
(DVD).
21 (stop): Arrête le disque (DVD)*.
22 Touches 0 à 9: Elles ont les mêmes fonctions
que les touches numériques de
votre télécommande habituelle et
servent en plus à entrer les codes
des
appareils.
23 -/--:
Permet, pour certains appareils, d
ʻ
entrer les
chaînes à 2 chiffres. Appuyez d
ʻ
abord
sur cette touche puis sur les touches
numériques correspondant au numéro de la
chaîne.
24 AV: Sélection d
ʼ
une source externe (PERITEL, HDMI, ...).
* Touches colorées, utilisables pour le choix de rubriques
lorsque le télétexte est activé, et fonctions spéci
fi
ques selon
la marque.
Description des touches
Essai de la télécommande sans
l’avoir programmée
Il se peut que cette télécommande, en fonction des
réglages d
ʼ
usine, soit déjà compatible avec votre
appareil. Faites un test de la façon suivante
1. Mettez en marche l
ʼ
appareil que vous souhaitez
commander.
2. Appuyez sur la touche correspondant au type
d
ʼ
appareil à commander :
TV
: téléviseur,
DVD
: lecteur DVD,
SAT
: récepteur
satellite,
AUX
: tout autre type d
ʻ
appareil.
3. Dirigez la télécommande vers l
ʼ
appareil à
commander et essayez de l
ʼ
éteindre avec la
touche
G
. Si l
ʼ
appareil ne s
ʼ
éteint pas, vous devrez
programmer la télécommande en suivant une des
méthodes
A
,
B
,
C
ou
D
décrites ci-après.
Note 1: Exceptée la touche TV, chaque touche de
mode (
DVD
,
SAT
et
AUX
) est programmable pour
commander un appareil autre que celui indiqué sur la
touche. Il est donc possible d
ʻ
attribuer, par exemple,
le mode
SAT
à la touche
DVD
. Vous devrez entrer le
code correspondant à la marque et à l
ʻ
appareil désiré
en suivant une des méthodes indiquées dans ce manuel.
Cependant, la méthode D (recherche automatique d
ʻ
un
code) vous simpli
fi
era la tâche. Il vous suf
fi
ra d
ʻ
entrer
n
ʻ
importe quel code de la liste correspondant au
type d
ʻ
appareil (ex : 0603 pour un récepteur satellite
Thomson) puis de lancer la procédure de recherche
automatique. La télécommande testera ainsi tous les
codes jusqu
ʻ
à trouver celui qui fera réagir le récepteur.
Note 2: Pour commander 2 appareils de mêmes
types et de mêmes marques (2 magnétoscopes
Thomson, 2 récepteurs satellite Thomson, ...) assurez
vous au préalable, que ces deux appareils sont déjà
paramétrés pour ne réagir qu
ʻ
à un sous code pour
l
ʻ
un et à un autre sous code pour l
ʻ
autre (code A et
B pour les appareils Thomson). Programmez ensuite
et successivement 2 touches de mode en utilisant la
méthode
D
.
Programmation
de la télécommande
Méthode A - Programmation rapide
avec un sous-code à 1 chiffre
Avant de commencer la programmation, recherchez
le sous-code de l
ʼ
appareil que vous souhaitez
commander. L
ʻ
entrée d
ʻ
un
sous-code
permet à la
télécommande de tester une liste prédé
fi
nie de codes.
Reportez-vous à la liste jointe à cette notice, page I
des
sous-codes
.
1. Mettez en marche l
ʼ
appareil que vous souhaitez
commander.
2. Maintenez appuyée la touche
SETUP
jusqu
ʻ
à ce
que la touche correspondant au dernier mode
sélectionné clignote puis reste allumée (le voyant
restera allumé quelques secondes pour vous laissez
le temps de procéder aux étapes suivantes. Le
clignotement du voyant indique la
fi
n du temps
disponible, puis il s
ʼ
éteint).
3. Appuyez sur la touche correspondant au type
d
ʼ
appareil à commander :
TV
: téléviseur,
DVD
: lecteur
DVD
,
SAT
: récepteur
satellite, câble, TNT, box ADSL, AUX: tout autre type
d
ʻ
appareil.
4. Pendant que le voyant est allumé, tapez le sous-code
(ex : 1 pour Thomson).
5. Dirigez la télécommande vers l
ʼ
appareil et essayez
de l
ʼ
éteindre en appuyant une fois sur la touche
G
.
6. Si l
ʼ
appareil à commander s
ʼ
éteint, appuyez sur
OK
pour mémoriser le code.
7. Si l
ʼ
appareil ne s
ʼ
éteint pas, appuyez de nouveau sur
la touche
G
, plusieurs fois jusqu
ʼ
à ce que l
ʼ
appareil
s
ʼ
éteigne. Entre deux appuis, laissez le temps à
la touche correspondant au mode sélectionné de
s
ʼ
éteindre puis de se rallumer (environ 1 seconde).
Ceci vous permet de vous rendre compte de la
réaction de l
ʼ
appareil.
8. Dès que l
ʼ
appareil à commander s
ʼ
éteint, appuyez
sur
OK
pour mémoriser le code.
Vérifi cation de la programmation :
Votre appareil est, en principe, prêt à recevoir les
ordres de la télécommande.
Véri
fi
ez le fonctionnement en procédant au test de
la page 6.
Méthode B – Programmation
avec des codes à 4 chiffres
Avant de commencer la programmation, recherchez le
code de l
ʼ
appareil que vous souhaitez commander.
Reportez-vous à la liste jointe à cette notice, page II
des codes.
1. Mettez en marche l
ʼ
appareil que vous souhaitez
commander.

