background image

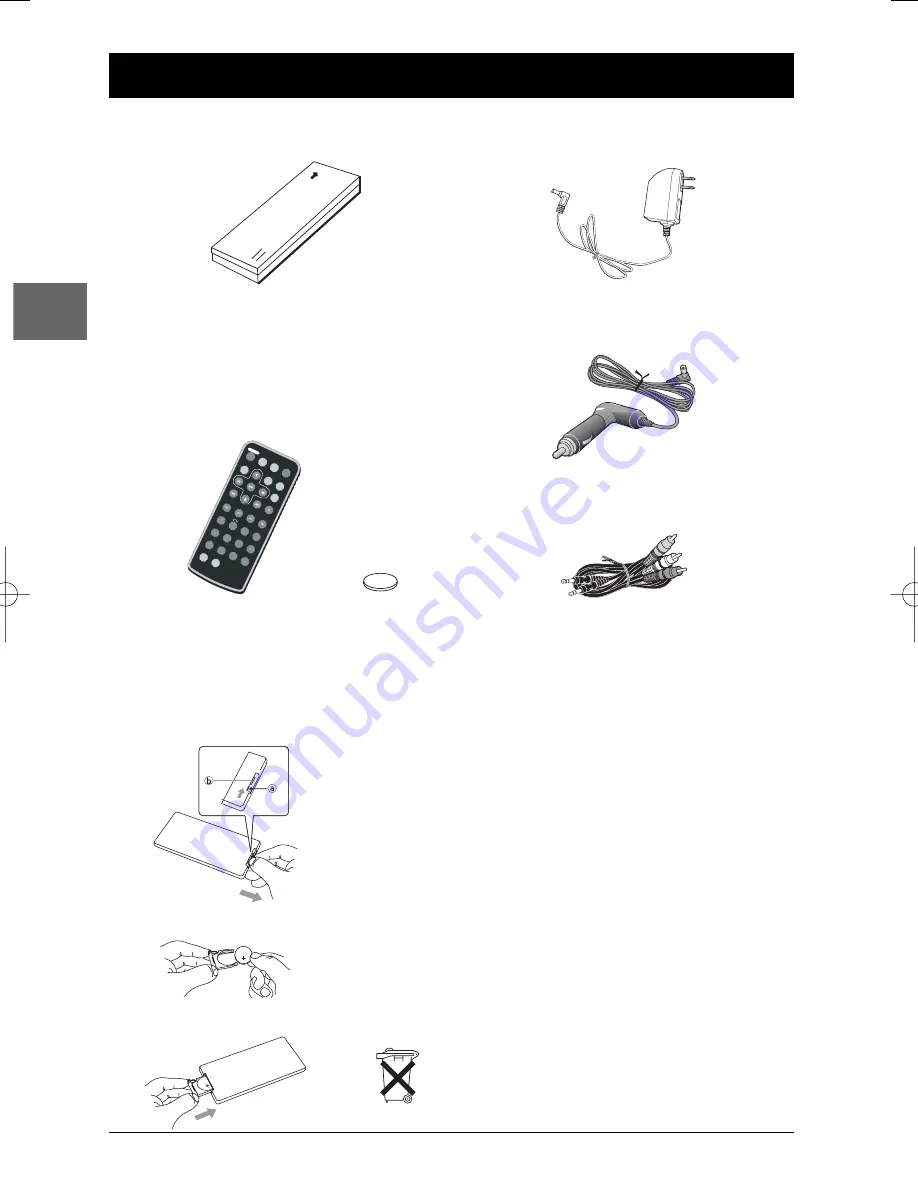
Inserting batteries in the remote control

2

Connections and Setup

EN

Accessories provided

Battery

Adapter and charger

+

Lithium Cell

CR2025

3V

Remote control and 1 battery CR2025

AUDIO

SUBTIT

LE

ANGLE

REPEA

T

ZOOM

TITLE

FWD

SLOW

PLAY/P

AUSE

REV

PREV

NEXT

STOP

SEARC

H

PROGR

AM

OSD

MENU

CLEAR

A-B

MUTE

7

4

SHIFT

SETUP

1

2

3

C

5

6

+10

8

9

0

BOOKM

ARK

RANDO

M

SLOW R

EV

Cigar-lighter adapter

Audio/video cables

CR2025

1

2

3

1.

Remove the battery compartment from the remote
control.

2.

Insert a CR2025 battery.

3.

Reinsert the battery compartment into the remote
control.

• In order to avoid any risk of explosion, observe the polarities

indicated inside the battery compartment. Replace only with
the type of batteries specified above. Do not dispose of them
in a fire or recharge them.

• If you are not using the remote control for a long period of

time, remove the batteries.

Please respect the environment and prevailing regulations.
Before you dispose of batteries or accumulators, ask your
dealer whether they are subject to special recycling and if
they will accept them for disposal.

DTH620_EN  28/04/05  15:42  Page 2

Содержание DTH616 - annexe 1

Страница 1: ...es 12 Player menus Using the player s menus 14 System Setup 15 Language Setup 16 Video Setup 16 Audio Setup 17 Digital Setup 17 Additional Information Troubleshooting 18 Precautions 18 Guarantee 19 Te...

Страница 2: ...tery compartment from the remote control 2 Insert a CR2025 battery 3 Reinsert the battery compartment into the remote control In order to avoid any risk of explosion observe the polarities indicated i...

Страница 3: ...yer to the OPEN position to open the battery compartment The door opens 2 Press the battery release tab located on the right side of the battery compartment to the right Pull out the battery by using...

Страница 4: ...COLOR BRIGHTNESS VIDEO IN OUT AUDIO IN OUT COAXIAL POWER OFF ON DC IN 12V B D E F G H I A C A Mains DC IN socket Connect the mains adapter to this socket B POWER ON OFF To switch on and off the playe...

Страница 5: ...eadphones sockets situated on the side of the player Connecting another appliance In order to see images coming from another appliance on the LCD screen of the DVD player connect the other appliance t...

Страница 6: ...PLAY PAUSE To start playback To activate freeze frame FWD To start forward accelerated playback SLOW To start slow motion or playback image by image Note To access the functions associated with the nu...

Страница 7: ...f the player to the right ON Using the menus Disc menu The appearance and contents of this menu vary according to the type of disc you have inserted and are independent of the player s menus When the...

Страница 8: ...ss a number of times the SLOW button or SHIFT and then a number of times the SLOW REV button to vary the speed and direction of the slow motion Note Reverse slow motion is not possible with a VCD 2 Pr...

Страница 9: ...of the available camera angles Notes If the disc was recorded using a single camera angle this function is not available There are very few discs offering more than one angle Play modes Repeat playbac...

Страница 10: ...ain Bookmarks The player can store up to 5 disc locations as long as the disc remains in the player and the unit remains switched on 1 Press SHIFT and then the BOOKMARK button during playback A menu a...

Страница 11: ...artment 3 The disc s contents appear The folder list appears on the left Select a folder using the and buttons and then press to see the folder s contents 4 Select a file on the right using the and bu...

Страница 12: ...al times the button to access the icons at the bottom of the screen then use the or button to select the DivX icon and press to confirm 4 Select a file using the and buttons on the remote control Note...

Страница 13: ...stration number so that you can fill in the form on the website you purchase your DivXVOD files from Note If you cannot play a DivX VOD file recorded on a CD R disc after downloading it the rental per...

Страница 14: ...an option using the and buttons Press to confirm your selection Return to a previous menu using the button Return to the icons using the button To exit from the player menus press the SETUP button aga...

Страница 15: ...ful if you need to use the player upside down for example Select an option using the and buttons and press to confirm Normal or Rotate 180 Password This option allows you to set or change the password...

Страница 16: ...subtitle language choose the language using the and buttons and press to confirm Note To change the language of the subtitles during playback press a number of times the SUBTITLE button on the remote...

Страница 17: ...und Systems for digital multichannel audio signals DTS and DTS Digital Out are trademarks registered by Digital Theater Systems Inc Dolby and the double D symbol are trademarks of Dolby Laboratories M...

Страница 18: ...oor quality Check the connections Set the volume on the side of the player The subtitles do not appear Check that the DVD disc provides subtitles Refer to the section on how to display subtitles see p...

Страница 19: ...clean discs if necessary always wiping from the centre to the edge Always put discs back in their cases after use and store in a vertical position Do not close the tray with two discs in it or with a...

Страница 20: ...dual layer DVDs are high density optical discs on which high quality images and audio are recorded by means of digital signals DVD R DVD RW DVD R DVD RW Most DVD R and DVD R one recording only DVD RW...

Страница 21: ...the use of special characters including The total number of files on a disc should be less than 650 Use a decompression transfer rate of at least 128 kB sec kilobytes second when recording mp3 files S...

Отзывы: