


Adjusting the picture
EN
14
Display the
OVERVIEW
menu using the
MENU
button. Select
Picture
and press
OK
to confirm.The
PICTURE
menu appears.
The contents of this menu depends on the signal.
In TV mode:
Adjust the
Brightness
,
Contrast
,
Colour
and
Sharpness
settings as
required.
The
Tint
option is only available when a NTSC signal is detected. It is
used for adjusting the picture’s tint.
To adjust the colour temperature, select the
Tone
option and select a
setting using the
buttons.
Check the box for the
Auto format
option so that the appropriate
format is automatically applied to the picture.
Note: if you are watching an AV programme through AV3 or Component Y/CB/CR, this
function is not available.
Use the
Noise reduction
function to improve the quality of the
picture in the case of poor reception. Use the
buttons to select
one of the options.
In PC mode:
Adjust the
Brightness
and
Contrast
settings as required.
To adjust the colour temperature, select the
Tone
option and select a
setting using the
buttons.
Use the
V-Size
option to change the vertical size of the picture. Using
the
buttons, move the cursor to the right to enlarge the picture,
or to the left to reduce it.
Use the
V-position
to move the picture vertically. Using the
buttons, move the cursor to the right to shift the picture up, or to the
left to shift it down.
Use the
H-Size
option to change the horizontal size of the picture.
Using the
buttons, move the cursor to the right to enlarge the
picture, or to the left to reduce it.
Use the
H-position
to move the picture horizontally. Using the
buttons, move the cursor to the right to shift the picture to the right,
or to the left to shift it to the left.
The
Phase
option allows you to finetune the set in order to perfectly
synchronize it with the video signal source.
Press the
EXIT
button to close the menu. Select
Return
to return to
the
OVERVIEW
menu.
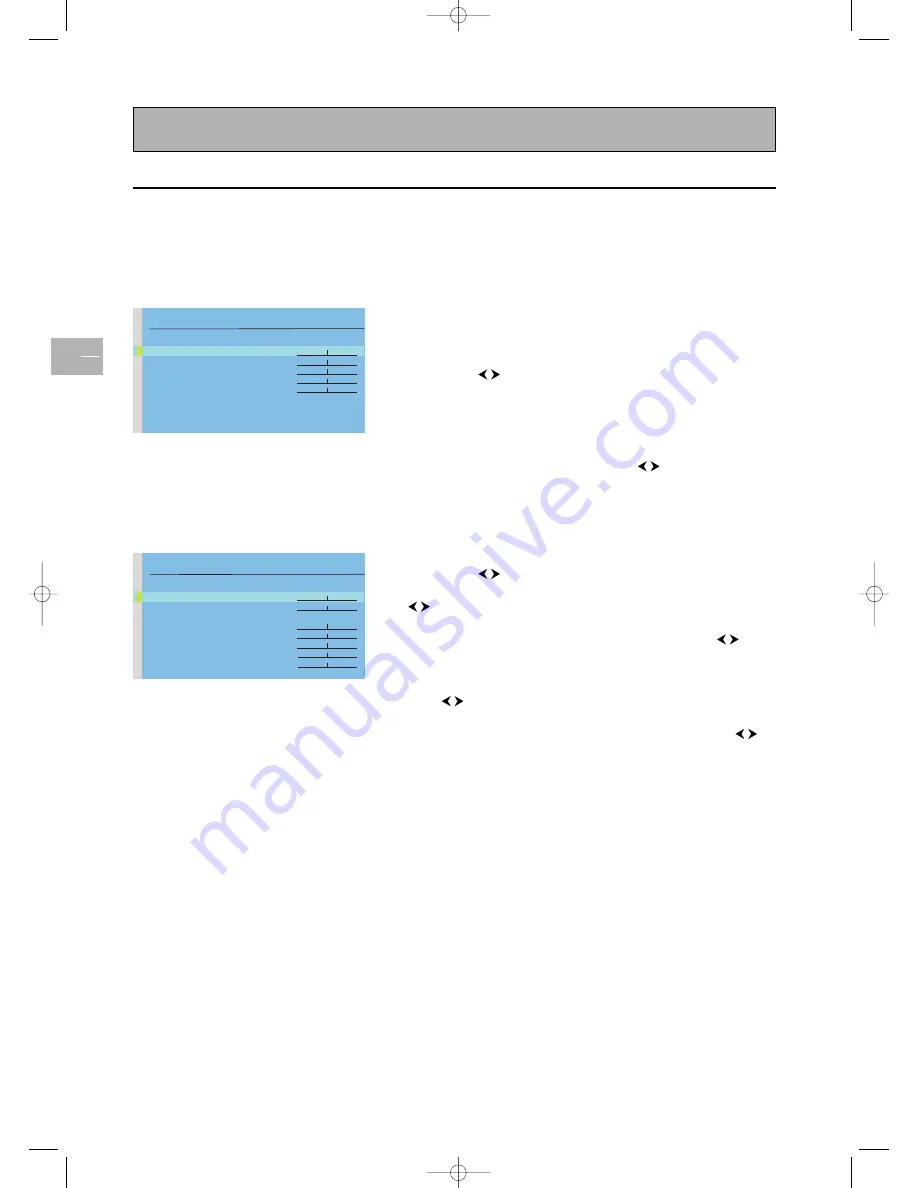
PICTURE
Return
Brightness
Contrast
Colour
Sharpness
Tint
Tone Cold
Auto
format
Noise
reduction Low
PICTURE
Return
Brightness
Contrast
Tone Neutral
V-Size
V-Position
H-Size
H-Position
Phase
PICTURE menu in TV mode
PICTURE menu in PC mode
42pb120S4-en 2/07/04 11:32 Page 14


