6
i.
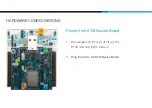
To run the DEMO application, just plug the Xkit to the Arduino
board.
ii.
Connect the external antenna to Xkit.
iii.
Configure the jumpers on Xkit instructed in Section 1.b (if power
from Arduino) or Section 1.c (if power from battery).
iv. The DEMO application is now running.
The Arduino board supplied with the Xkit is pre-flashed with a DEMO application that send a message containing the temperature
value, the output voltage from the photovoltaic sensor, the pressure value and the acceleration every 10 minutes.
The same message will also be sent if a magnet is close to the reed switch or the button on Xkit is pressed.
RUN THE DEMO APPLICATION
How To Run DEMO App
Explain Function Of DEMO App
LSB
Integer
2 bytes
Integer
2 bytes
Integer
2 bytes
Signed Integer
2 bytes
Signed Integer
2 bytes
Signed Integer
2 bytes
Received frame
on the backend
Actual measured
value
Convert the received values on the backend to the actual measured values
TEMPERATURE
Temperature/100
(
o
C)
X_Acc
X_Acc/250
(g)
PRESSURE
Pressure*3
(Pa)
Y_Acc
Y_Acc/250
(g)
PHOTO
Photo/1000
(V)
Z_Acc
Z_Acc/250
(g)
LSB
LSB
LSB
LSB
LSB
MSB
MSB
MSB
MSB
MSB
MSB


