12
11
1)
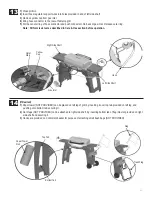
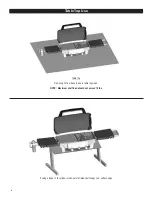
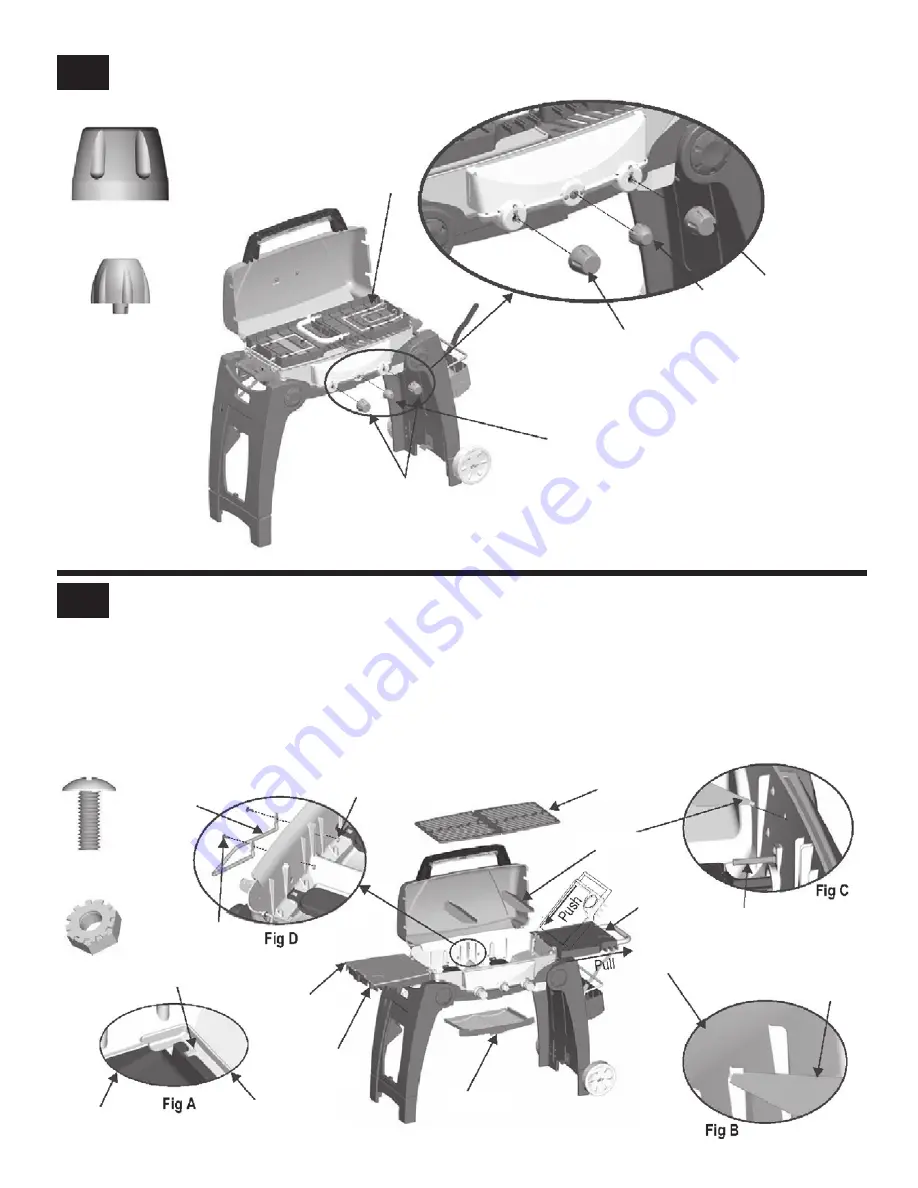
Open grill lid, unfold left non-locking side-shelf and griddle.
2)
Unfold right locking side-shelf halfway and push towards hinge. Unfold completely and pull shelf outside to engage table
top grill handle.
3)
Insert round end of vaporizer bar inside front hole of table top grill (See Fig C). Rest rear end of vaporizer bar over
support rib on backside of table top grill. (See Fig B).
4)
Attach leg support to back of grill using (2) #10-24x1/2” screws and (2) #10-24 lock nuts. (See Fig. D)
5)
Insert (2) cooking grates.
6)
Insert Grease tray.
Note: To remove grease tray, rear lock tabs must be dis-engaged. (See Fig A)
1)
Attach (2) control knobs and (1) rotary ignitor knob by aligning holes with control panel as shown.
2)
Remove (4) clear protectors from shelf supports.
Control Knob
Rotary Ignitor
Knob
Control Knob
Rotary Ignitor
Knob
Control Knob
Control Knob
Qty: 2
Rotary Ignitor Knob
Qty: 1
Clear
Protectors
#10-24 x1/2”
Screw
Qty: 2
#10-24
Lock Nut
Qty: 2
Leg Support
Rear Lock
Lower Casting
Grease Tray
Griddle
Left Side
Shelf
Grease Tray
Cooking Grate
Vaporizer Bar
Front of Grill
Right Side
Shelf
Back Side
of Grill
Vaporizer Bar
#10-24 x 1/2”
Screw
#10-24
Nuts
16
Содержание GRILL2GO Advantage 07401407
Страница 1: ...07401407 80008949 05 23 08 ...
Страница 25: ......


