background image

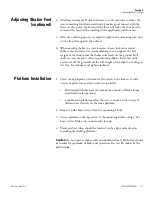
6.   Rotate high-limit control slowly counterclockwise until set point is

reached.

6a. For A-Class shakers high-limit light will illuminate when set point

is reached. Rotate high limit control clockwise until status lamp
goes out. Make an additional 1/8th turn clockwise beyond this
point.

6b. For E-Class shakers, when set point is reached, high-limit status

lamp will flash and the audible alarm will beep once. Rotate the
high-limit control slowly clockwise approximately 1/8th turn
beyond this point.

7.   When desired temperature is achieved, load the shaker.

Warning

Do not operate the unit if any of the temperature controls

become inoperative - a hazardous condition will develop which can result
in injury or death and property damage. 

s

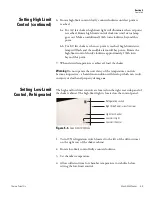
The high and low limit controls are located on the right rear side-panel of
the shaker cabinet. The high-limit light is located on the control panel.

1.   Turn ON refrigeration switch located to the left of the defrost timer

on the right rear of the shaker cabinet.

2.   Rotate low-limit control fully counterclockwise.

3.   Set chamber temperature.

4.   Allow sufficient time for chamber temperature to stabilize before

setting the low-limit control.

MaxQ 5000 Shaker       5-9

Thermo Scientific

Section 5

Operation

Setting High Limit

Control (continued)

Setting Low Limit

Control, Refrigerated

Refrigeration switch

Right Side Panel - view from rear

High Limit Control

Low Limit Light

Low Limit Control

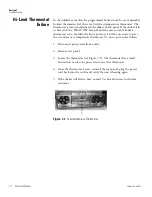
Figure 5-4. 

Low Limit Controls

Содержание MaxQ 5000

Страница 1: ...Visit us online to register your warranty www thermoscientific com labwarranty MaxQ 5000 Incubated and Refrigerated Floor Shakers Operating Manual and Parts List LT2087X1 7004348 Rev 14 User Manual...

Страница 2: ...Timer For Continuous Shaking Step 3 pg 5 5 ccs 9 29034 9 10 12 Added note to hyperterminal information on pg 5 6 ccs 8 28316 3 7 12 Added platform mntg plate replacement in Maintenance section ccs 7 2...

Страница 3: ...quipment performance Caution All internal adjustments and maintenance must be performed by qualified service personnel s Material in this manual is for information purposes only The contents and the p...

Страница 4: ...that has been put on the market after 13 August 2005 This product is required to comply with the European Union s Waste Electrical Electronic Equipment WEEE Directive 2002 96 EC It is marked with the...

Страница 5: ...re or replacement parts or provide you with on site service We can also provide you with a quotation on our Extended Warranty for your Thermo Scientific products Whatever Thermo Scientific products yo...

Страница 6: ...d Control and Display 5 1 Power Switch 5 1 Temperature Calibration 5 2 Temp Controller Setting Temperature 5 2 Calibrating Shaker Speed 5 4 Setting Shaker Speed 5 4 Turning Shaker On 5 4 RS232 Interfa...

Страница 7: ...aintenance 6 1 Gas Springs 6 1 Replacing Platform Mounting Plate 6 1 Platform Maintenance 6 2 Troubleshooting 7 1 Hi Limit Thermostat Failure 7 2 Replacement Parts 8 1 Ordering Procedures 8 2 Table of...

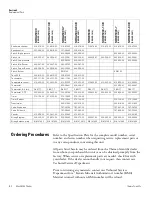
Страница 8: ...the power supply prior to maintenance and servicing To avoid personal injury 1 Use appropriate hand and eye protection when handling hazardous chemicals 2 Refer servicing to qualified personnel 3 Do n...

Страница 9: ...or timed from 1 60 mins Continuous or timed from 0 1 999 hours or 0 1 999 mins Continuous or timed from 0 1 999 hours or 0 1 999 mins Recorder Output None None None None RS232 Interface None None Mon...

Страница 10: ...tion stops Beeps twice when time has expired Shaking motion stops Unbalanced Load None None If the unit is running in an unbalanced condition an alarm will sound and the shaker will stop until the end...

Страница 11: ...ler that is adjustable with membrane switches on a keypad in 1 rpm increments Solid state DC brushless motor provides more power Refrigerated units feature environmentally safe CFC free insulation and...

Страница 12: ...in the event of primary control failure 75 lb 34 kg platform load capacity at safe speeds less than 400 rpm for A Class shakers and less than 500 rpm for E Class shakers Environmental Operating Condit...

Страница 13: ...OUNCIL on fluorinated greenhouse gases This product contains fluorinated greenhouse gases in a hermetically sealed system If a leak in the sealed system is detected the operator shall repair without u...

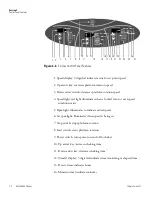
Страница 14: ...maintain temperature 3 Temperature High Limit Light Illuminates when high limit thermostat is controlling chamber temperature 4 Speed Control Sets platform rotation speed 5 Power Switch Turns power on...

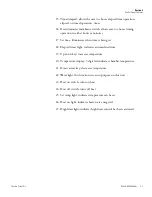
Страница 15: ...minates to indicate actual speed 6 Set rpm light illuminates when speed is being set 7 Stop switch stops platform rotation 8 Start switch starts platform rotation 9 Power switch turns power on and off...

Страница 16: ...e is being set 18 Elapsed timer light indicates accumulated time 19 Up arrow key increases temperature 20 Temperature display 3 digit led indicates chamber temperature 21 Down arrow key decreases temp...

Страница 17: ...pporting the weight of the shaker with any accessories while in operation Place shaker near an electrical outlet that matches the unit s nameplate requirements Allow approximately 12 30 5 cm of cleara...

Страница 18: ...y adjusted feet will be unstable and possibly dangerous s Warning Check shaker to make sure it is level If not adjust shaker feet until shaker is level s It is very important that this unit have the f...

Страница 19: ...t until casters are off the ground and the full weight of the shaker is resting on the feet Level shaker and tighten locknuts 1 Select the appropriate platform for the vessels to be shaken A wide vari...

Страница 20: ...es being thrown out during the mixing action Warning Do not operate the shaker at speeds that will cause the contents of vessels to be thrown out s For optimum performance distribute the load evenly o...

Страница 21: ...se speed The markings on the outside of the dial are for reference purposes only 2 The speed control tachometer provides an analog readout of the actual platform rotation speed up to a maximum of 400...

Страница 22: ...roceed as follows a Press and hold the star key and use either the up or down arrow key to adjust the set point to the desired temperature Release the star key b Allow sufficient time for chamber temp...

Страница 23: ...key and using the up or down arrow key If there is already a zero value present then add the new value to the one already present 8 When the correct zero value has been entered press and hold the two...

Страница 24: ...shaking SET RPM light will illuminate Note Speed can be changed without pressing the start or stop membrane switches Simply press the appropriate up or down membrane switch until desired rpm is reach...

Страница 25: ...om time selected An audible alarm will sound at the end of the timing cycle and platform rotation will cease 1 Press TIMER ELAPSED switch until ELAPSED light is illuminated The HOURS or MINUTES light...

Страница 26: ...In the COM1 Properties box Port Settings folder select the following options Bits per second 19200 Data bits 8 Parity None Stop bits 1 Flow control None After verifying the above settings click OK No...

Страница 27: ...ation at the speed and timer settings that were entered at the time that AC power failed 1 Fill a 250 ml Erlenmeyer flask with approximately 100 ml of water and position it at the approximate geometri...

Страница 28: ...light is located on the control panel Note Shakers without optional refrigeration system illustrated below only have high limit control on side panel 1 Make appropriate power connection 2 Turn power...

Страница 29: ...ecome inoperative a hazardous condition will develop which can result in injury or death and property damage s The high and low limit controls are located on the right rear side panel of the shaker ca...

Страница 30: ...approximately 32 C or less based on your ambient temperature is required Both the main power switch and the refrigeration switch need to be ON for the refrigeration system to work When the refrigerati...

Страница 31: ...bypassed through the iced coil When ice on the coil has melted defrost cycle ends automatically 3 Fan Delay Status Lamp During defrost timer power up and after defrost cycle the circulating fan is lo...

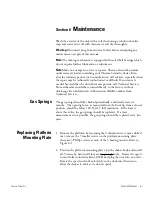
Страница 32: ...n Materials Authorization RMA number from Technical Services The gas springs should be checked periodically and ideally every six months The opening force as measured from the front lip from a closed...

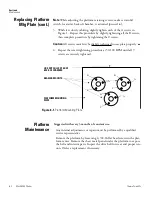
Страница 33: ...ocedure at 50 100 RPM until all 9 screws are securely tightened Suggested with every 3 months of constant use Any internal adjustments or repairs must be performed by a qualified service representativ...

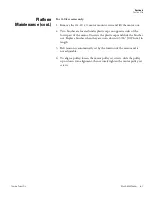
Страница 34: ...ide the brushes out Replace brushes when they are worn down to 3 16 0 476 cm in length 3 Belt tension is automatically set by the location of the motor and is not adjustable 4 To align a pulley loosen...

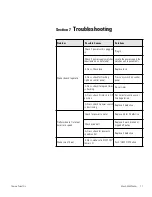
Страница 35: ...rol panel Press any switch on control panel E Class check if elapsed timer is flashing Re set timer A Class check if timer is in Off position Set timer for continuous or timed operation A Class check...

Страница 36: ...thermostat set to the fully clockwise position it will be necessary to reset the secondary over temperature thermostat To do so proceed as follows 1 Disconnect power cord from outlet 2 Remove rear pan...

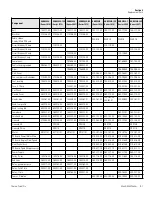
Страница 37: ...60 279 00 560 279 00 560 279 00 560 279 00 560 279 00 560 279 00 560 279 00 Heater tube 340 363 00 340 363 00 340 408 00 340 363 01 340 363 00 340 363 00 340 363 01 340 408 00 340 363 01 Knob low prof...

Страница 38: ...stat OTP 330 400 00 330 400 00 330 403 00 330 400 00 330 400 00 330 400 00 330 403 00 330 400 00 Tim er 270 135 00 270 135 00 270 135 00 270 135 00 Tim er Defrost 270 108 00 270 108 00 270 108 00 270...

Страница 39: ...s light bulbs and lid gaskets are excluded from this warranty Extended warranties are dependent on the units being maintained regularly as stated in the operation and service manuals Replacement or re...

Страница 40: ...s i e glass filters light bulbs and lid gaskets are excluded from this warranty Extended warranties are dependent on the units being maintained regularly as stated in the operation and service manuals...

Страница 41: ...n and direction prior to performance of any repairs Expendable items i e glass filters light bulbs and lid gaskets are excluded from this warranty Extended warranties are dependent on the units being...

Страница 42: ...tion and direction prior to performance of any repairs Expendable items i e glass filters light bulbs and lid gaskets are excluded from this warranty Extended warranties are dependent on the units bei...

Страница 43: ...mo Fisher Scientific and its subsidiaries Specifications terms and pricing are subject to change Not all products are available in all countries Please consult your local sales representative for deta...

Отзывы: