Thermo Scientific Jewett Blood Bank Refrigerators
Installation and Operation
8
Hinge And Latch Adjustment
8.1 Hinge Adjustment
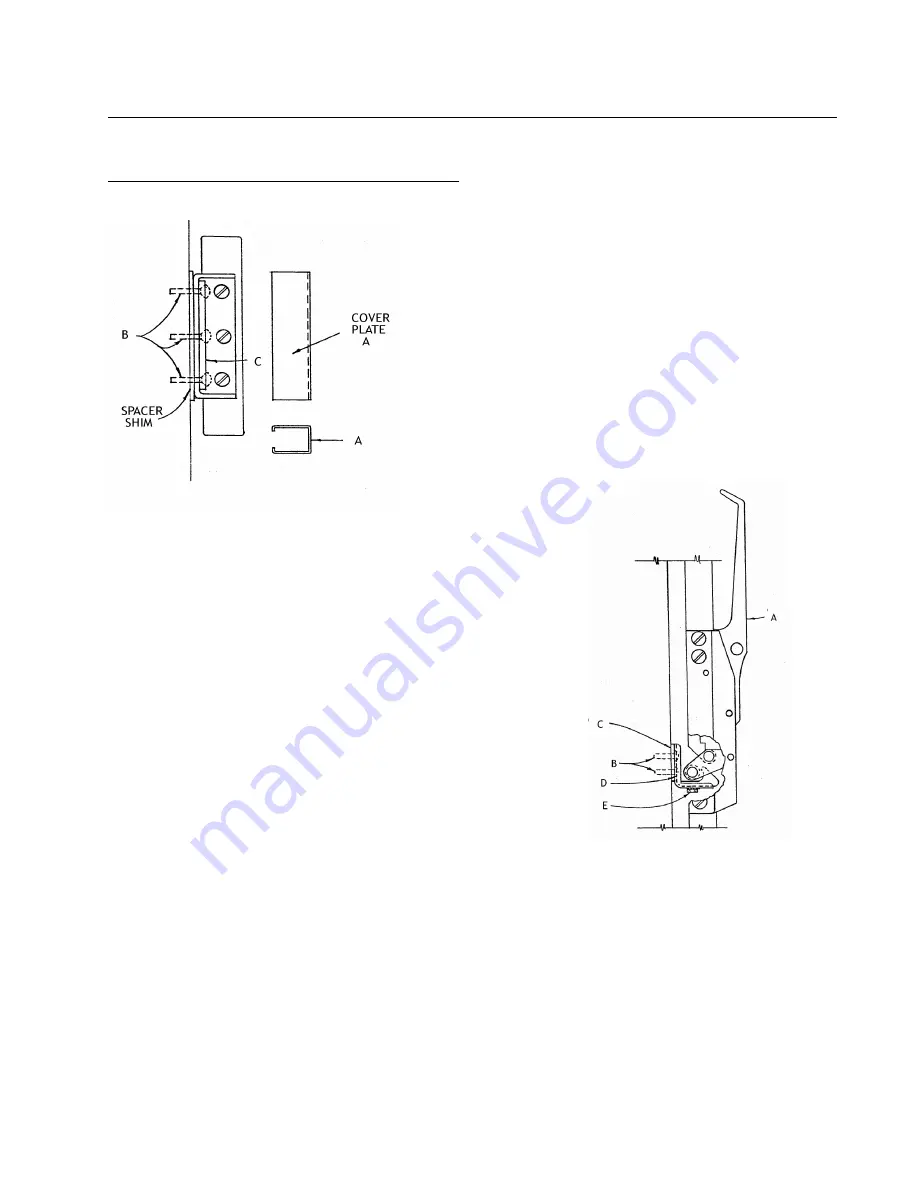
1. Remove exterior hinge cover plate by opening the
refrigerator door. Place a screwdriver under interior
portion of cover and gently pry cover outward. Pull
straight out. Close cover.
2. Loosen the three (3) screws "B" which hold adjusting
plate "C" in position.
3. To tighten gasket seal, place hand against exterior of
door near hinges; gently press in on door so gasket sits
firmly against cabinet face. Tighten screws "B".
4. When adjustment is complete, it hinges are adjusted so
gasket seal is too tight, door will tend to spring open.
Door must be readjusted. To test gasket seal, insert a
dollar bill (or piece of paper of similar size) between
the gasket and the cabinet opening. Close door; a slight
resistance to removal of the dollar bill (test strip)
should be felt. Check the perimeter of the door. If the
latch is loose, see latch-adjusting information.
5. Replace cover plate "A."
Note:
To accomplish different offsets, shims are utilized.
If replacing hinges, make sure to reuse any shims
furnished on the cabinet.
8.2 Latch and Strike Adjustment
1. Latch is fastened to door.
2. For up or down adjustment (proper latch engagement)
loosen mounting screws "B".
3. Strike plate "C" remains in position.
4. Move strike "D" up or down as required and tighten
screws "B" when adjustment is satisfactory. No play
will be present in the latch handle with the door closed.
5. For in and out adjustment (proper gasket seal) loosen
screw "E". Adjust in or out as required and tighten
screw when adjustment is satisfactory.
6. The stainless steel hex head cap screw is 10/32" X
5/16" long. Use box wrench, open-end wrench, or
ratchet to tighten. Do not use a nut driver or pliers.
Note:
If replacing latch and strike assembly, make sure
to reuse any shims furnished on the cabinet.
8


