background image

22

21

ภาษาไทย

คู่มือการติดตั้งสายไฟ

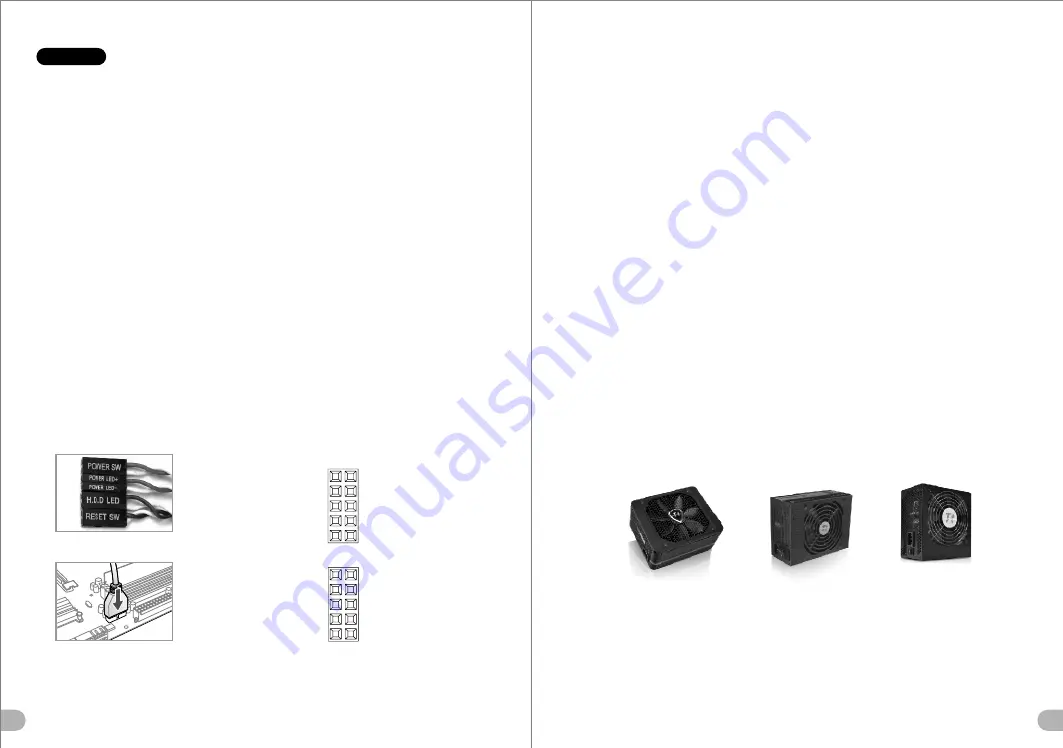
การเชื่อมต่อไฟ LED ของเคส
กรุณาศึกษารายละเอียดจากคู่มือผู้ใช้ของผู้ผลิตแผงวงจรหลักของคุณ 
จากนั้นให้เชื่อมต่อสายไฟเหล่านี้เข้ากับส่วนหัวของแผงบนแผงวงจรหลัก
การเชื่อมต่อ USB 2.0 / กรุณาศึกษารายละเอียดจากคู่มือผู้ใช้ของผู้ผลิตแผงวงจรหลักของคุณ ในหัวข้อ "การเชื่อมต่อ USB"
การเชื่อมต่อ USB 3.0 / กรุณาศึกษารายละเอียดจากคู่มือผู้ใช้ของผู้ผลิตแผงวงจรหลักของคุณ ในหัวข้อ "การเชื่อมต่อ USB"
การเชื่อมต่ออุปกรณ์รับส่งสัญญาณเสียง/ กรุณาดูรายละเอียดจากภาพประกอบของตัวเชื่อมต่อสัญญาณเสียงต่อไปนี้ 
และคู่มือผู้ใช้ของผู้ผลิตแผงวงจรหลักของคุณ
กรุณาเลือกแผงวงจรหลักที่ใช้ AC’97 หรือ HD Audio(Azalia) 
(กรุณาตรวจสอบให้แน่ใจว่าอุปกรณ์รับส่งสัญญาณเสียงของคุณรองรับ AC’97 หรือ HD Audio (Azalia)) 
มิฉะนั้นอุปกรณ์ของคุณอาจเสียหายได้

 / ที่ด้านหน้าของเคส คุณจะเห็นไฟ LED และสายไฟของสวิตซ์ 

Toughpower / TR2 / Litepower 
power supply series (Optional)

1. 

Automatic


Fan


Speed


Control

All


power


supply


can


detect


the


inside


heat


and


automatically


adjust


the


fan


speed


to


provide


adequate


airflow

.

2. 

Ultra


Silent

Ball


bearing


fans


with


high


reliability

 140

mm


or

 120

mm


cooling


fan


and


super


low


acoustic


noise


under


all


load


condition

.

3. 

Modularized


Cable


Management

To


eliminate


clutter


and


improve


airflow


inside


the


case

.

The


functions


can


assure


all


Thermaltake


Power


Supply


meets


the


balance


in


noise


control


and


heat


exhausted

All


power


supply


provides


complete


protection


function


as


follow

:

1. 

Over


power


protection

.

2. 

Short


circuit


protection


on


all


output

.

3. 

Over


voltage


protection

 / 

Under


voltage


protection

.

4. 

Over


current


protection

.

5. 

Over


temperature


protection

.

Besides

Thermaltake


enables


the


quality


assurance


of


all


power


supply

: 100% 

Hi

-

POT


and


ATE


Function


Test

, 100% 

Burn

-

In


and


AC


Input


cycled


on

/

off


under


high


temperature


condition

Furthermore

it


has


been


approved


by


UL

CUL

TUV

CB

FCC

CE

GOST, and


BSMI

.

The Thermaltake Power Supply series specification meets latest Intel & AMD 

multi-core processors and NVIDIA & AMD high performance graphic cards;

 it offers plenty of functions, which mainly include:

There are three main products line of Thermaltake PSU which divided into 

Toughpower (include Toughpower Grand, Toughpower XT) series, 

TR2 (include TR2 RX) series and Litepower series.

Please refer to 

http://www.thermaltake.com

PURPLE

ORANGE

BLACK

+(

BLACK

)

GRAY

+(

BLACK

)

KEY

GREEN

BROWN

+

BROWN

YELLOW

+

YELLOW

BLUE

+

BLUE

RED

+

RED

AUDIO H


D


A


UDIO F


unction

AUD_GND

PRESENCE#

SENSE1_RETURN

KEY 

SENCE2_RETURN

PORT1 L

PORT1 R

PORT2 R

SENSE_SEND

PORT2 L

RED

(

BROWN

)+

BROWN

(

YELLOW

)+

YELLOW

BLUE

KEY

BLACK

(

BROWN

)

(

YELLOW

)

N

.

C

N

.

C

AUDIO


A


C’97


F


unction

AUD_GND

N/C

FP_RET_R

KEY

FP_RET_L

MIC

MIC_BIAS

FP_OUT_R

N/C

FP_OUT_L

USB 3.0 Connection 

Содержание Commander MS-III VO1000 Series

Страница 1: ...ww thermaltake com User s Manual Benutzerhandbuch Mode d emploi Manual del usuario Manuale dell utente Manual do Utilizador Εγχειρίδιο Χρήσης 安裝說明書 用戶手冊 ユーザーズマニュアル Руководство пользователя kullanıcı elkitabı EEE Yönetmeliğine Uygundur คู มือการใช Tested To Comply With FCC Standards FOR HOME OR OFFICE USE VO1000 Series Commander MS III ...

Страница 2: ...nel I O Ports Standard PS2 PSU optional Supports 1 2 3 8 1 4 water tube PSU LCS Upgradable Net Weight 9 6 x 9 6 Micro ATX 12 x 9 6 ATX VO100A1W2N Front intake Optional 120 x 120 x 25 mm fan x 1 Rear exhaust 120 x 120 x 25 mm Blue LED fan 1000rpm 16dBA Top exhaust Optional 120 x 120 x 25 mm fan x 2 Side intake Optional 120 x 120 x 25 mm fan Bottom intake Optional 120 x 120 x 25 mm fan Exterior Inte...

Страница 3: ...nstallare primo dispositivo vano da 5 25 Atenção Limite de altura para o dissipador do CPU O limite de altura para o dissipador do CPU é 155 mm 6 1 polegadas Limite de comprimento para VGA placa gráfica O limite de comprimento para VGA placa gráfica é 320 mm 12 6 polegadas Se estiver a instalar uma ventoinha na parte frontal superior da caixa não instale o dispositivo da primeira baía de 5 25 Προε...

Страница 4: ...n arkasındaki vidaları çıkarın ve yan paneli açın ภาษาไทย ถอดสกรูที ด านหลังของแชสซีส แล วเปิดแผงด านข าง English Place the power supply in proper location and secure it with screws Deutsch Installieren Sie das Netzteil an seiner Position und sichern Sie es mit Schrauben Français Mettez l alimentation dans le bon endroit et sécurisez la avec des vis Español Coloque el suministro de alimentación en...

Страница 5: ... Entfernen Sie die Metallabdeckung des 5 25 Zoll Schachts 4 Drehen Sie die Verriegelungseinheit im Uhrzeigersinn um die Einheit zu entsperren und die Verriegelungseinheit zu entfernen 5 Platzieren Sie die 5 25 Zoll Einheit in den Laufwerkschacht 6 Finden Sie die passenden Öffnungen Bringen Sie die Verriegelungseinheit wieder an und drehen Sie sie gegen den Uhrzeigersinn um das Laufwerk zu sperren ...

Страница 6: ...cü bölmesinin içine yerleştirin 6 Uygun açıklıkları bulun Kilit aygıtını yerine takın ve sürücüyü sabitlemek için saatin ters yönünde döndürün ภาษาไทย 1 ถอดแผงด านหน าออก 2 ถอดฝาปิดช องไดรฟ ขนาด 5 25 ออก 3 ถอดฝาปิดโลหะของช องไดรฟ ขนาด 5 25 ออก 4 หมุนอุปกรณ ล อคตามเข มนาฬิกาเพื อปลดล อค แล วถอดอุปกรณ ล อคออก 5 ใส อุปกรณ ขนาด 5 25 เข าในช องไดร ฟ 6 ขยับให เข าที พอดี ใส อุปกรณ ล อคกลับเข าไปแล วหมุน...

Страница 7: ...e ruotarlo in senso antiorario per fissare l unità Português 1 Rode o dispositivo de bloqueio para a direita para desbloquear e remova o dispositivo de bloqueio 2 Coloque o disco rígido na baía da unidade 3 Encontre as devidas aberturas Volte a colocar o dispositivo de bloqueio e rode para a esquerda para fixar a unidade Ελληνικά 1 Στρέψτε τη διάταξη ασφάλισης δεξιόστροφα για απασφάλιση και αφαιρέ...

Страница 8: ...Insérez le périphérique PCI dans le slot PCI 3 Remettez le support du slot PCI et vissez la vis Español 1 Extraiga el tornillo del soporte de la ranura del PCI y retire dicho soporte 2 Inserte el dispositivo del PCI en la ranura para el PCI 3 Vuelva a colocar el soporte de la ranura para el PCI y ajuste los tornillos Italiano 1 Rimuovere la vite ad alette dal supporto slot PCI ed estrarre tale sup...

Страница 9: ...ez ces fils aux onnecteurs sur la carte mère Connexion USB 2 0 S il vous plaît consultez le manuel de votre carte mère à la section Connexion USB Connexion USB 3 0 S il vous plaît consultez le manuel de votre carte mère à la section Connexion USB Connexion Audio S il vous plaît référez vous à l illustration suivante du connecteur audio et au guide de l utilisateur de votre carte mère S il vous pla...

Страница 10: ...ης Συμβουλευτείτε το εγχειρίδιο οδηγιών του κατασκευαστή της μητρικής σας μετά συνδέστε αυτούς τους αγωγούς στην κεφαλή του πίνακα στη μητρική πλακέτα Σύνδεση USB 2 0 Συμβουλευτείτε το εγχειρίδιο της μητρικής σας για να βρείτε την ενότητα για τη Σύνδεση USB Σύνδεση USB 3 0 Συμβουλευτείτε το εγχειρίδιο της μητρικής σας για να βρείτε την ενότητα για τη Σύνδεση USB Σύνδεση Ήχου Ανατρέξτε στην ακόλουθ...

Страница 11: ... R PORT2 R SENSE_SEND PORT2 L RED BROWN BROWN YELLOW YELLOW BLUE KEY BLACK BROWN YELLOW N C N C AUDIO AC 97 Function AUD_GND N C FP_RET_R KEY FP_RET_L MIC MIC_BIAS FP_OUT_R N C FP_OUT_L USB 3 0 Connection Türkçe Русский Указания по прокладке кабелей Подключение индикаторов корпуса Подключение Подключение аудиоразъема USB 2 0 Указания по прокладке кабелей В передней части корпуса расположены индика...

Страница 12: ...the case The functions can assure all Thermaltake Power Supply meets the balance in noise control and heat exhausted All power supply provides complete protection function as follow 1 Over power protection 2 Short circuit protection on all output 3 Over voltage protection Under voltage protection 4 Over current protection 5 Over temperature protection Besides Thermaltake enables the quality assura...

Отзывы: