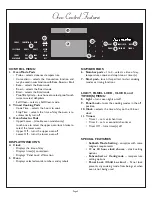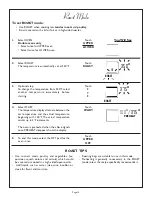
Setting the Clock
To Set the CLOCK:
Setting the Lights
•
Oven lights turn on automatically when the door is opened and off when closed.
•
Te set manually, always start by highlighting the oven, whether it is “active” or not.
(Touch the UPPER/LOWER pad to display the active oven; the flashing outline is the
active oven).
•
A single light pad activates the lights in either oven.
You Will See
8:00
SET CLOCK
––:––
8:00
SET CLOCK
1.
Select the CLOCK pad
Touch
CLOCK
2.
Set the current time of day
Touch
(Example shows 8 o’clock set for
8
the time of day)
0
0
3.
Select START or CLOCK
Touch
START
1.
Select the “active” oven by touching once
or twice to highlight oven display.
2
Touch once to turn light on or off.
To manually control the interior oven
lights if both ovens are in use.
1.
Select the UPPER/LOWER until lower
oven is highlighted in the display.
2
Touch once to turn light on or off.
To manually control the interior oven
lights if either oven is in use.
Touch
UPPER
LOWER
Touch
LIGHT
Touch
UPPER
LOWER
Touch
LIGHT
YOU WILL SEE
OR
• Always set the clock immediately after installation
or after a power failure. Once power returns to the
oven, the clock displays the time of day when power
was turned off or lost.
• If 10 seconds elapse between touching the clock pad
or number pads, the mode is automatically cancelled.
Set again.
• The time of day clock can be set even when an auto-
matic Timed cooking mode is in operation.
Page 10


