


ECHO PELLET E.I. II
PELLET HEATER
28
APPENDIX C
–
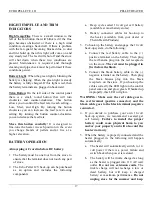
FINE TUNING
Because of the variability of pellets (i.e., length
thickness, density, quality of sawdust), you
might have to
—
from time to time
—
fine tune
your heater to compensate for pellet quality.
Following are some suggestions for fine tuning.
There are three (3) fine-tuning adjustment
components:
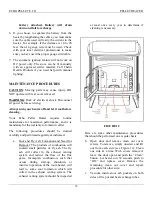
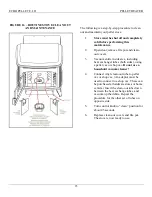
1. The Trim Button located on the control plate
(see Figure 11) will allow you to change the
feed rate on each setting (i.e., Hi, Med,
Low). By turning the trim button clockwise
you can increase the feed rate, and by
turning the trim counterclockwise you can
decrease the feed rate. For example, if the
pellet you are using is a hardwood pellet and
longer than 1”, then the stove could go out
on the low setting for lack of fuel. Turn the
trim clockwise to increase fuel and thus
sustain the fire.
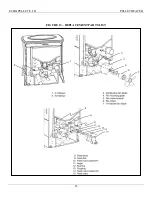
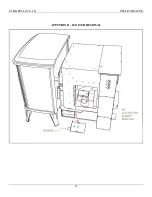
2. The Air Intake Damper control located on
the air intake damper (see Figure 2) will
allow you to regulate the amount of
combustion air being fed to the pellet fire
pot. If, for example, you have a high vertical
run of pipe (over 10’) then as the pipe
warms up the draw can be intense enough to
suck more heat out of the stove than is
necessary. To make the stove run efficiently
you need to close the damper about 60% and
see if the heat output increases. If, on the
other hand, you feel the pellets are not
getting enough air, then opening the air
damper could help. You can also increase
combustion air utilizing the procedure in #3.
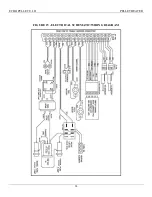
3. The Fan Trim Pot Adjustment is located on
the circuit board (see Figure 14). Please note
the two fan trim pots marked on the drawing
(lower left hand corner). By using a small
slot screwdriver you can adjust fan speeds to
compensate for poor pellets or airflow. By
turning the trim pots clockwise you can
speed up the fan speed on both Hi and Low
settings. You will have to experiment with
the setting to determine the proper burn. A
good, brisk flame that is yellow, not orange,
is what indicates a good burn.
Содержание ECHO-COMSTOCK PELLET E.I. II
Страница 4: ...ECHO PELLET E I II PELLET HEATER 4 LABORATORY LISTING LABEL...
Страница 9: ...ECHO PELLET E I II PELLET HEATER 9 FIGURE 4...
Страница 10: ...ECHO PELLET E I II PELLET HEATER 10 FIGURE 5...
Страница 11: ...ECHO PELLET E I II PELLET HEATER 11 FIGURE 6...
Страница 14: ...ECHO PELLET E I II PELLET HEATER 14 FIGURE 8...
Страница 22: ...ECHO PELLET E I II PELLET HEATER 22 FIGURE 13 REPLACEMENT PARTS LIST...
Страница 24: ...ECHO PELLET E I II PELLET HEATER 24 FIGURE 15 ELECTRICAL SCHEMATIC WIRING DIAGRAM 250 VAC 250 VAC...
Страница 27: ...ECHO PELLET E I II PELLET HEATER 27 APPENDIX B E I FIREPOT ASSEMBLY...
Страница 29: ...ECHO PELLET E I II PELLET HEATER 29 APPENDIX D IGNITER REMOVAL...
Страница 31: ...ECHO PELLET E I II PELLET HEATER 775 241 2586...


