background image


EXIF Information 

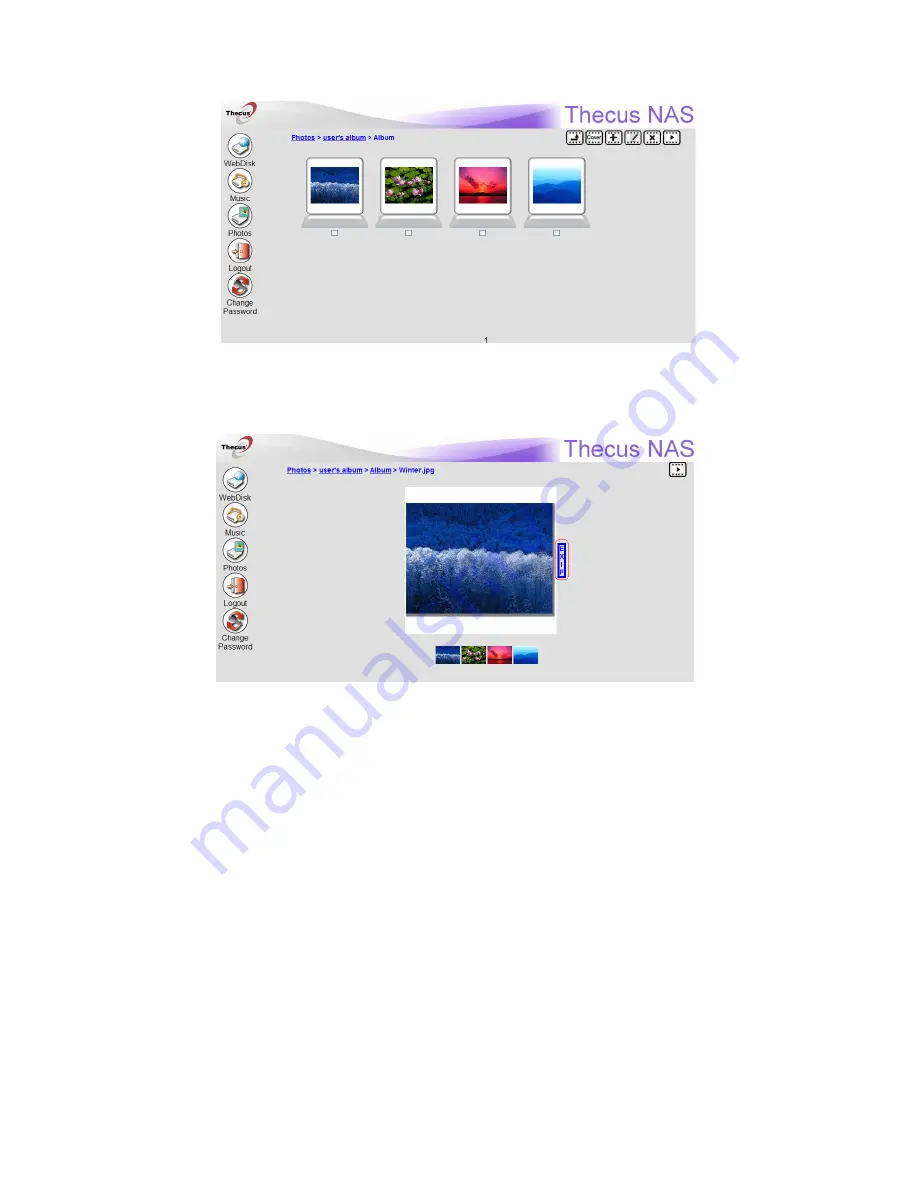
While viewing pictures, you can also have the N3200PRO display the EXIF 
information for each photo. 


Simply click the EXIF button to display EXIF information. To hide this information, 

click the EXIF button again. 

Slide Shows 

Slide shows are a great way to enjoy pictures stored on your N3200PRO.  

 
You can click on the Start Slide Show icon on the top right hand corner to start 
the slide show. 


80 

Содержание N3200PRO

Страница 1: ...Thecus N3200PRO User s Manual ...

Страница 2: ... provide us with your feedback Thecus Technology Corporation reserves the right to modify the contents of this manual without notice Product name Thecus N3200PRO Manual Version 1 01 Release Date October 2008 Limited Warranty Thecus Technology Corporation guarantees all components of Thecus N3200PRO are thoroughly tested before they leave the factory and should function normally under general usage...

Страница 3: ... relative humidity of 0 80 Using the N3200PRO under extreme environmental conditions could damage the unit Ensure that the N3200PRO is provided with the correct supply voltage AC 100V 240V 50 60 Hz 3A Plugging the N3200PRO to an incorrect power source could damage the unit Do NOT expose the N3200PRO to dampness dust or corrosive liquids Do NOT place the N3200PRO on any uneven surfaces DO NOT place...

Страница 4: ...Installation 12 Cable Connections 13 Chapter 3 First Time Setup 14 Overview 14 Thecus Setup Wizard 14 RAID Setup and Firmware Installation 16 Setting up the RAID 16 LCD Operation 17 LCD Controls 17 Display Mode 17 USB Copy 18 Typical Setup Procedure 18 Step 1 Network Setup 18 Step 2 RAID Creation 18 Step 3 Create Local Users or Setup Authentication 18 Step 4 Create Folders and Set Up ACLs 19 Step ...

Страница 5: ...iguration 37 Adding Users 37 Modifying Users 38 Deleting Users 38 Local Groups Configuration 38 Adding Groups 38 Modifying Groups 39 Deleting Groups 39 ADS NT Configuration 39 System Settings 41 System Notifications 41 System Logs 41 Time and Date Settings 42 System Configuration Backup and Restore 43 Module Management 43 Reset to Factory Default Settings 44 Upgrading System Firmware 44 Change Adm...

Страница 6: ...S X Backup Utilities 83 Chapter 7 Tips and Tricks 84 USB and eSATA Storage Expansion 84 Adding a Spare Disk 84 Remote Administration 84 Part I Setup a DynDNS Account 85 Part II Enable DDNS on the Router 85 Part III Setting up Virtual Servers HTTPS 85 Firewall Software Configuration 85 Replacing Damaged Hard Drives 86 Hard Drive Damage 86 Replacing a Hard Drive 86 RAID Auto Rebuild 86 File System C...

Страница 7: ... 95 JBOD 95 Stripe Size 95 Disk Usage 95 Appendix D Active Directory Basics 96 Overview 96 What is Active Directory 96 ADS Benefits 96 Appendix E Licensing Information 97 Overview 97 Source Code Availability 97 CGIC License Terms 98 GNU General Public License 98 ...

Страница 8: ...on your network can access these files in a snap To learn about the Web User Interface go to Chapter 6 Using the N3200PRO Web User Interface FTP Server With the built in FTP Server friends clients and customers can upload and download files to your N3200PRO over the Internet with their favorite FTP programs You can create user accounts so that only authorized users have access To set up the FTP Se...

Страница 9: ...from a connected USB webcam at designated intervals To set up the Web Cam Server refer to Chapter 5 Additional Feature Setup Web Cam Server Printer Server With the N3200PRO s Printer Server you can easily share an IPP printer with other PCs connected to your network To set up the Printer Server refer to Chapter 5 Additional Feature Setup Printer Server Superior Power Management N3200PRO supports s...

Страница 10: ...LED Solid red HDD failed Blinking orange HDD activity USB Port USB 2 0 port for compatible USB devices such as digital cameras USB disks USB printers and USB wireless dongles Note For supported USB wireless dongles please contact support thecus com Power Button Power on off N3200PRO Solid blue Device is powered on LCD Display Displays current system status and messages Update time 60 seconds Down ...

Страница 11: ...ters WAN Port WAN port for connecting to an Ethernet network through a switch or router LAN Port LAN port that can be used for connection sharing System Fan System fan that exhausts heat from the unit Power Connector Connect the included power cords to these connectors Reset Button Resets the N3200PRO immediately press and hold the Reset button on the back for 5 seconds This will reset your networ...

Страница 12: ... the N3200PRO 3 Be careful not to use magnetized screwdrivers around the N3200PRO s electronic components Hard Disk Installation The N3200PRO supports three standard 3 5 Serial ATA SATA hard disks To install a hard disk into the N3200PRO follow the steps below 1 Remove the front panel of the N3200PRO 2 Unscrew the thumbscrews which are securing the hard drive rails 3 Remove the hard drive rails an...

Страница 13: ... an Ethernet cable from your network to the WAN port on the back panel of the N3200PRO 2 Connect the provided power cord into the power socket on the back panel Plug the other end of the cord into a surge protector socket 3 Press the power button on the Front Panel to boot up the N3200PRO 13 ...

Страница 14: ...rform the following steps 1 Insert the installation CD into your CD ROM drive the host PC must be connected to the network 2 The Setup Wizard should launch automatically If not please browse your CD ROM drive and double click on Setup exe NOTE For MAC OS X users double click on Thecus Setup Wizard 1 1 99 dmg 3 The Setup Wizard will start and automatically detect all Thecus storage devices on your ...

Страница 15: ...our N3200PRO and configure the network IP address If your switch or router is configured as a DHCP Server configuring the N3200PRO to automatically obtain an IP address is recommended You may also use a static IP address and enter the DNS Server address manually Press Next to continue 7 Change the default administrator password 15 ...

Страница 16: ...install the Thecus Setup Wizard on a host machine with one of these operating systems before using the unit NOTE RAID Setup and Firmware Installation Once the setup wizard has completed you should now be inside the Web Admin Interface From here it is time to initialize your RAID system and other setting per needed The next steps are for first time setup only If you have previously setup your N3200...

Страница 17: ...trol panel LCD Controls Icon Function Description Down Button Select the previous configuration settings option Up Button Select the next configuration settings option Enter Enter to display USB copy operation ESC Escape Escape to give up USB copy Press and hold for 3 seconds to turn off the LCD s backlight Press any button to switch the backlight back on Display Mode During normal operation the L...

Страница 18: ... follows the five steps outlined below For more on how to use the Web Administration Interface see Chapter 4 System Management Web Administration Interface Step 1 Network Setup From the Web Administration Interface you can configure the network settings of the N3200PRO for your network You can access the Network menu from the menu bar For details on how to configure your network settings refer to ...

Страница 19: ...0PRO and control user access to each using Folder Access Control Lists More information on managing folders see Chapter 4 System Management Folder Management To find out about configuring Folder Access Control Lists see Chapter 4 System Management Folder Management Folder Access Control List ACL Step 5 Start Services Finally you can start to setup the different services of the N3200PRO for the use...

Страница 20: ...ter s network IP address must be on the same subnet as the N3200PRO If the N3200PRO has default IP address of 192 168 1 100 your managing PC IP address must be 192 168 1 x where x is a number between 1 and 254 but not 100 NOTE 2 Login to the system using the administrator user name and password The factory defaults are User Name admin Password admin If you changed your password in the setup wizard...

Страница 21: ...sers and groups System Various N3200PRO system settings and information Language Choose your preferred language here Moving your cursor over any of these items will display the dropdown menu selections for each group In the following sections you will find detailed explanations of each function and how to configure your N3200PRO Language Selection The N3200PRO supports multiple languages including...

Страница 22: ...iption Manufacturer Displays the name of the system manufacturer Product No Shows the model number of the system Firmware version Shows the current firmware version Up time Displays the total run time of the system To access this screen again navigate to Status About System Status From the Status menu choose the System item and the System Status screen appears These screens provide basic system st...

Страница 23: ... printer printing may suddenly fail If your print jobs seem to be locked up pressing the Remove All Documents button to clear the print queue may resolve the issue For information on how to set up the Printer Server refer to Chapter 5 Additional Feature Setup Printer Server Wake Up On Lan WOL The M3800 has the ability to be awoken from sleep mode via WAN or LAN From the Status menu choose the WOL ...

Страница 24: ...s the SATA hard disk capacity Model Displays the SATA hard disk model name Firmware Shows the SATA hard disk firmware version Status Indicates the status of the disk Can read OK Warning or Failed Total Capacity Shows the total SATA hard disk capacity Disk Power Management The administrator can set the disk to power down after a period of inactivity NOTE When the Status shows Warning it usually mea...

Страница 25: ...d to the N3200PRO USB Information Item Description Disk No Number assigned to each USB disk Capacity MB Shows the capacities of each USB disk in megabytes MB Model Displays the model names of each USB disk Firmware Shows the firmware version of each USB disk Status Shows the status of each USB disk An Eject button appears beside each USB disk Press this button before removing the USB disk Refresh ...

Страница 26: ...Basics RAID Level You can set the storage volume as JBOD RAID 0 RAID 1 or RAID 5 RAID configuration is usually required only when you first set up the device A brief description of each RAID setting follows RAID Levels Level Description JBOD The storage volume is a single HDD with no RAID support JBOD requires a minimum of 1 disk RAID 0 Provides data striping but no redundancy Improves performance...

Страница 27: ...n to exit without saving changes Creating a RAID To create a RAID volume follow the steps below 1 On the RAID Configuration screen set the RAID storage space as JBOD RAID 0 RAID 1 or RAID 5 see Appendix C RAID Basics for a detailed description of each 2 Tick the checkboxes of the hard disks you wish to use to create a RAID 3 Specify a stripe size 64K is the default setting 4 Press Create to build ...

Страница 28: ...dding Folders On the Folder screen press the Add button and the Add Folder screen appears This screen allows you to add a folder After entering the information press Apply to create new folder Press Back to return to the Folder screen Add Folder Item Description Folder Name Enter the name of the folder Description Provide a description the folder Browseable Enable or disable users from browsing th...

Страница 29: ...it to save your changes Back Press Back to return to the Folder screen Deleting Folders To delete a folder press the Del button from the specified folder row The system will confirm folder deletion Press OK to delete the folder permanently or Cancel to go back to the folder list All the data stored in the folder will be deleted once the folder is deleted The data will not be recoverable WARNING NF...

Страница 30: ... in this column Remove Removes the selected user or group from the column in order to reset their access privileges Submit Submits and confirms settings Reset Cancel your settings and return to the Folder screen To configure folder access follow the steps below 1 On the ACL screen all network groups and users are listed in the left hand column Select a group or user from this list 2 With the group...

Страница 31: ... IP address of the WAN interface Netmask Network mask which is generally 255 255 255 0 Gateway Default Gateway IP address DNS Server Domain Name Service DNS server IP address IP Sharing Mode When enabled PCs connected to the LAN port will be able to access the WAN Default is Enabled NOTE A correct DNS setting is vital to networks services such as SMTP and NTP WARNING Most Fast Ethernet 10 100 Swit...

Страница 32: ...ht not be able to connect to your N3200PRO In this case you have to reset the system back to default by the holding down front panel reset button for 5 seconds during boot up process NOTE DHCP Configuration A DHCP server can be configured to assign IP addresses to devices connected to the LAN port To configure these ports choose LAN from the Network menu DHCP Configuration Item Description DHCP Se...

Страница 33: ...ed by the N3200PRO This will prevent the Access Point from broadcasting the ESSID The N3200PRO will still respond to a wireless device that wants to communicate if it sends a matching ESSID Channel The channel that the N3200PRO uses to communicate with client devices Auth Mode Authentication mode used by the N3200PRO Shared Shared key authentication Open Open key authentication WEP Enable Specifie...

Страница 34: ...iption DDNS Enable or disable DDNS support Register Enter your desired DDNS server here User Name Enter your user name Password Enter your password or DDNS key Domain Name Enter your host name i e www N3200PRO dyndns org Apply Click to save your changes Typical DDNS Configuration Procedure To setup DDNS on your N3200PRO follow the steps below 1 Go to http www dyndns org from your home PC 2 Click o...

Страница 35: ...P item and the AFP Configuration screen appears This screen displays the configuration items for the Apple Filing Protocol You can change any of these items and press Apply to confirm your settings A description of each item follows Apple Network Configuration Item Description AFP Server Enable or disable Apple File Service to use the N3200PRO with MAC OS based systems MAC CHARSET If your operatin...

Страница 36: ...he N3200PRO can act as an NFS server enabling users to download and upload files with their favorite NFS clients Press Apply to confirm your settings A description of each item follows NFS Support Item Description NFS Enable or Disable NFS support Apply Click Apply to save your changes 36 ...

Страница 37: ...al users Modify Press the Modify button to modify a local user Delete Press the Delete button to delete a selected user from the system Adding Users 1 Click on the Add button on Local User Configuration screen and Local User Setting screen appears 37 2 On the Local User Setting screen enter a name in the User Name box 3 Enter a password in the Password box and re enter the password in the Confirm ...

Страница 38: ...Accounts menu choose the Groups item and the Local Groups Configuration screen appears This screen allows you to Add Modify and Delete local groups Local Groups Configuration Item Description Add Press the Add button to add a user to the list of local groups Modify Press the Modify button to delete a selected group from the system Delete Press the Delete button to delete a selected group from the ...

Страница 39: ...he Local Group Configuration screen select a group name from the list 2 Press Delete to delete the group from the system ADS NT Configuration If you have a Windows Active Directory Server ADS or Windows NT server to handle the domain security in your network you can simply enable the ADS NT support feature the N3200PRO will connect with the ADS NT server and get all the information of the domain u...

Страница 40: ...uired for N3200PRO to join domain Administrator Password Enter the ADS NT Administrator password Confirm Password For re entering password to confirm To join an AD domain you can use the example below to configure the N3200PRO AD Domain Example Item Information Work Group Domain Name Thecus ADS Support Enable ADS Server Name ADServer ADS NT Realm thecus com Administrator ID Administrator Administr...

Страница 41: ... beeper that beeps when a problem occurs Email Notification Enable or disable email notifications of system problems SMTP Server Specifies the hostname IP address of the SMTP server Port Specifies the port to send outgoing notification emails Auth Type Select the SMTP Server account authentication type SMTP Account ID Set the SMTP Server Email account ID Account Password Enter a new password Confi...

Страница 42: ...me screen appears Set the desired Date Time and Time Zone You can also elect to synchronize the system time on the N3200PRO with an NTP Network Time Protocol Server You can change any of these items and press Apply to confirm your settings See the following table for a detailed description of each item Time Item Description Date Sets the system date Time Sets the system time Time Zone Sets the sys...

Страница 43: ...file to overwrite current system configuration Module Management From the System menu choose the Module Mgmt item and the Module Management screen appears From here you can install separate software modules to extend the functionality of your N3200PRO Modules can potentially harm your system Only install modules from your vendor or publishers you can trust NOTE Module Management Item Description N...

Страница 44: ...From the System menu choose the Firmware Upgrade item and the Firmware Upgrade screen appears Follow the steps below to upgrade your firmware 1 Use the Browse button to find the firmware file 2 Press Apply 3 The beeper beeps and the Busy LED blinks until the upgrade is complete NOTE The beeper only beeps if it is enabled in the System Notification menu Check Thecus website for the latest firmware ...

Страница 45: ...s this to save your changes Reboot and Shutdown System From the System menu choose Reboot Shutdown item and the Shutdown Reboot System screen appears Press Reboot to restart the system or Shutdown to turn the system off Scheduled Power On Off You may also designate a schedule for the N3200PRO to turn on and off To do this first enable the feature by checking the Enable Timer checkbox Then simply c...

Страница 46: ... will not shut down unless powered down manually You may also choose two on times or two off times on a particular day and the system will act accordingly Example Monday Off 8 00 Off 16 00 System will turn off at 8 00 AM on Monday System will turn off at 16 00 PM on Monday if it was on If the system was already off at 16 00 PM on Monday system will stay off Logout To logout of the Web Administrati...

Страница 47: ...s to upload or download files to from public folders Download Allow anonymous FTP users to download files from public folders No access Block anonymous FTP user access Auto Rename If checked the system will automatically rename files that are uploaded with a duplicate file name The renaming scheme is filename where represents an integer Upload Bandwidth You may set the maximum bandwidth allocated ...

Страница 48: ...Rescan interval in seconds MP3 Tag Encode Specify tag encoding for MP3 files stored in N3200PRO All ID3 tags will be sent out in UTF 8 format Once the iTunes service is enabled the N3200PRO will make all music located in the Music folder available for iTunes equipped computers on the network Media Server With the built in Media Server capability the N3200PRO provides media streaming service to sta...

Страница 49: ...required for scanning depends on the size of the folder Connecting DMAs to the Media Server Next it s time to connect your Digital Media Adapter DMA to the media server 1 Connect your DMA to your Media Server a Configure your DMA to use a Dynamic IP address The IP address will be assigned by the router b Some DMAs are wireless enabled You can connect the DMA to a wireless router For instructions o...

Страница 50: ...e the specified task Click to delete the specified task A prompt will appear asking you if you would like to delete the task itself or the task and all related downloaded files Task Name of the task Click to see more information about this task Type Type of transfer Can be HTTP FTP or BT Rate Transfer rate of the task in kilobytes per second KB s DL Download rate UL Upload rate Status Status of th...

Страница 51: ...k to the Download Manager follow these steps 1 Using the Task Type dropdown select HTTP and click Add Task 2 In the HTTP Task window start by inputting the target URL in the Website URL box This is the link to the download you want to queue 51 ...

Страница 52: ...t the destination folder from the Destination Folder dropdown This is where the download will reside 52 4 Select the maximum download bandwidth from the Max Download Bandwidth dropdown 5 Press Apply to add the task ...

Страница 53: ...ppear in the list of download tasks To start the download simply click the Start icon and the download will begin 7 The download status will continually update in the Download Tasks window To pause the download click the Pause icon 53 ...

Страница 54: ...sk to the Download Manager follow these steps 1 Using the Task Type dropdown select FTP and click Add Task 2 In the FTP Task window start by inputting the target URL in the FTP File box This is the link to the download you want to queue 54 ...

Страница 55: ...from the Destination Folder dropdown This is where the download will reside 55 4 The next step depends if you are using an anonymous login for your FTP download If you are logging in anonymously select Anonymous Login and move on to step 5 ...

Страница 56: ...in with a user name and password select Username and input your user name and password into the appropriate fields 5 Select the maximum download bandwidth from the Max Download Bandwidth dropdown 56 6 Press Apply to add the task ...

Страница 57: ...ppear in the list of download tasks To start the download simply click the Start icon and the download will begin 8 The download status will continually update in the Download Tasks window To pause the download click the Pause icon 57 ...

Страница 58: ...add a new BT task to the Download Manager follow these steps 1 Using the Task Type dropdown select BT and click Add Task 2 In the BT Task window start by clicking Browse and selecting the torrent file you wish to start 58 ...

Страница 59: ...e destination folder from the Destination Folder dropdown This is where the download will reside 59 4 Next you can select the maximum and minimum number of peers from selecting the counts from the appropriate dropdowns ...

Страница 60: ...ownload and upload bandwidths from the dropdowns below 6 Press Apply to add the task 7 Once added your download will appear in the list of download tasks To start the download simply click the Start icon and the download will begin 60 ...

Страница 61: ...inished download files 4 Click OK to delete the task Click Cancel to return to the Download Manager Scheduling Downloads With the Download Manager you can schedule your downloads to begin at different times of the day This is useful if you wish to complete your downloads during off peak hours reserving your bandwidth for other applications A table describing the Download Schedule window appears be...

Страница 62: ...a daily download period select Daily and select a start time and end time To schedule a weekly download period select Weekly and select a start day time and end time day 3 Click Apply to save your changes If the Download Scheduler is enabled ALL download tasks will adhere to the designated schedule NOTE 62 ...

Страница 63: ...image Can be 160x120 320x240 or 640x480 Interval Select an interval between each captured image Schedule Click to schedule webcam image capture Preview Click to preview the image capture Apply Click to save your changes Web Cam Preview From the Web Camera window you can click the Preview button to view the image from the Web Cam before setting up the recording schedule if you wish Note Picture qua...

Страница 64: ...ve your changes Adding a Web Cam Schedule After finishing with the basic settings we need to now configure the capture schedule To do this begin by activating the schedule function by selecting Enable in the Web Camera Schedule window Next select time slot you want to record through the Web Cam If Always is selected it will start to record right away and will not stop until the Web Camera Schedule...

Страница 65: ... record every Monday and Tuesday from 2 00 6 00 and from 20 00 22 00 One important point worth mentioning is how captured picture is stored The folder where captured images are stored is the Video system folder which is associated with the system created Web Cam sub folder See the figure below for reference 65 ...

Страница 66: ...he network can utilize the same printer Windows XP SP2 To set up the Printer Server in Windows XP SP2 follow the steps below 1 Connect the USB printer to one of the USB ports preferably the rear USB ports front USB ports can be used for external HDD enclosures 2 Go to Start Printers and Faxes 3 Click on File Add Printer 4 The Add Printer Wizard appears on your screen Click Next 5 Select the A netw...

Страница 67: ...ndows system will ask you if you want to set this printer as Default Printer Select Yes and all your print jobs will be submitted to this printer by default Click Next 9 Click Finish Note that if a multi function all in one printer is attached to the N3200PRO usually only the printing and fax functions will work Other features such as scanning probably will not function Not all USB printers are su...

Страница 68: ...rver in Windows Vista follow the steps below 1 Open Printer Folder from the Control Panel 2 Click the right mouse button in anywhere on the Printers folder and then select Add Printer 3 Select Add a network wireless or Bluetooth printer 68 ...

Страница 69: ...earching for available printers to finish 5 Click Select a shared printer by name Type http Thecus_NAS 631 printers usb printer in the box where Thecus_NAS_IP is the IP address of the N3200PRO Click Next 6 Select or install a printer and then press OK 69 If your printer model is not listed please contact your printer manufacturer for help ...

Страница 70: ...7 Windows will attempt to connect to the printer 8 You can choose to set this printer as the default printer by checking the Set as the default printer box Click Next to continue 9 Done Click Finish 70 ...

Страница 71: ... Chapter 4 System Management Network Management Web Services Configuration Login Page To login to the system enter your user name and password and click Login to log into the system You will be taken to the Web User Interface Web User Interface The Web User Interface is where users interact with the N3200PRO and manage all sorts of digital media The simple layout makes it easy for anyone to enjoy ...

Страница 72: ...Sort Arrange all files and folders by type name size or last modified date Delete Delete the selected files or folders Page Number Use this to navigate when multiple pages are required to list the contents of the selected directories Create New Folder Enter a new folder name and press the Create button Upload Files Browse to the desired file location and press the Upload button The Delete Create N...

Страница 73: ...ccess to the specific folder NOTE Adding Music Files You could add music files into iTunes Server through Web User Interface however if you have lots of folders and files to upload there is a simpler way 1 Open a Windows Explorer and type the N3200PRO IP address in the address bar i e 192 168 1 100 2 Double click the Music folder to enter it Then drag and drop music folders and files here 3 The N3...

Страница 74: ...haracters and each description is limited to 255 characters Delete Delete the selected albums or photos 74 Creating Albums If duplicate file names exist during upload process system will add a number in front of the original file name abc Æ 1abc Only these photo file types will be uploaded jpg gif bmp png pcx psd bmp To prevent system errors the N3200PRO sets the following limitations on photo fil...

Страница 75: ...he pictures with the Delete Windows XP Publishing Wizard to upload pictures into their photo album 1 Click on the XP Publishing Wizard icon Edit screen will appear 2 album so that only people with the correct password can view the alb Uploading pictures to albums using Initially the album is empty 2 Photos screen will appear Users can select and upload up to 8 pictur a time or Modify buttons on th...

Страница 76: ... Run 4 Once the Wizard is installed use the Windows file manager to browse the folder that contains the picture you want to publish On the left pane there will be an icon labeled Publish this folder to the Web 5 Click on this icon and Web Publishing Wizard will start 76 ...

Страница 77: ...ing a check mark on the top left hand corner of the picture Click Next 7 Your PC will start to connect to the Photo Web Server 8 Select N3200PRO Photo Gallery Wizard to publish your pictures to the N3200PRO 9 Login into the N3200PRO with your local user name and password 77 ...

Страница 78: ...um by entering an album name and clicking on the Create Album button 11 Select the album you want to upload your pictures to 12 Confirm the target album 13 Windows will show you that the picture upload is in progress 78 ...

Страница 79: ...ether if you want to go to the website Click Finish to go to your Photo Web Server 15 Click on the user s icon to go to that user s album 16 You will see the user s album list Click on Album 17 Finished You will see the pictures just selected in the album 79 ...

Страница 80: ...r each photo Simply click the EXIF button to display EXIF information To hide this information click the EXIF button again Slide Shows Slide shows are a great way to enjoy pictures stored on your N3200PRO You can click on the Start Slide Show icon on the top right hand corner to start the slide show 80 ...

Страница 81: ...indows 2 In the menu bar select Tools and then Map Network Drive 3 The Map Network Drive window appears 4 Assign a drive letter for the share folder 5 Click the Browse button to find the folder over your network Alternatively you may enter the folder name you wish to connect to or enter its IP address i e 192 168 1 100 share 6 Click Finish When the Connect As window appears enter your user name an...

Страница 82: ...lick on the CD the Backup Utility will be installed under Program Groups Thecus Thecus Backup Utility If it is not installed you can copy the file Thecus Backup Utility exe to a convenient location on your hard disk and double click to execute it 82 When you execute this utility for the first time it will ask you whether to create a DB file Click Yes If you can not find Thecus Backup Utility on yo...

Страница 83: ... Once installed you can use the Windows Backup Utility by following the steps below 1 Click Start and point to All Programs Accessories System Tools Backup to start the wizard 2 Click Next to skip past the opening page Choose Backup files and settings from the second page and then click Next 3 Select which option you want to back up 4 Click Next and in the Backup Type Destination and Name page spe...

Страница 84: ...annot add new files or modify existing files If you want to write to an USB storage device the file system must be FAT32 NOTE USB Storage FAT32 Partition NTFS Partition Read OK OK Write OK Adding a Spare Disk With a RAID 1 array you can add a spare disk after the initial RAID is setup To add a spare disk follow the steps below 1 On the RAID Configuration Screen tick the checkbox of the hard disk y...

Страница 85: ... org f 2 Click on the Sign Up Now link 3 Check the Check boxes select a user name i e N3200PRO create a password i e xxxx 5 Open the email and click on the link to activate your account Part II Enable DDNS on the Router 1 Go to the router setup screen and select IP Config Miscellan DDNS Setting from your Home PC 2 Click on Yes for Enable the DDNS Cl 3 Select www dyndns org 4 Go to router setup scr...

Страница 86: ...ID 5 you can easily replace a damaged hard driv in the Thecus N3200PRO while keeping your data secure with the system s automa Hard Drive Damage W beeps hen a hard drive is damaged LCM will display Replacing a Hard Drive To replace a hard disk 1 Remove the tray with the damaged hard disk 2 Insert the hard place 3 The LED solid green when the HDD is accessed RAID Auto Rebuild function when an error...

Страница 87: ...e following screen 5 If you select Run file system check option the file system check utility will be started and last 20 lines of the result will be displayed in your browser 6 When the file system check is finished the result will be displayed in your browser 87 ...

Страница 88: ...NOTE If the file system is corrupted beyond repair you may have to remove RAID and recreate the file system 88 ...

Страница 89: ...irst disconnect any existing mappings to this network share 2 The mapped network drive could not be created because the following error has occurred Multiple connections to a server or shared resource by the same user using more than one user name are not allowed Disconnect all previous connections to the server or shared resource and try again To check out existing network connections type net us...

Страница 90: ...isc org by default please make sure the DNS Server is c ered thereby rrectly resolve WAN 2 Navigate to System Time 3 Under NTP Server select 5 n addition RO is able to access the Internet and you want to k he NTP Se orrectly ent allowing the NTP Server name to co See Network DNS Server ...

Страница 91: ... Humidity y non condensing 0 80 relative humidit Certifications MI C Tick RoHS Compliant CE FCC BS S t oftware Specifica ions Network Network Configuration Fixed IP address Dynamic IP address DDNS Network File Protocols Protocol HTTPs Microsoft Networks CIFS SMB Apple Filing Protocol AFP 3 Network File System NFS v3 File Transfer Protocol FTP Hyper Text Transfer Protocol HTTP Secure Hyper Text Tra...

Страница 92: ...ased server management GUI Multilingual support English French German Italian Traditional Chinese Simplified Chinese Japanese h Korean and Spanis Setup Wizard Device discovery and setup utility program Windows 2000 XP 2003 MAC OS X Notification Sends system messages via e mail to specified email accounts Backup Thecus Backup Utility Client backup utility Windows XP 2000 MAC OS X One Button Copy Co...

Страница 93: ...oubleshooting located in this manual You can also try to ensure that you are using the latest firmware version for your N3200PRO Thecus is committed to providing free firmware upgrades to our customers Our newest firmware is available on our Download Center http www thecus com download php If you are still experiencing problems wi Merchandise Technical Su http www thecus com support_tech p Custome...

Страница 94: ...l hard drives in the volume The system can then use multiple hard drives for faster read and write The stripe size parameter that was set when the RAID was created determines the size of each block No parity calculations complicate the write operation hard disk disk Data security is enhanced by a RAID since data loss due to a hard disk failure is minimized by regenerating redundant data from the o...

Страница 95: ...uire data secu customer service Use it also for ap write requests RAID 5 includes disk striping at the byte level and parity information is written t several hard disk drives If a hard disk fails the system uses parity stored on eac of the other hard disks to recreate all missing information JBOD Although a concatenation of disks also called JBOD or Just a Bunch of D not one of the numbered RAID l...

Страница 96: ...on in its domain d Neighborhood and was slow Man issues Active Directory solved What is Active Directory A designed to m a Microsoft calls Active Directory a namespace where names can be resolv ADS Benefits ADS lets the N3200PRO integrate itself with the existing ADS in environment This means the N3200PRO is able to recognize your ords on the ADS server Other major passw 1 Easy integration of the ...

Страница 97: ...nc This product includes software developed by Mark M This product includes software developed by Eric Yo eay cryptsoft com This product includes software devel ely availabl This product includes software developed by the University of California Berkeley and its contributors This product includes software developed by Winning Strategies Inc This product includes software developed by the Apache G...

Страница 98: ...nse Version 2 June 1991 Copyright 1989 1991 Free Software Foundation Inc 51 Franklin St Fifth Floor Boston MA 02110 1301 USA Everyone is permitted to copy and distribute verbatim copies of this license document but changing it is not allowed licenses for most software are designed to take away your freedom to share change it By contrast the GNU General Public License is intended to rantee your fre...

Страница 99: ...TIONS FOR COPYING DISTRIBUTION AND MODIFICATION This License applies to any program or other work which contains a notice placed by the copyright holder saying it may be distributed under the terms of this Gene p Program or any derivative work under copyright law that is to say a work containing the Program or a portion of it either verbatim or with modifica and or translated into another language...

Страница 100: ... it is not the intent of this section to claim rights or contest your right work written entirely by you rather the intent is to exercise the right to control the distribution of derivative or collect In addition mere aggregation of another work not based on the Program with the Program or with a work based on the Program on a volume of a storage or distribution medium does not bring the other wor...

Страница 101: ...acceptance of modifying the Program or works based on it 6 Each time you redistribute the Program or any work based on the Pr the recipient automatically receives a license from the original licensor to distribute or modify the Program subject to these terms and conditions You may not impose any further restrictions on the recipients exercise of the rights granted herein You are not respon 7 or fo...

Страница 102: ...nt write to the author to ask for permission For software which is copyrighted by the Free Software Foundation write to the Free Software Foundation we sometimes make exceptions for this Our decision will be guided by the two goals of preserving the free status of all derivatives of our free software and of promoting the sharing and reuse of software generally 628BNO WARRANTY 11 629BBECAUSE THE PR...

Отзывы: