


— 15 —
Operation
Auto Tune® Advanced Settings
The Auto Tune® Advanced Settings will allow you to create custom presets and make
adjustments as desired.
1
2 2
2
2
1
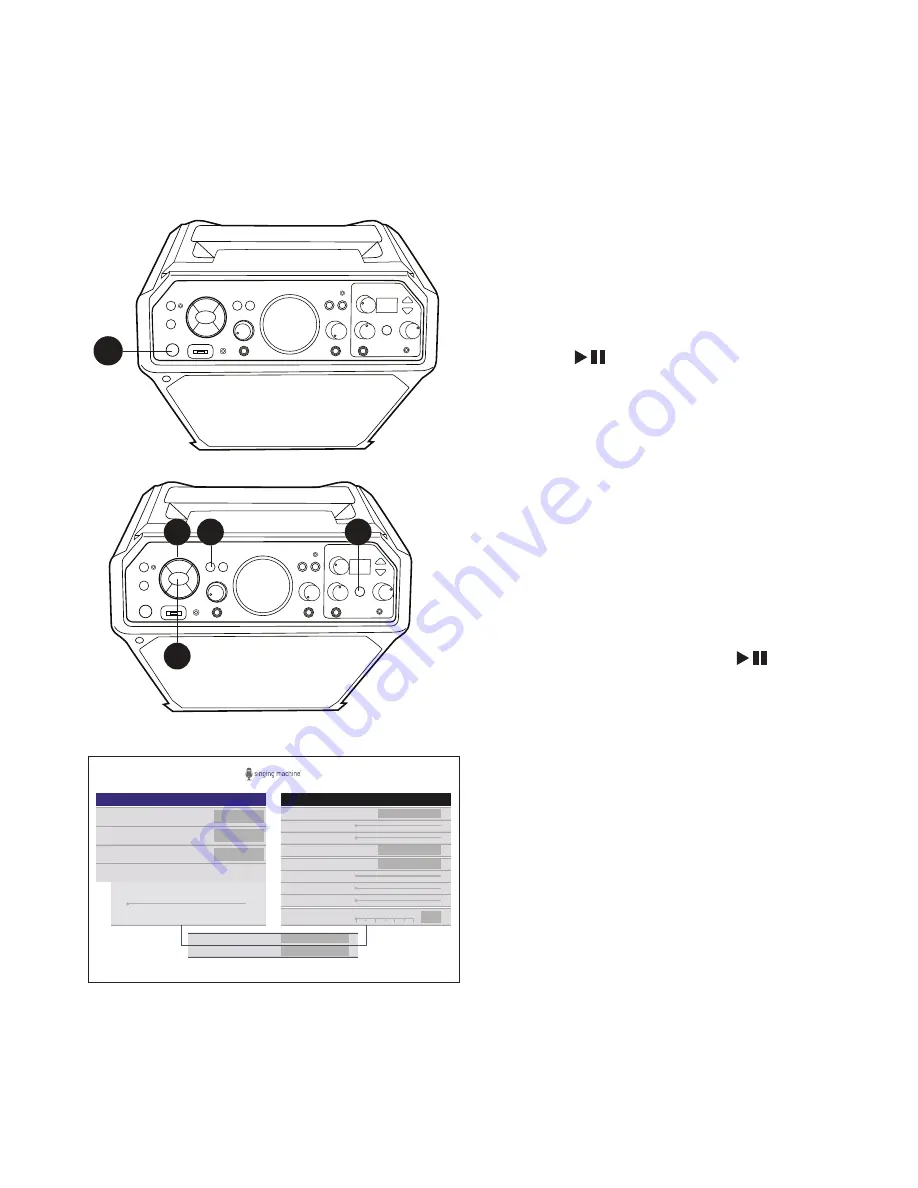
Connect the unit to a TV as described
previously. Press the
STANDBY/ON
button to turn the unit ON.
2
Press the
Navigation
Right or
Left button to select the Auto-Tune®
Advanced Settings, then press the
ENTER
button; the Function
indicator will light purple. You can also
repeatedly press the
FUNCTION
button or press and hold the
AUTO-
TUNE®
control button to select the
Auto-Tune® Advanced Settings.
You can also press and hold the
microphone’s
MENU
button to go into
AT advanced settings menu.
3
While on this screen you can make
adjustments to the following Auto-
Tune® and Vocal Effect Settings using
the
Navigation
and
ENTER
buttons
(see note on next page for more control
options) :
AUTO-TUNE®
: Turn on or off.
KEY/SCALE
: When Auto-Tune® is turned
on, set the desired key.
AUTO-TUNE® LEVEL
: Set the slider
for a more Natural or Extreme sound or
anywhere in between.
REVERB
: Select from available reverb
options or turn off.
MIX LEVEL, ROOMS SIZE
: When Reverb is
on, set sliders as desired.
MIC 2 EFFECTS
: Set the desired effect for
microphone 2.
DELAY FX
: Select from available Delay
options or turn off.
MIX LEVEL, DELAY, FEEDBACK
: When
Delay Fx is turned on, set sliders as desired.
BEATS PER MINUTE
: Set the slider for the
desired beats per minute.
AUTO-TUNE® LEVEL
SCALE
KEY
AUTO-TUNE®
Auto-Tune®
C
Major
SAVE AS PRESET
A
DELETE PRESET
Off
Natural
Extreme
Vocal Effects
ROOM SIZE
MIX LEVEL
MIC 2 EFFECTS
REVERB
DELAY
MIX LEVEL
FEEDBACK
DELAY FX
Off
None
Off
50
BEATS PER MINUTE
100
50
150
200
Off


