background image


5

STEP 3:

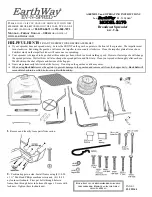
 Insert the Inner Axle Bushing into the Outer Axle Bushing and make sure they are tight. 

Install the right Wheel Assembly onto the right Axle using a bolt M5x45 and lock nut M5, and then 
install the Cap onto the right Axle using a wooden or rubber hammer. Now install the left Wheel 
Assembly onto the left Axle, put a flat washer Ø16 and install the Cap onto left Axle using a 
wooden or rubber hammer.     


Insert the Inner Axle Bushing into the Outer Axle 
Bushing and make sure that they are tight 

Содержание THS80

Страница 1: ...02 08 2013 THS80 ASSEMBLY AND OPERATING INSTRUCTION Handy Distribution Spares Support 01793 333212 ...

Страница 2: ...wise Clean the impeller plate after each use Fertilizer stuck on the impeller blades will cause uneven spreading z Your spreader is designed to be pushed at three miles per hour which is a brisk walking speed Slower or faster speeds will change the spread patterns Wet fertilizer will also change the spread pattern and flow rate Clean your spreader thoroughly after each use Wash between the shut of...

Страница 3: ...3 STEP 1 Install impeller onto the Gear Box Axle Assembly Insert Screw M4x20 through impeller then through Gear Box Axle ...

Страница 4: ...Make sure the hole in the Gear Box Axle is on the right side when assembling as shown Attach the Wheel Assembly Frames and Support Leg onto Hopper using bolts M6x70 lock nuts M6 and Big Flat Washers Ø6 Note The bolts and nuts needn t be tightened yet Left Wheel Assembly Frame Right Wheel Assembly Frame Make sure the hole in the Gear Box Axle is on the right side when assembling as shown ...

Страница 5: ...e using a bolt M5x45 and lock nut M5 and then install the Cap onto the right Axle using a wooden or rubber hammer Now install the left Wheel Assembly onto the left Axle put a flat washer Ø16 and install the Cap onto left Axle using a wooden or rubber hammer Insert the Inner Axle Bushing into the Outer Axle Bushing and make sure that they are tight ...

Страница 6: ...6 STEP 4 Insert Upper Handle into the Support Leg and tighten using bolts M6x40 and Lock Nuts M6 NOW GO BACK AND TIGHTEN ALL NUTS AND BOLTS STARTING WITH FIRST STEP DO NOT OVER TIGHTEN ...

Страница 7: ...ntrol cable into the small hole on the Gauge and Lever Assembly 2 Release the two bolts M5x10 and lock nuts on the Press Plate 3 Put the Plastic Tube into the slot of the Press Plate 4 Retighten the two bolts M5x10 and lock nuts again 5 Insert R Pin ...

Страница 8: ... hopper can be closed completely 3 Push the handle to the lowest position use your hand to adjust the adjustable plate so as to make sure the hole at the bottom of the hopper can be opened completely 4 Tighten the bolts and nuts on clamp To operate this spreader push the handle to the lowest position downwards You may move the position of the Wing nut on the Gauge Lever to adjust the space on the ...

Страница 9: ...he flow rate to maintain the same coverage The faster you walk the wider the broadcast width 6 Make sure the drive pin is installed in the axle before starting the spreader 7 Always start walking before opening the closure plate 8 Always shut the closure plate before turning or stopping 9 If fertilizer is accidentally deposited too heavily in a small area soak the area thoroughly with a garden hos...

Страница 10: ...5 LB 1 7 LB 30 6 0 LB 3 0 LB 2 0 LB 35 7 0 LB 3 5 LB 2 3 LB 40 8 0 LB 4 0 LB 2 7 LB 45 9 0 LB 4 5 LB 3 0 LB 50 10 0 LB 5 0 LB 3 3 LB These are only estimates actual amounts may vary Chart B Spreader Settings Spread Widths MULTI USAGES LBS 1 000 SQ FT SPREADER SETTING SMALL PARTICLE SPREAD MEDIUM PARTICLE SPREAD LARGE PARTICLE SPREAD 1 10 5 6 FT 6 9 FT 9 12 FT 2 12 5 6 FT 6 9 FT 9 12 FT 3 14 5 6 FT...

Страница 11: ...d open feed gate push the knob down whilst in motion If spread is uneven or inadequate pull the lever up and set micro dial to a higher number Repeat until satisfactory distribution is obtained N B ALWAYS MOVE OFF BEFORE OPENING THE FEED GATE ALWAYS CLOSE THE FEED GATE BEFORE STOPPING Even branded materials may vary in grain size humidity Density etc If you are in doubt either 1 Choose a lower set...

Страница 12: ...12 PARTS DRAWING ...

Страница 13: ...crew M4x20 1 11 TH146 11 Hopper 1 36 TH137 47 Hex Bolt M5x45 1 12 TH138 12 R Pin Ø2x60 1 37 TH138 37 Line Clamp Press Plate 2 13 TH138 13 Center Cover 1 38 TH138 38 Control Rod 1 14 TH146 14 Hex Bolt M6x70 4 39 TH138 39 Screw M5x10 2 15 TH146 15 Rivet Ø5X12 4 40 TH137 12 Nylon Washer 1 16 TH146 16 Active Adjustable Plate 1 41 TH137 13 Big Flat Washer Ø6 5 17 TH146 17 Fixed Adjustable Plate 1 42 TH...

Страница 14: ...the event of a problem with the product within the guarantee period please contact Customer Service on 01793 333212 or email customerservice handydistribution co uk If the issue cannot be resolved over the telephone or by email you may be referred to your local approved service dealer Please keep your sales receipt as proof of purchase Your statutory rights remain unaffected Guarantor Handy Distri...

Страница 15: ...15 ...

Страница 16: ...16 To order spare parts and see the complete range of garden machinery and garden equipment from Handy visit www thehandy co uk Spares Support 01793 333212 ...

Отзывы: