background image


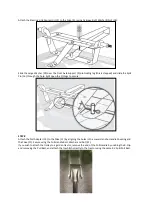
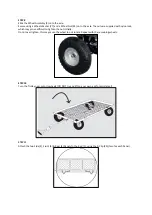
Attach the Steering Link Connector (12) to the Yoke (11) using Carriage Bolt, Washer & Nut (18). 


Slide the Large Washer (23) over the Front Axle Support (9) protruding leg (this is stepped) and slide the Split 
Pin (16) through the hole. Split open the Pin legs to secure. 


STEP 8 

Attach the Pull Adapter (13) to the Yoke (11) by aligning the holes in the Lower Handle, Handle Coupling and 
the Yoke (11). Secure using the Pull Handle Bolt, Washer and Nut (21).  
If you wish to attach the trolley to a garden tractor, remove the end of the Pull Handle by undoing the R-Clip 
and removing the Pull Bolt, and attach the tow hitch directly to the tractor using the same R-Clip & Pull Bolt. 


Содержание 193854004

Страница 1: ...ncrete tarmac etc could cause premature wear on the trolley tyres Commercial or industrial environments are not recommended Not to be used on public highways or roads When operating with a tractor do not exceed 10mph FOR YOUR SAFETY WARNING PERSONS SHOULD NEVER RIDE IN THE GARDEN TROLLEY Please read understand this manual paying attention to the safety instructions before use Incorrect use of the ...

Страница 2: ...ersonal educational use only Commercial copying redistribution hiring or lending is prohibited No part of this publication may be stored in a retrieval system or transmitted in any other form or means without written permission from Handy Distribution In all cases this copyright notice must remain intact ...

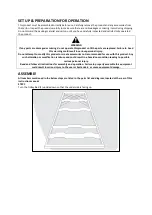
Страница 3: ...e Assembly section for instructions Because of the weight and or size of the machine it is recommended that another adult is present to assist with the assembly Inspect all components closely upon receipt to make sure no items are missing or damaged WARNING Read this instruction manual carefully before operating this machine Make sure that you are familiar with the controls and properly operate th...

Страница 4: ...t not in public facilities parks or sports grounds and not for agricultural or forestry use Never exceed the rated load capacity of 200kg 440lb This is a garden trolley therefore extended use over abrasive surfaces e g concrete tarmac paving etc could cause premature wear on the trolley tyres Commercial or industrial environments are not recommended Not to be used on public highways or roads When ...

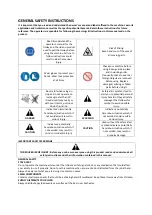
Страница 5: ...tential personal injury hazards Obey all safety messages that follow this symbol to avoid possible injury DANGER Indicates an imminently hazardous situation which if not avoided will result in serious injury WARNING Indicates a potentially hazardous situation which if not avoided could result in serious injury CAUTION Indicates a potentially hazardous situation which if not avoided may result in m...

Страница 6: ...hine Serious injury could occur if the machine is tipped or if the moving parts are unintentionally contacted Do not store anything above or near the machine where anyone might stand on the machine to reach them DO NOT FORCE TOOL Do not exceed equipment maximum load capacity of 200kg 440lb Avoid large holes and ditches when transporting loads Always work within the rated capacity Do not use machin...

Страница 7: ... this warning could result in serious personal injury Do not attempt to modify this product or create accessories not recommended for use with this product Any such alteration or modification is misuse and could result in a hazardous condition leading to possible serious personal injury Read and follow all instructions for assembly and operation Failure to properly assemble this equipment could re...

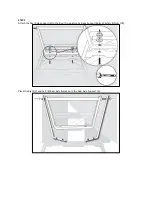
Страница 8: ...STEP 2 Attach the Rear Axle Support 6 to the Bed 1 using two Carriage Support Bolts Washers Nuts 18 Place the Right 7 and Left 8 Rear Axle Braces onto the Rear Axle Support 6 ...

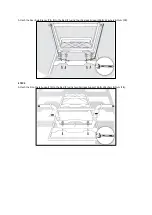
Страница 9: ...Attach the Rear Axle Braces 7 8 to the Bed 1 using four Carriage Support Bolts Washers Nuts 18 STEP 3 Attach the Front Axle Support 9 to the Bed 1 using two Carriage Support Bolts Washers Nuts 18 ...

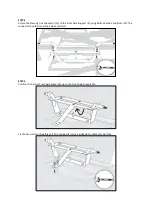
Страница 10: ...Axle Support 9 using Bolts Washers and Nuts 19 The connector should sit over the axle as pictured STEP 5 Position the Central Front Axle Brace 10 up to the Front Axle Support 9 Fix the Central Front Axle Brace 10 to the Bed 1 using Carriage Bolt Washer Nut 18 ...

Страница 11: ... Support 9 this leg is stepped so the Yoke 11 will not go all the way over the leg Position the straight arm of the Yoke 11 between the Centre Front Axle Brace 10 Front Axle Support 9 STEP 7 Fix the Yoke 11 Centre Front Axle Brace 10 to the Front Axle Support 9 usng Bolt Washer Nut 19 ...

Страница 12: ...it open the Pin legs to secure STEP 8 Attach the Pull Adapter 13 to the Yoke 11 by aligning the holes in the Lower Handle Handle Coupling and the Yoke 11 Secure using the Pull Handle Bolt Washer and Nut 21 If you wish to attach the trolley to a garden tractor remove the end of the Pull Handle by undoing the R Clip and removing the Pull Bolt and attach the tow hitch directly to the tractor using th...

Страница 13: ...ck which may prove difficult to tighten the nut initially Do not over tighten this may cause the wheel to not rotate Repeat with the remaining wheels STEP 10 Turn the Trolley over onto its wheels DO NOT try and lift on your own ask for assistance STEP 11 Attach the two Side 2 Front 3 Rear 4 Panels to the Bed 1 using the R Clip 20 Two for each Panel ...

Страница 14: ... approved vehicles when towing the trolley Lawn Garden Tractors and ATVs 4 DO NOT over fill the trolley Overflow loads can cause the trolley and towing vehicle if used to lose traction and skid out of control 5 ALWAYS use the trolley for its intended purpose 6 ALWAYS make sure that the tow vehicle and the combined weight of the operator MUST BE greater than the load of the trolley weight for corre...

Страница 15: ... years of trouble free service make sure the Trolley is clean and dry before storing Store in a dry protected area away from sunlight and severe weather in winter months If storing for an extended period grease the axles and wheel bearings on the Trolley with multi purpose grease TROUBLESHOOTING WARNING If the product does not perform properly makes unusual sounds or any other irregularity or malf...

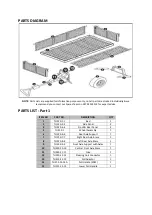
Страница 16: ... Left Rear Axle Brace 1 9 TH220 9 9 Front Axle Support with Axles 1 10 TH220 10 10 Central Front Axle Brace 1 11 TH220 11 11 Yoke 1 12 TH220 12 12 Steering Link Connector 1 13 TH215 E2 13 Pull Adaptor 1 14 TH215 14 14A Pull Handle 2022 1 15 TH215 15 15 Lower Pull Handle 1 NOTE Parts Lists are supplied for information purposes only not all parts are stocked individually we recommend you contact our...

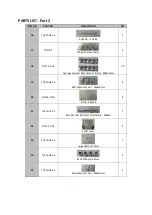
Страница 17: ...TH215 C 18 Carriage Support Bolt Washer Nut M8x15mm 10 19 TH215 A4 19 Bolt Washer Nut M6x16mm 3 20 TH215 D 20 R Clip 40x105 8 21 TH215 E1 21 Bolt Washer Nut for Pull Handle M8x60 1 22 TH215 F 22 Panel Lever 4 23 TH215 A2 23 Large Washer 10mm 1 24 TH215 B2 24 M12 Wheel Lock Nut 4 25 TH215 A3 25 Bolt Washer Nut M6x20mm 1 ...

Страница 18: ...o the professional commercial user c 90 days from the original date of sale when used for hire d A reduced warranty period of 90 days applies to those items which are subject to normal wear and tear e g but not limited to wheels tyres cutter bars cylinders cutting blades blade boss belts cables nylon line spool collection bags spark plugs e Engines are supplied with a separate warranty to the mach...

Страница 19: ...ges or injuries including but not limited to loss of crops loss of profit out of pocket expenses or profits rental of substitute equipment or other commercial losses General a Most warrantable failures show up within the first few weeks of use These failures are usually straightforward and warranty assessment is relatively easy b Failures relating to cutter decks and belts need careful investigati...

Страница 20: ...on co uk Opening Hours Weekdays February to October 8 00am 5 00pm November to January 8 30am 5 00pm CLOSED WEEKENDS BANK HOLIDAYS To see our range of garden machinery equipment visit www thehandy co uk Making gardening easier affordable since 1938 Distributed by Handy Distribution Murdock Road Dorcan Swindon SN3 5HY ...

Отзывы:

Похожие инструкции для 193854004