background image

6.   During processing, you can 
 

adjust the speed by selecting 


the LOW ( | ) or HIGH ( || ) speed 

 button.

7.   To stop the THUNDERSTICK™  
 

take your fingers off the switch  


button ( | ) or ( || ). Unplug the  


appliance from the power outlet.

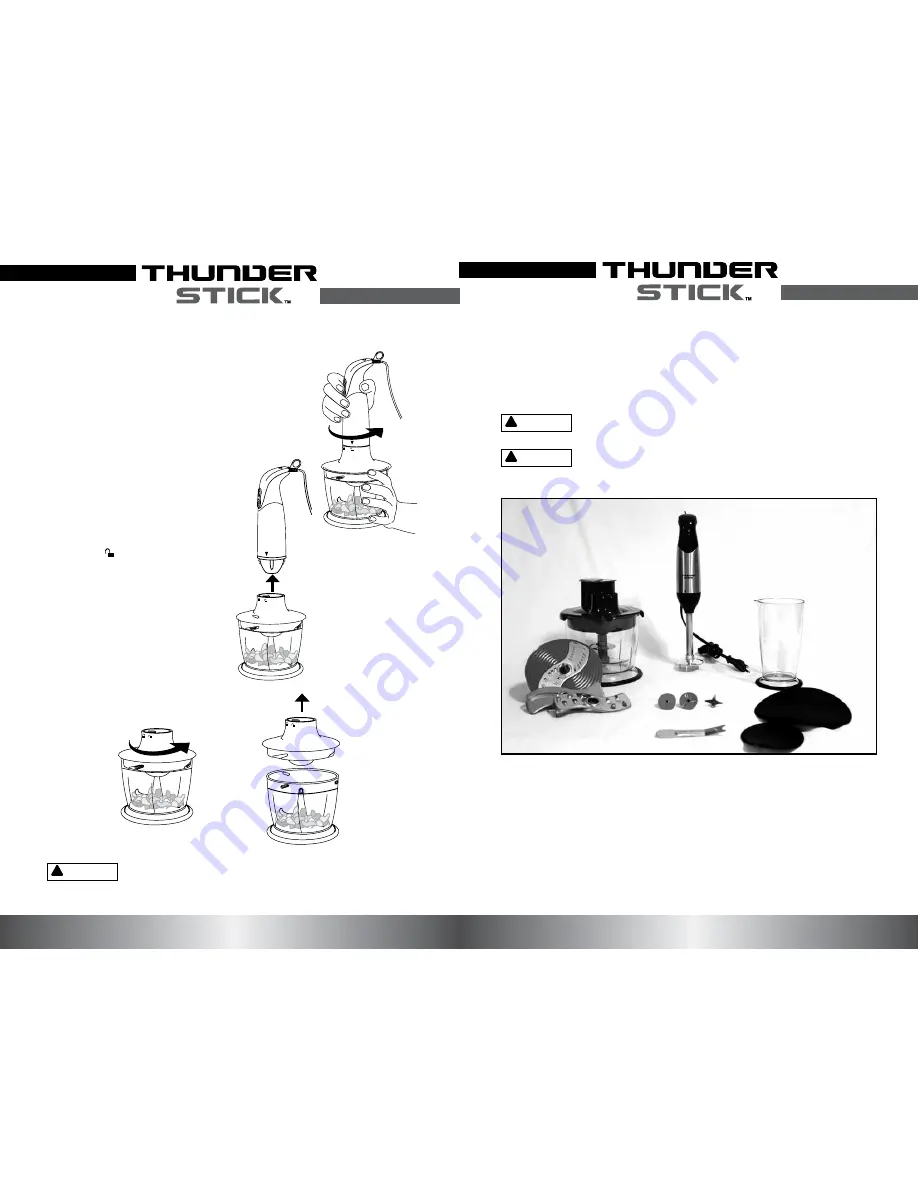
8.   Turn the motor appliance counter- 
 

clockwise until the arrow mark 


on the motor appliance is  


aligned with the unlocked  


symbol (    ) on the chopper  


lid, as illustrated in Fig. 8a. 


Detach the motor appliance  


from the lid as illustrated in Fig.  


8b.Turn the lid in a counter-   


clockwise direction as illustrated  


in Fig. 8c to remove from the


chopper bowl as shown in Fig. 8d.

37

6

Check that all accessories are complete and not damaged, and wash all 
detachable parts thoroughly according to the section CLEANING AND 
MAINTENANCE.


           Blades and discs are very sharp, handle with care. 


           Do not rinse the motor appliance or submerge it in water.

!

CAUTION

BEFORE THE FIRST USE

!

CAUTION

FIG. 8a

FIG. 8b

FIG. 8c

FIG. 8d

!

CAUTION

Do not open the lid until the blades stop rotating.

Содержание Thunder Stick FP9017-A

Страница 1: ...55 MODEL FP9017 A 220 240 V FOOD PROCESSOR USER S GUIDE...

Страница 2: ...e this the best cooking appliance available and only after extensive testing added it to our family of quality products for the home Please read this book thoroughly and retain for future reference En...

Страница 3: ...option 1 Vortex 4 BLADE 14 15 HOW TO OPERATE THE FOOD PROCESSOR WITH Vortex 4 BLADE 16 18 ASSEMBLY of option 2 DISC BLADE 19 21 HOW TO OPERATE THE FOOD PROCESSOR WITH Disc BLADE 22 26 Optional ATTACHM...

Страница 4: ...ric shock do not immerse motor appliance of blender in water or other liquids If the appliance falls into liquid remove immediately but do not reach into the liquid unless the appliance is unplugged 1...

Страница 5: ...f the appliance wait until the blades have come to a complete stop and then remove the motor appliance 21 Do not use fingers to scrape food away from the blade while the appliance is operating This ma...

Страница 6: ...rom the cutting edge both when handling and cleaning 26 To reduce the risk of injury never place cutting blade or discs on base without first putting the bowl properly in place 27 When mixing liquids...

Страница 7: ...Detach the motor appliance from the lid as illustrated in Fig 8b Turn the lid in a counter clockwise direction as illustrated in Fig 8c to remove from the chopper bowl as shown in Fig 8d 37 6 Check th...

Страница 8: ...ch as the kitchen countertop 2 Place the food into the chopper bowl 3 Make sure that the chopper lid is securely locked in place NOTE Before processing fruit remove any pits if chopping meat remove th...

Страница 9: ...to evenly chop or combine the ingredients move in an up and down and circular motion for pureeing and blending ingredients Chops vegetables fruit and berries minces cooked meat purees potatoes and oth...

Страница 10: ...b Stop pin Stop pin Exercise caution when removing the blade FIG 3a ASSEMBLY OF THE CHOPPER 1 Assemble the chopper blade by placing the blade over the pin in the chopper bowl as shown in Fig 1a 2 Atta...

Страница 11: ...ft and attach the shaft to the motor body Turn the motor body in the clockwise direction until the arrow mark on the motor appliance is aligned with the locked symbol on the detachable shaft and the m...

Страница 12: ...it remove any pits Note The maximum quantity of food can t exceed the maximum capacity of the mixing cup for each operation 2 Plug the THUNDERSTICK into a power outlet 3 Hold the motor body with one h...

Страница 13: ...RSTICK after use Keep the THUNDERSTICK out of reach of children Blades are very sharp keep fingers away 6 For refrigerating and storage use the Storage Lid as illustrated in Fig 6a Do not store proces...

Страница 14: ...ny bones and cut into small pieces For the most consistent results do not overfill the jug and blend the food in smaller quantities 4 Make sure that the blender lid is securely locked in place 5 Plug...

Страница 15: ...at the two tongs extensions on the lid are aligned with the two grooves on the food processor bowl as illustrated in Fig 2b Once the two tongs on the lid are slotted in the two grooves push down the l...

Страница 16: ...e Never add food before installing the vortex 4 blade for blender 2 Attach the blender lid onto the blender jug make sure that the spout cover on the lid is aligned with the spout on the blender jug P...

Страница 17: ...sary 1 Make sure that the non slip base is correctly attached to the bottom of the food processor bowl 2 Place the food processor on a flat surface such as a kitchen countertop 3 Place the food inside...

Страница 18: ...ither side of the lid as illustrated in Fig 10a and 10b CAUTION FIG 9a FIG 9b FIG 10a FIG 10b HOW TO CHANGE REMOVE THE BLADE FROM THE DISC 1 Hold the disc with one hand and with the other hand push th...

Страница 19: ...eep fingers away FIG 10a FIG 10b FIG 11a FIG 12a 10 Remove the lid by pulling out the locking clips on either side of the lid as illustrated in Fig 10a and 10b 11 Remove the Disc Blade from the food p...

Страница 20: ...s cabbage carrots and cucumbers into small pieces for salads and toppings LARGE Shredding Blade The Large Shredding Blade is best suited for shredding food items into larger pieces 2 Locate the short...

Страница 21: ...take your fingers off the switch button I or II and unplug the appliance from the power outlet 23 20 Note Never add food before installing the Disc Blade 4 Attach the food processor lid onto the bowl...

Страница 22: ...such as a kitchen countertop 3 Make sure that the lid is securely locked and the large food pusher and the small food pusher are in place refer to Fig 3a 4 Plug the THUNDERSTICK into a power outlet 5...

Страница 23: ...nal Inc 2011 THANE INTERNATIONAL INC Thunderstick 220V MNL ENG R2 110928 Thane International Inc La Quinta CA 92253 U S A www thane com Thane Direct Canada Inc Mississauga ON L4W 5M6 Canada www thane...

Отзывы: