Texmate, Inc. Tel. (760) 598-9899 • www.texmate.com
Page 6
DL-40JANUS-SG manual (d0116)
STEP A Enter the Calibration Mode
1) Press the
P
and buttons at the same time.
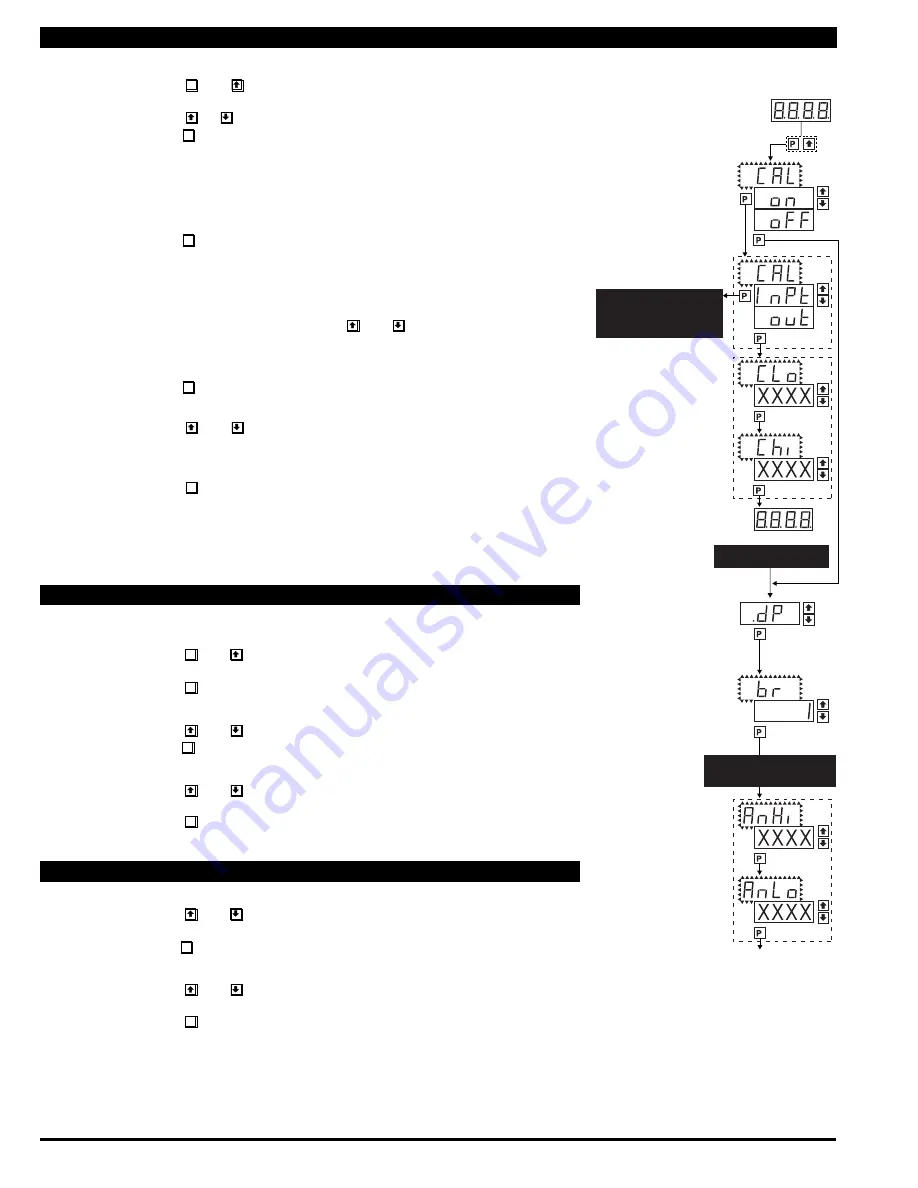
Display toggles between [CAL] and [oFF].
2) Press the or button. Display changes from [oFF] to [on].
3)
Press the
P
button. Display toggles between [CAL] and [out] input calibration.
Note: If at this point the display skips directly to toggle between [oFSt] (Manual) or [ZErO]
(Auto) and the previous setting, the software is detecting that the optional analog output hard-
ware is NOT installed.
STEP B Enter the Analog [oUT] Output Mode
1) Press the
P
button. Display toggles between [CLo] and an internal scale factor.
STEP C Set or Calibrate the [CLo] Low Analog Output Range
1) Select the voltage or current loop output header position on the output
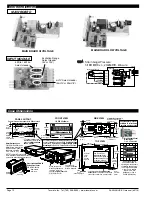
module. (See Component Layout on page 9).
2) Connect a multimeter to pins 16 and 17 on the output module. (See Rear
Panel Pinouts on page 8). Using the and buttons, adjust the analog
output to the desired low value as shown on the multimeter display.
cLo may be adjusted to any value from –0.3 mA to 17 mA (mA output
selected) or from –0.6 V to 8 V (volt output selected)
3)
Press the
P
button. Display toggles between [CHi] and an internal scale factor.
STEP D Set or Calibrate the [CHi] High Analog Output Range
1) Using the and buttons, adjust the analog output to the desired high
value as shown on the multimeter display. CHi may be adjusted to any value
from 17 mA to 21 mA (mA output selected) or from 8 V to 10.3 V (volt out
put selected)
2) Press the
P
button. The display exits the calibration mode and returns to
the operational display.
Note: Having established the Low and High range of the analog output, the digital span
can now be selected which will set the two digital points between which the analog out-
put will occur. (See Digital Span Selection below).
STEP A Enter the Decimal Point and Brightness Mode Through the Sub Menu
[CAL] [oFF]
1) Press the
P
and buttons at the same time.
Display toggles between [CAL] and [oFF].
2) Press the
P
button. Display shows previous [dP] selection.
STEP E Set the Decimal Point
1) Using the and , adjust the display to the desired decimal point setting.
2) Press the
P
button. Display toggles between [br] and the previous [br] setting.
STEP F Set the Display Brightness
1) Using the and buttons, adjust the display to the desired brightness
setting (4 is the brightest setting).
2) Press the
P
button. Display brightness changes to new setting and display
toggles between [AnHi] and the previous [AnHi] setting.
STEP G Setting the Digital Span Point for Analog High Output
1) Using the and buttons, adjust the display to the desired digital value
which sets the point at which the selected analog high output range will occur.
2) Press the
P
button. Display toggles between [AnLo] and previous [AnLo] setting.
STEP H Setting the Digital Span Point for Analog Low Output
1) Using the and buttons, adjust the display to the desired digital value
which sets the point at which the selected analog low output range will occur.
2) Press the
P
button. The display exits the calibration mode and returns to
the operational display.
Note: Any two digital scale points from –1999 to 9999 can be selected. The digital scale
points for analog high and analog low can be reversed for reversed 20-4 mA output. The
span of the digital scale can be as small as two counts however small spans cause the 16
bit D to A to increment in stair case steps.
Two Point Analog Output Range Setting and Calibration
Decimal Point and Brightness Selection
Digital Span Selection for Analog Range Output
MAIN MENU
Operational Display
Sub-menu
MODE
STEP A
Calibration Mode
TWO POINT AUTO
CALIBRATION or
MANUAL RESCALING MODE
See page 4 and 5
STEP B
Calibration Mode
STEP C
Calibrate Analog
Output Lo
STEP D
Calibrate Analog
Output Hi
DECIMAL POINT AND
BRIGHTNESS SELECTION
[X•XXX]
[XX•XX]
[XXX•X]
[XXXX•]
[XXXX]
[2]
[3]
[4]
STEP E
Decimal
Point (dp)
STEP F
Display
Brightness (br)
STEP G
Analog
High (Anhi)
STEP H
Analog
Low (AnLo)
Confirm
DIGITAL SCALE AND SPAN
SELECTION FOR FULL SCALE
ANALOG RANGE OUTPUT


