


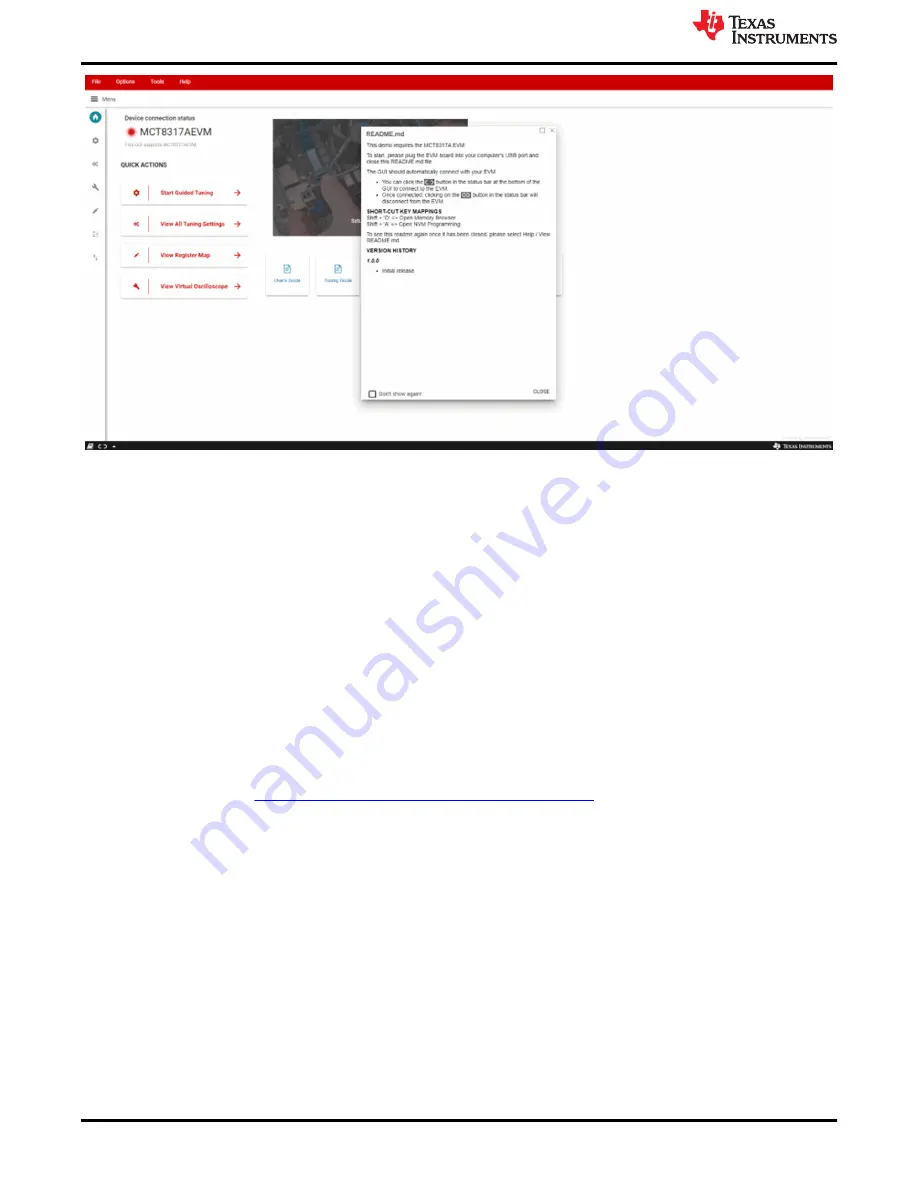
Figure 6-1. MCT8317A GUI
Once the GUI is loaded, follow the step-by-step Guided Tuning section of the GUI to configure the device.
6.2 Offline Installer
Alternatively, the MCT8317A GUI can be downloaded and installed offline using the download feature in the TI
Cloud Gallery. Here are the steps to install offline MCT8317A GUI.
1. Go to dev.ti.com/gallery and search for "MCT8317".
2. Place the cursor on the download (down arrow) button.
3. Select the approprioate operating system (Linux, MAC or Windows) and click the operating system. (Note:
Do not click the runtime)
4. A zip file will begin downloading. Unzip the file and click the .exe file to install the offline MCT8317A GUI.
7 MSP430FR2355 Interface Firmware
The MSP430FR2355 on the MCT8317EVM comes pre-programmed with the firmware necessary for
communicating with the PC GUI and the MCT8317. In order to reprogram or flash custom code on the
MSP430FR2355, you will need an external MSP430 LaunchPad
™
that includes the eZ-FET Debug Probe. In
MSP-EXP430FR2355 LaunchPad Development Kit
to provide the debug probe. Follow
the steps below to download the code for the MCT8317EVM to use with the GUI.
7.1 Downloading Code Composer Studio and Importing MSP430FR2355 Interface Firmware
Code
1. Extract the “MCT8317EVM_MSP430FR2355_Firmware_GUI.zip” to a location on the computer.
2. Download the latest version of
. This will set up a ti folder in the directory C:\ti.
a. Accept all agreements, default install locations, and hit “Next” to proceed through menus.
b. In the “Select Components” window, ensure to check “MSP430 Low-Power MCUs” to install the required
packages for the MSP430 LaunchPad Evaluation Kits.
3. After installing, run CCS and select a folder or the default to use as the Workspace to store any new
projects. The location and naming convention can be changed based on the user's preference. Click the OK
button to accept.
4. In CCS, click on the Project tab and select “Import CCS Projects”. Click on Browse.
5. Select the “MCT8317EVM_MSP430FR2355_Firmware_GUI” folder installed from step 1.
MCT8317A GUI Application
10
MCT8317EVM Evaluation Module
Copyright © 2022 Texas Instruments Incorporated


