


12-10 Chapter 12: Using the Display Toolbox
Copying permitted provided TI copyright notice is included
© 1997, 1999 Texas Instruments Incorporated
Animation
The
Animation
tool automatically moves an independent object along a specified path. Direction and
speed are determined by the animation “spring.” You can increase or decrease the animation speed
by pr or
−
respectively, while the animation is active.
Objects defined by
Trace
are displayed at a specific interval relative to the length of the path. If the
tabulation table is selected prior to the animation, animation automatically enters tabulation data
into the table at a predetermined interval. (See “
Tabulate”
in the chapter “Using the Measure
Toolbox.”)
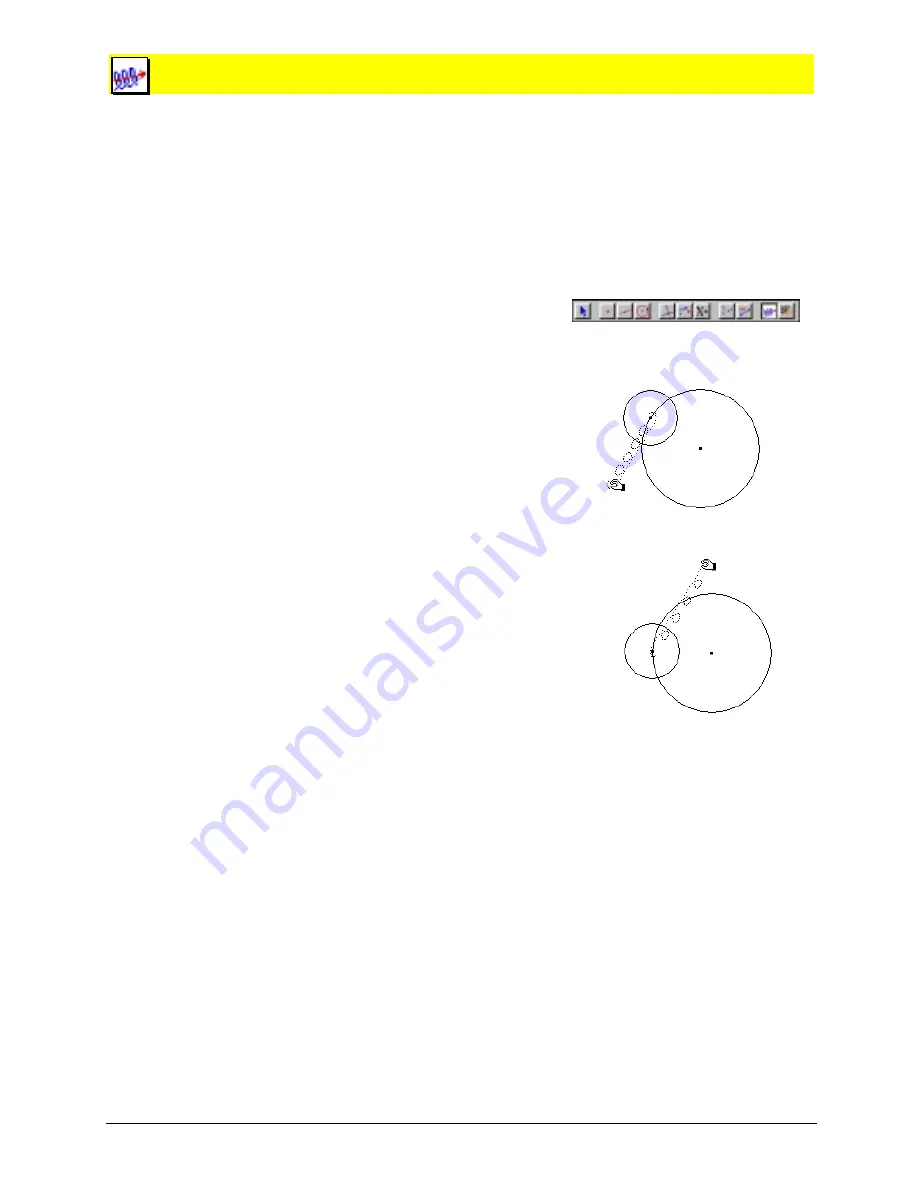
Animating an object
1.
Select
Animation
from the
Display
toolbox.
2.
Place the cursor on any object, and drag the
animation spring in the
opposite
direction to the
intended animation.
The farther away the spring is pulled, the faster the
object is animated. The animation begins when the
mouse button is released and the spring collapses.
If the
Pointer
tool is visible in the toolbar and the
object does not lie on a defined path, the animated
direction is 180 degrees from the spring. Otherwise,
the object is animated along its defined path.
If the
Rotate
,
Dilate
, or
Rotate and Dilate
tool is visible in
the
Pointer
toolbox and the object can be transformed,
the animation will be relative to the visible
Pointer
tool. For example, if the
Rotate
tool is visible, the
object is rotated automatically.
3.
Stop the animation by clicking anywhere on the
drawing.
Drag the animation spring.
Release the mouse button to begin.