Quick Start
4
SBAU316 – August 2018
Copyright © 2018, Texas Instruments Incorporated
BOOSTXL-ADS1219 BoosterPack™ User's Guide
2
Quick Start
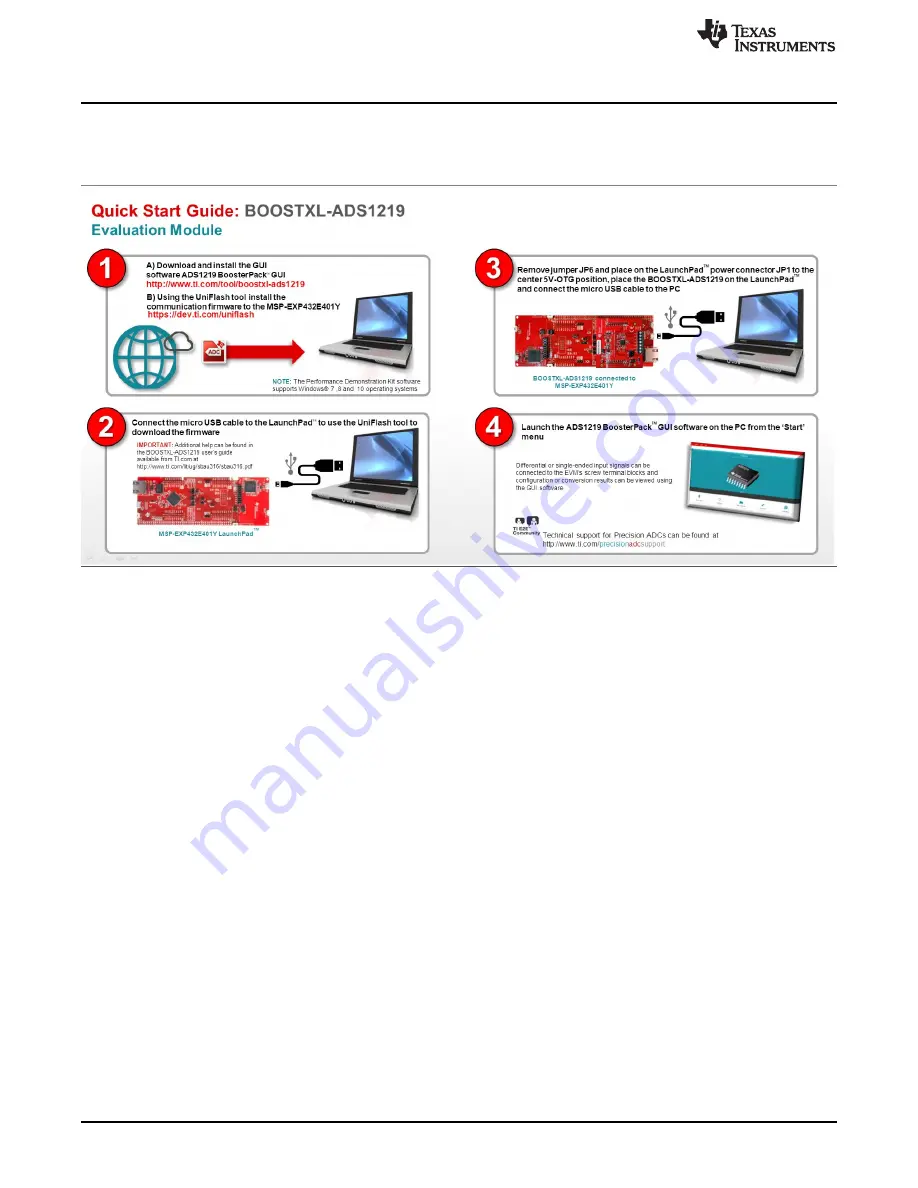
The quick start in
shows a minimalist view of the startup procedure to get the system up and
running. Details regarding these steps can be found in
.
Figure 3. Quick Start
2.1
Step 1
Download and install the GUI software from the
tools folder. This software install
also includes the firmware file required for communication with the LaunchPad™. The firmware file can be
installed to the LaunchPad™ by using the
cloud tool. A desktop version of UniFlash is also
available for
if needed.
2.2
Step 2
Connect the LaunchPad™ to the PC and download the firmware to the LaunchPad™ using the micro USB
cable provided with the LaunchPad™ kit.
2.2.1
Connect the LaunchPad™
Connect the USB cable from the PC to the micro USB connector on the top portion of the LaunchPad™
(XDS110 portion of the LaunchPad™). A green LED lights up indicating that the LaunchPad™ is powered.
2.2.2
Start the UniFlash Program and Choose the Correct LaunchPad™
Start the UniFlash program and begin a
New Configuration
) and select the LaunchPad™ MSP-
EXP432E401Y.
The connection type is automatically chosen based on the LaunchPad™ being used. Verify that the
Texas
Instruments XDS110 USB Debug Probe
is selected and press
Start
.
2.2.3
Choose the Firmware File and Flash the LaunchPad™
The firmware file is located in the folder
Program Files (x86)\Texas Instruments\ADS1219\firmware
. Use
the
Browse
button to browse to folder containing the firmware binary file. The firmware file can also be
dragged and dropped into the browse window provided in UniFlash.


