


CONNECTIONS
<Step3 > Connect Your TV
Connect the unit to your TV.
Select one of the following examples.
If you use a TV with Progressive Scan capability, set
the unit to the Progressive mode.
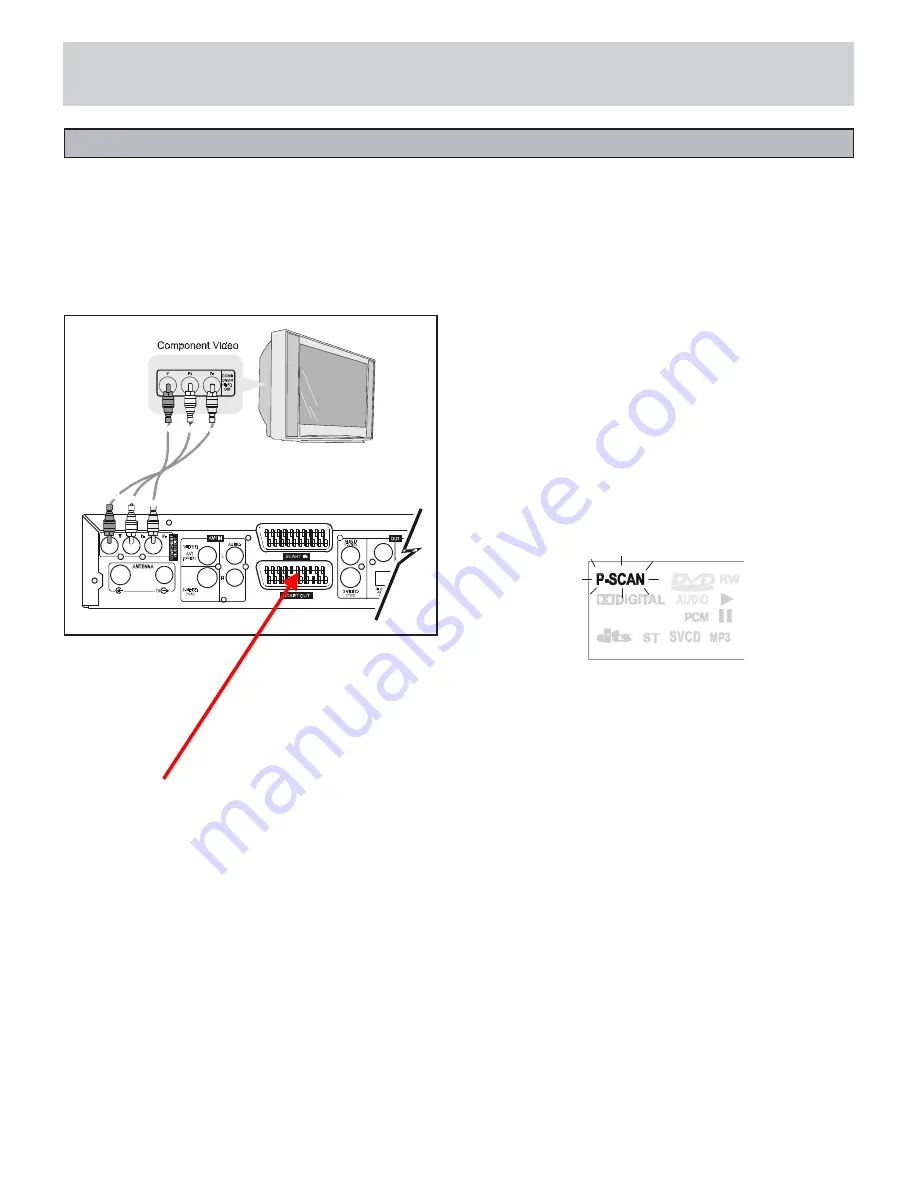
Connecting the COMPONENT VIDEO OUT jacks
Connect the component video cable supplied as shown
below. You can now enjoy high quality picture images.
(For Audio connection, see pages 13 and 14)
Gree n Blue Red
Progressive Scan Video provides the highest quality
pictures with less flickering.
If you are using the COMPONENT VIDEO OUT jacks,
but are connecting the unit to a standard television, set
Progressive Scan to OFF.
If you are using the COMPONENT VIDEO OUT jacks
and are connected to a TV or monitor that is
compatible with a progressive scan signal, set
Progressive Scan to ON. To setup Progressive Scan
ON or OFF, please follow the instructions below or via
SETUP menu, detail see page 20:
Gree n Blue
Red
1 Press OPEN/CLOSE to open the disc tray.
2. Press STOP on the remote control or front panel
5 times, and the video output will be set to
Progressive Scan. The “ P-SCAN” icon on the VFD will
turn on.
3. In the same way, press the STOP button on the
remote control or front panel 5 times when the DVD tray
is open, to set Progressive Scan OFF. The “ P-SCAN”
icon on the VFD will turn off.
Note:
Once the setting for progressive scan output is entered,
an image will only be visible on a progressive scan
compatible TV or monitor. If you set Progressive Scan to
On in error, you must set back it to Off. If you cannot
receive a picture on your TV, and your TV is not a
progressive scan compatible TV, check that the “P-
SCAN” icon is not illuminated.
11
Remove Scart Connections
Содержание DVD 160 HDD II
Страница 1: ...DVD 160 HDD II...
Страница 3: ...IMPORTANT SAFEGUARDS 0 1 1 2 3 1 1 4 5 6 6 7 6 8 6 9 1 0 3 4 5 6...


