4
5.1
Initial configuration
Devices leave the factory with this control over Ethernet interface IP address: 192.168.1.10. In order to avoid conflicts
with other IP addresses, it is necessary to perform an initial configuration in the local mode. Subsequently, it will be possible
to access the device via local area network (LAN), either to change the configuration or to check the operating status.
The device leaves the factory with the following control over Ethernet interface TCP/IP configuration:
IP address of the device
:
192.168.1.10
Subnet mask
:
255.255.255.0
Default Gateway
:
192.168.1.1
To access device, use a personal computer (PC) equipped with an Ethernet card and
RJ-45 cable (CAT-5E or CAT-6). The IP address of the PC/MAC must be configured within
the following range: 192.168.1.2 - 192.168.1.254 (do not use 192.168.1.10, since this is the
IP address of the device to be configured). To start the configuration of the device, open
your web browser and type in the following direction: http://192.168.1.10. The login prompt
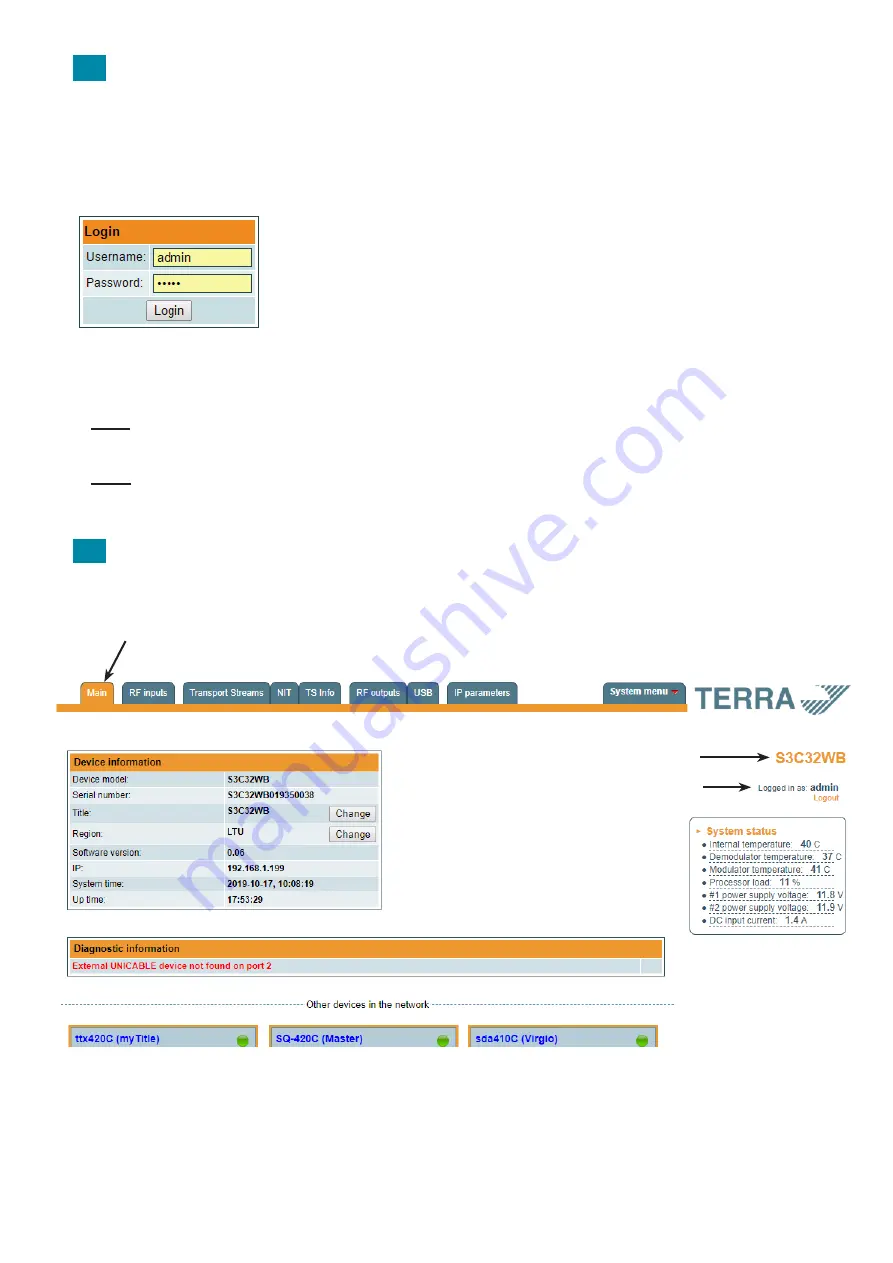
will appear on the screen (see Figure 2).
Figure 2. Login window
Access to the device is protected by user name and password. The default user name and password is
admin
. Enter the
user name and password and click on "
Login"
button.
NOTE*
: the default password -
admin
- can (and must) be changed as explained in the section
5.11
.
5 "User management".
During initial configuration you need to change the default control interface TCP/IP configuration as explained in the section
5.9
"
IP settings".
NOTE**
: If you are using Internet Explorer Web browser, supported versions are version 10 or higher.
Control interface IP address reset to default procedure: press the "
RESET
"
[17]
button for more than 3 seconds and release
it. After this operation the control interface IP address will be set to
192.168.1.10
, user name and password set to
admin
.
5.2
General configuration
Initial Web interface screen
The first screen that appears when the device accessed is the "Main" window, which gives general information on the device.
Figure 3. General information screen
In the top of each configuration screen you will see a main menu tabs
[1]
. Using it, you can switch between the different
configuration menu. The tab highlighted in yellow shows which menu is active at a given moment. The "System menu" tab
contains several submenu items. Also common elements for all screens are device title
[2]
and login information strings
[3]
. The device title can be changed after pressing the "Change" button in the "Device information" table. Pressing on the
"Logout" string you can logout from device control.
[1]
[2]
[3]


