


7
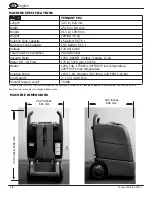
Tennant EH2 (01/2014)
EN
English
7
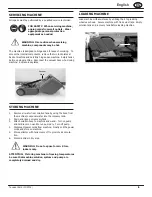
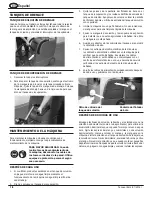
CARPET CLEANING WITH WAND
1. Follow site safety guidelines concerning wet
À
oors.
2. Verify the vacuum hose and solution hose are securely
connected to the machine and wand.
3. Turn on the pump, vacuum, and heater switches.
4. For optimum cleaning results it is suggested to use a V
stroke pattern as shown. Start with an area approximately
4’ x 4’. On the back stroke pull the trigger on the wand for
the solution to spray.
CAUTION
When handling wand avoid contact
with hose coupler, valve and metal solution line.
This area could create a burn hazard. Wear
protection gloves as needed.
5. Let up on the trigger about 4 inches before the end of the
stroke for maximum water recovery.
6. Push the wand forward at a slight angle until next stroke is
slightly overlapping previous stroke.
7. Go over area
M
ust cleaned with vacuum only stroke before
moving to the next area.
NOTE:
Use defoamer any time foaming occurs in the recovery
tank to prevent damage to the motor or other components.
8. Monitor the water level in the solution tank. If solution
tank runs dry, the pump must be reprimed.
9. When the solution tank is low, turn off all the switches,
empty the recovery tank and then
¿
ll the solution tank.
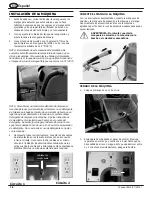
2. Turn the pump on from the control panel. Press the lever
on the wand and spray until there is no air coming out with
the water. This takes approximately 2-3 minutes. Turn the
pump off.
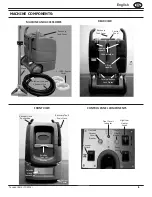
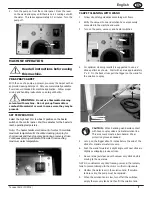
MACHINE OPERATION
PRE-SPRAY CARPET
With the use of a pump-up sprayer, pre-spray the carpet with an
approved cleaning detergent. Only use commercially available
À
oor cleaners intended for machine application. Follow proper
mixing and handling instructions on detergent bottle.
WARNING
Do not use
À
ammable cleaning
sol
Y
ents with machine. Do not pic
N
up
À
ammable or
combustible material or work in areas were they may be
present.
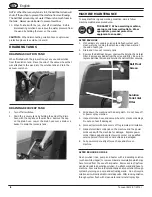
SET TEMPERATURE
Select the high heat II or low heat I position on the heater
switch on the control panel. Wait two minutes for the heater to
reach operating temperature.
Note: The heater holds a small amount of water. To maintain
maximum temperature for the entire cleaning
M
ob, spray for
short periods and then stop spraying during a recovery stroke.
Continuous spraying will prevent the water from reaching
maximum water temperature.
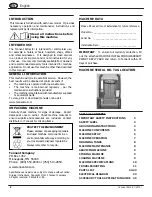
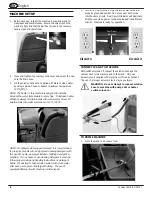
Read all instructions before using
this machine.
Heater
Switch
Pump
Switch
Heater Hi/Lo
Switch
Vacuum
Switch
Pump
Switch


