26
•
Press the function button
PREV
to display basic information on the previous
record.
•
Press the function button
NEXT
to display the
basic information on the next record.
•
Press the function button
RETURN
to go back to
the previous menu.
•
Press the function button
TREND
to view the
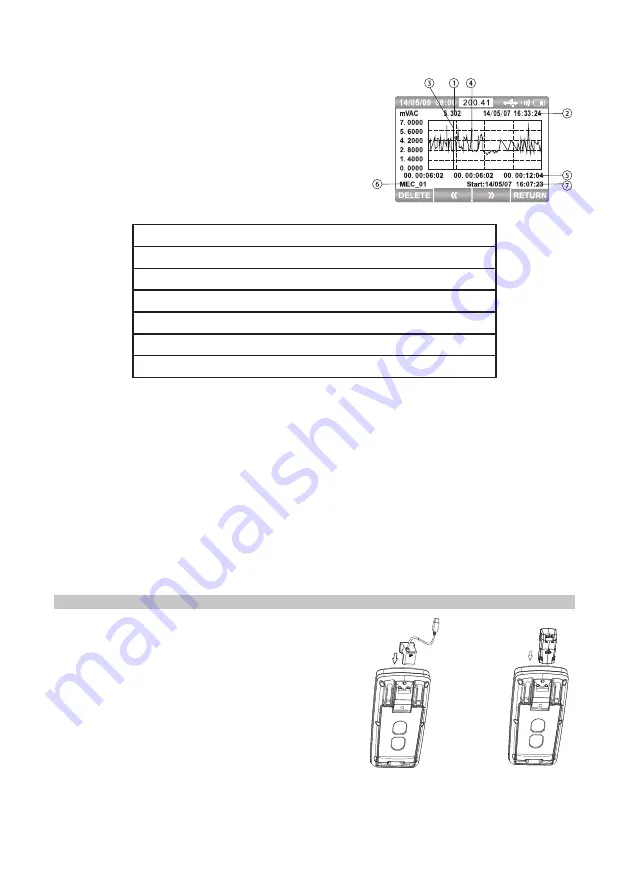
trend chart of the present record as shown right:
•
The display information of trend data is
explained in the following table:
1)
Measured value corresponding to cursor
2)
Date and time for measurement corresponding to cursor
3)
Cursor
4)
Trend time
5)
Time label of X-axis to display during elapsed time
6)
Name of record event
7)
Time and date from the start of the recording
•
View the trend chart. Press or hold the
F2
button to move the cursor left and
F3
to
move the cursor to the right.
•
The cursor will move one data to the left or right for each press.
•
Hold down
F2
or
F3
to speed the cursor up.
•
Press ▲ or ▼ to scale the graph vertically and ◄ or ► to scale the graph
horizontally.
•
Press the
F1
button to delete this record and again (
YES
) to confirm, or
NO
to
cancel the deletion.
-
Delete All Record
•
Press the function button
DELETE
to delete all recordings. Press the function
button
YES
to confirm, or
NO
to cancel the operation.
COMMUNICATION
•
Turn on communication by pressing
SETUP
,
before moving the cursor to “Communication”.
•
Press
F1
to turn on and the Bluetooth symbol
will appear in the top right hand corner of the
screen.
•
The meter carries a USB communication by
connecting the USB cable to a PC.
•
It can also use a bluetooth module (optional)
and mobile phone for bluetooth communication.


