Wireless Modem Router User Guide
- 48 -
www.tendacn.com. In this example, we assume the Internet IP address of your router is 183.37.227.201. Then follow
instructions below:
To configure the router to make your local FTP server public:
1.
Click
NAT -> Virtual Server
to enter it and then click the
Add
button.
2.
- Select FTP that you wish to host on your network from the
Select a Service
drop-down list. The port number (21)
used by this service will then be automatically populated.
- Or if you wish to define the service yourself, enter a descriptive name in the
Custom Service,
say My FTP,
and
then manully enter the port number (21) used by this service in the
Internal Starting Port, Internal Ending Port,
External Starting Port and External Ending Port fields
.
3.
Select a protocol from the
Protocol
drop-down list. If you are unsure, select
TCP/UDP
.
4.
In the
Server IP Address
field, enter the last digit of the IP address of your local computer that offers this service.
Here in this example, we enter 192.168.1.100.
5.
Click the
Apply/Save
button.
6.
Your friends on Internet will then be able to access your FTP server simply by entering "ftp://183.37.227.201" in his
browser.
To configure your router to make your local web server public:
1.
Click
NAT -> Virtual Server
to enter it and then click the
Add
button.
2.
- Select
Web Server (HTTP)
that you wish to host on your network from the
Select a Service
drop-down list. The
port number (80) used by this service will then be automatically populated.
- Or if you wish to define the service yourself, enter a descriptive name in the
Custom Service,
say My Web Server
(HTTP),
and then manully enter the port number (80) used by this service in the
Internal Starting Port, Internal
Ending Port, External Starting Port and External Ending Port fields
.
3.
Select a protocol from the
Protocol
drop-down list. If you are unsure, select
TCP/UDP
.
4.
In the
Server IP Address
field, enter the last digit of the IP address of your local computer that offers this service.
Here in this example, we enter 192.168.1.110.
5.
Click the
Apply/Save
button.
6.
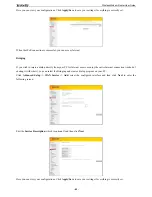
Now you can view your configurations as seen in the screenshot below. Your friends on Internet will then be able to
Содержание D151
Страница 1: ...Wireless Modem Router User Guide 1...
Страница 83: ...Wireless Modem Router User Guide 83 4 5 9 Reboot Click the Reboot button to reboot the router...
Страница 85: ...Wireless Modem Router User Guide 85...
Страница 87: ...Wireless Modem Router User Guide 87...
Страница 91: ...Wireless Modem Router User Guide 91 MAC Click System Preferences...
Страница 92: ...Wireless Modem Router User Guide 92 iPhone iPad...
Страница 93: ...Wireless Modem Router User Guide 93...


