Important notice
TeleSat S is packaged in two separate cartons for transport reasons:
a) the first package contains the driving unit with all the cables, and the Control unit.
b) the second package only contains the dish.
• It is important to check that the dish has not been damaged during transport when the
package is opened. In particular, check the following well:
• By resting the dish edge against a flat surface (e.g. the floor or a wall) check that it makes
contact to the surface all around. If it is not so, try and make the edge level, without denting
the dish, or call our After-Sales Service.
• After checking that everything is in order, install the dish on the driving unit as follows:
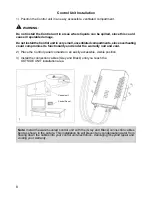
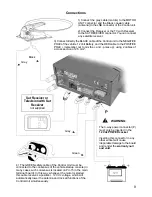
1) Temporarily connect the Control unit to the driving unit through the grey motor cable.
2) Connect the Control panel to the Control unit through the RJ45 cable.
3) Power the Control unit using a battery.
Warning:
For correct connection of the wiring and to prevent damage to the
equipment please consult page 9 “Connections”.
4) Press the switch-on button on the control panel and wait
for the dish support mast to rise.
5) Once the desired position has been reached, turn off the
TeleSat S via the same button.
6) Secure the dish to the mast and screw
down the four supplied screws.
7) Turn the unit on again and wait for
the antenna to close.
8) Disconnect the the Control unit,
the battery and install the driving
unit on the vehicle
YES
NO
Warning:
NEVER loosen the two dish arm lock
screws (A) to attach the dish as this
will result in loss of alignment with
the antenna.
4
Содержание TeleSat S65
Страница 1: ...Installation guide and user manual GB...
Страница 2: ......
Страница 18: ...16...
Страница 20: ...18...
Страница 22: ...20...
Страница 27: ......
Страница 28: ...19 05 2017...


