


7 / 49
Getting Started
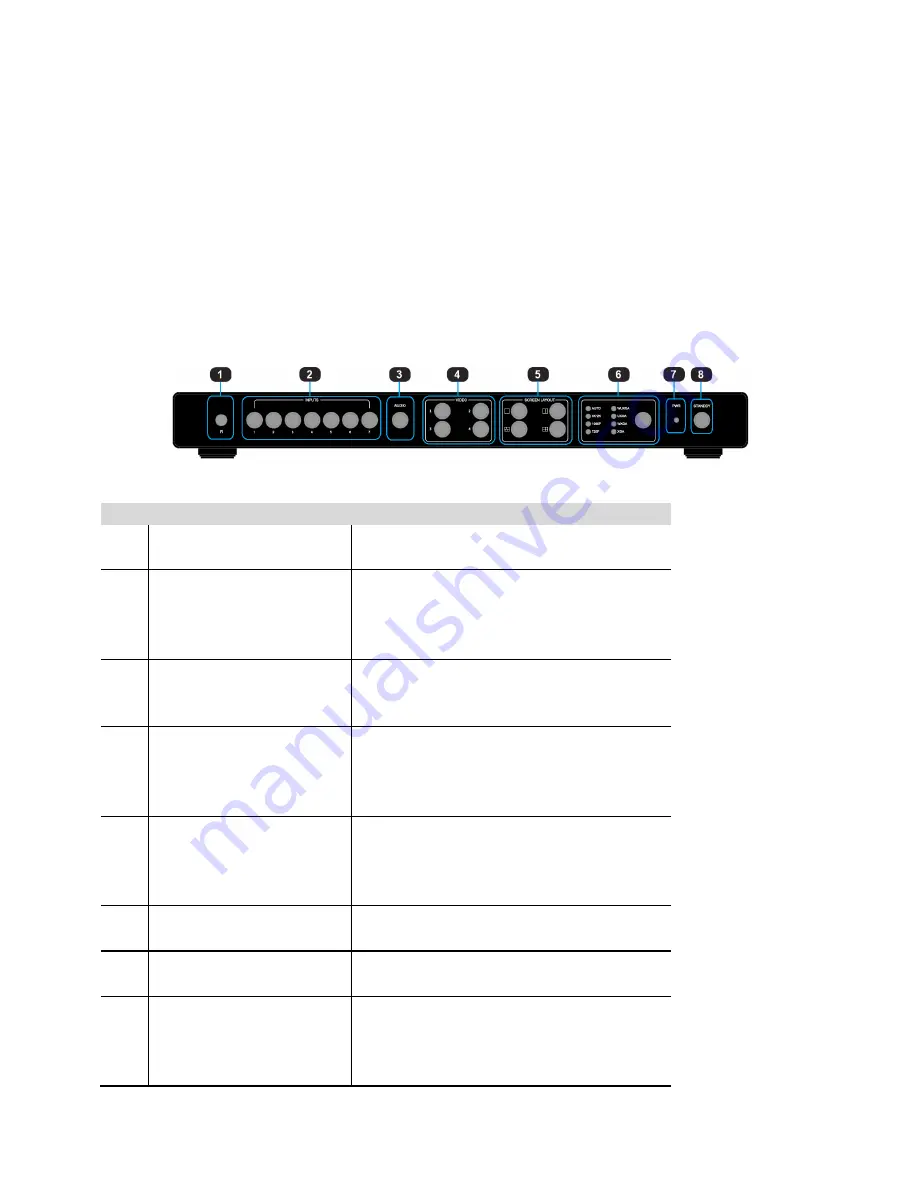
Panel Layout
Front Panel
ID
Name
Description
1
IR receive window
IR receive sensor, receives the IR signals
from the IR remote.
2
Input Buttons and Indicator
Presses the buttons 1~7 to select the
corresponding video or audio input. The
indicators mean the corresponding status of
the video or audio input.
3
Audio Selection Button and
Indicator
Presses this button, then the indicator lights
up, meaning switching between audio
outputs.
4
Video Input Button and
Indicator
Presses the buttons 1~4, indicating the
corresponding windows are selected. The
indicators mean whether this window is
effective.
5
Video Window Mode
Button and Indicator
Video window mode selection: single
window, double windows, triple windows
and quadruple windows. The indicators
mean whether this window is effective.
6
Output Resolution Button
and Indicator
Selects the related resolutions, then the
indicators light up.
7
Power Indicator
Indicates whether the power is working
properly or not.
8
Standby button and
indicator
l
Switches between standby and normal
work modes.
l
When this device is switched to the
standby mode, the indicator lights up.
Содержание TEK MV71-4K 79064
Страница 14: ...14 49...
Страница 22: ...22 49 C When the triple windows are displayed...
Страница 23: ...23 49 D Quad windows 3 Audio Mute indicates 4 Volume adjustment 5 VGA Auto Menu...
Страница 24: ...24 49 6 IP address...


