18
OPERATION INSTRUCTIONS
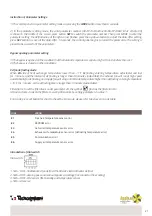
1. ON/OFF: press ON/OFF button once for starting; twice for closing. In ON status, the light of power indicator is on, and the
ventilator begins to run. In OFF status, the light is off and the ventilator stops.
2. Mode switch: press MODE to choose to display the OA/RA/SA/FR status.
3. Air velocity setting: press FAN button to adjust the air velocity. Users can set the return air velocity in “RA” status, and set
the supply air velocity in “SA” status.
4. Time setting: time records if power off. If user need to reset the time, please press the CLOCK button, when the colon of
the clock stills, press it again, then the hour flashes, users can press button
◄►
to adjust the hour; then press the CLOCK
button again to adjust the minute in the same way, the interval is 10 minutes. After setting, please press SET button to save
the data or press EXIT to leave the operation without saving the data. If no operation in 8 seconds, display will disappear
and all setting is invalid.
5. Day setting: press DAY button, when the day code flashes, select the day by pressing button
◄
and
►
. After setting,
please press SET button to save the data or press EXIT to exit without saving the data. If no operation in 8 seconds, display
will disappear and all setting is invalid.
6. Weekly timer on: press TIMER ON button, all the days display, then press this button to switch the hour->minute-
>invalidation of timer. Users can set the hour and minute when flashing. When it shows “--:--”; it means timer is invalid.
Besides, users can press DAY button to switch the day, the day flashed when chosen. After setting, please press SET button
to save the data or press EXIT to leave the operation without saving the data. In the status of TIMER ON, code “1” “2” stands
for the first or second period of timer. User can choose the period of timer by pressing the button of “MODE”. If no operation
in 8 seconds, display will disappear and all setting is invalid.
7. Weekly timer off: press TIMER OFF button, all the days display, then press this button to switch the hour->minute-
>invalidation of timer. Users can set the hour and minute when flashing. When it shows “--:--”; it means timer is invalid.
Besides, users can press DAY button to switch the day, the day flashed when chosen.
After setting, please press SET button to save the data or press EXIT to leave the operation without saving the data. In the
status of TIMER OFF, code “1” “2” stands for the first or second period of timer. User can choose the period of timer by
pressing the button of “MODE”. If no operation in 8 seconds, display will disappear and all setting is invalid.
8. Check weekly timer: press DAY button, and press button
◄
and
►
to choose the day, then the set timer on and timer off
will display. Users can press TIMER ON or TIMER OFF button to check the exact time.
9. The running of weekly timer: the control system will record the current time, the ventilator starts to run automatically when
the timer is on, if the unit is on already, it maintains running. On the other hand, it stops when the timer is off, if it is off already,
it remains stop status. The timer on and off can be used independently or simultaneously. When the timer is ON/OFF, users
can still change the ON/OFF status of the unit.
10. Parameter List of Controller are kept after restarting from power-off.
11. temperature setting, after connecting the electrical heater to the PCB (LD3 and LD4), then can set the temperature by
temperature increase and decrease buttons, when SA temperature lower than setting temperature then electrical heater on
1) 0°C setting temperature - SA temperature <5 °C, 1st stage heater on, 2nd stage heater off
2) Setting temperature - SA temperature >5°C, 1st and 2nd stage heater on
Содержание HI-TECH PUR 12300012
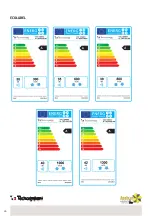
Страница 26: ...26 ECOLABEL...
Страница 28: ...28 NOTE NOTES...
Страница 29: ...29 NOTE NOTES...
Страница 30: ...30 NOTE NOTES...
Страница 31: ...31 NOTE NOTES...


