background image

EVO

SELF


| Manuale d’uso e manutenzione | IT

3

INDICE

INTRODUZIONE pag. 

4


USO DEL MANUALE 

pag. 4


CONSERVAZIONE DEL MANUALE 

pag. 4

DESCRIZIONE DEL MOBILE REFRIGERATO 

pag. 5

1.  POSIZIONAMENTO DEL MOBILE REFRIGERATO 

pag. 6

1.1 TRASPORTO 

pag. 6

1.2  SCARICO DEL MOBILE REFRIGERATO / DIMENSIONI / PESI 

pag. 6

1.3 IMBALLO 

pag. 6

1.4  SCARICO ACQUA CONDENSA / TUBAZIONI GAS REFRIGERANTE 

pag. 6

1.5  POSIZIONAMENTO E REGOLAZIONE PIEDINI 

pag. 6

1.6  INSTALLAZIONE ALL’INTERNO DEL PUNTO VENDITA 

pag. 7

1.7  VASCHETTA SCARICO ACQUA CONDENSA / COLLEGAMENTO SCARICO 

pag. 7

1.8  MOBILE CON UNITA’ CONDENSATRICE INCORPORATA 

pag. 7

1.9  MOBILE CON UNITA’ CONDENSATRICE REMOTA 

pag. 8

2.  COLLEGAMENTO ELETTRICO E MESSA A TERRA pag. 

8

2.1  ALIMENTAZIONE ELETTRICA 

pag. 8

2.2  MESSA IN FUNZIONE ED UTILIZZO 

pag. 9

3.  PULIZIA  

pag. 10

3.1  PULIZIA DEL BANCO FRIGORIFERO 

pag. 10

3.2  PULIZIA CONDENSATORE UNITA' CONDENSATRICE 

pag. 10

4.  RACCOMANDAZIONI ED AVVERTENZE 

pag. 11

4.1  MAX CARICO PRODOTTO SU RIPIANO 

pag. 11

4.2  CONSERVAZIONE DEL PRODOTTO 

pag. 11

5.  MANUTENZIONE - GESTIONE RIFIUTI - SMALTIMENTO MATERIALI pag. 

12

5.1  CONTROLLI PERIODICI 

pag. 12

5.2  SOSTITUZIONE VETRO FRONTALE / LATERALE / VETRO RIPIANI 

pag. 12

5.3  SOSTITUZIONE LAMPADE ILLUMINAZIONE 

pag. 12

5.4  SOSTITUZIONE MOTOVENTILATORE 

pag. 12

5.5  SOSTITUZIONE COMPRESSORE / GAS REFRIGERANTE 

pag. 12

5.6  SMALTIMENTO MATERIALI E GESTIONE RIFIUTI  

pag. 13

5.7. ORDINARE LE PARTI DI RICAMBIO 

pag. 13

6.  PANNELLO COMANDI 

pag. 14

DICHIARAZIONE DI CONFORMITA' 

alla fi ne del manuale

APPENDICE - Targhetta identificazione prodotto 

alla fi ne del manuale

APPENDICE - 2 - Descrizione parti del mobile frigorifero 

alla fi ne del manuale

APPENDICE - 3 - Dati tecnici 

alla fi ne del manuale

APPENDICE - 4 - Test dielettrico 

alla fi ne del manuale

APPENDICE - 5 - Riepilogo schemi elettrici armadi 

alla fi ne del manuale

Содержание EVO SELF

Страница 1: ...MANUALE D USO E MANUTENZIONE USER AND MAINTENANCE MANUAL IT EN Cod LIEVON Rev 01_2015 del 03 2015 EVO SELF NANCE M M MANUAL ...

Страница 2: ... Das Symbol der durchkreuzten Mülltonne auf dem Produkt oder der Dokumentation der Gebrauchsanweisung gibt an dass das Produkt nach dem 13 August 2005 auf den Markt gebracht wurde Am Ende des Nutzungszyklus muss das Produkt entsprechend der im jeweili gen Land geltenden Bestimmungen gesammelt entsorgt und getrennt von anderem Hausmüll transportiert werden Auf dieseWeise kann es zurückgewonnen werd...

Страница 3: ...LIZIA DEL BANCO FRIGORIFERO pag 10 3 2 PULIZIA CONDENSATORE UNITA CONDENSATRICE pag 10 4 RACCOMANDAZIONI ED AVVERTENZE pag 11 4 1 MAX CARICO PRODOTTO SU RIPIANO pag 11 4 2 CONSERVAZIONE DEL PRODOTTO pag 11 5 MANUTENZIONE GESTIONE RIFIUTI SMALTIMENTO MATERIALI pag 12 5 1 CONTROLLI PERIODICI pag 12 5 2 SOSTITUZIONEVETRO FRONTALE LATERALE VETRO RIPIANI pag 12 5 3 SOSTITUZIONE LAMPADE ILLUMINAZIONE pa...

Страница 4: ...al normale funzionamento del prodotto stesso fenomeni atmosferici fulmini sovratensioni della rete elettrica irregolare od insufficiente alimentazione elettrica etc La manutenzione comporta semplici operazioni eseguibili esclusivamente da un tecnico specializzato USO DEL MANUALE Il manuale d uso e manutenzione costituisce parte integrante del mobile e deve essere di facile ed immediata consultazio...

Страница 5: ...one fianchi in vetrocamera temperata illuminazione cappello controllore elettronico di comando Il mobile e fornito come standard in Acciaio Inox Disponibile con gruppo incorporato oppure in versione per l allacciamento ad unità condensa trice remota Alimentazione 230V 1ph 50Hz La vasca è realizzata senza l uso di CFC a basso impatto ambientale ATTENZIONE Tutte le operazioni riguardanti i capitoli ...

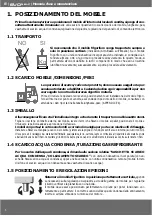
Страница 6: ...llo sia integro e che durante il trasporto non abbia subito danni Togliere il cartone di imballo esterno del mobile levare i fermi che fissano il mobile al pallet posizionare il mobile e rimuovere la pellicola adesiva a protezione dell acciaio I mobili con porta e in vetro sono forniti a corredo di maniglia per porta con relative viti di fissaggio Installare e fissare la maniglia a carico del clie...

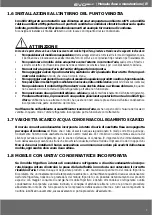
Страница 7: ... la sua altezza in modo che questa non ostruisca le prese d aria dell unità condensatrice incorporata della parte posteriore del mobile Verificare che nell ambiente vi sia sufficiente ricambio d aria anche nei periodi di chiusura del locale di vendita In questo modo l unità refrigerante incorporata potrà funzionare correttamente 1 7 VASCHETTA SCARICOACQUA CONDENSA COLLEGAMENTO SCARICO Il murale co...

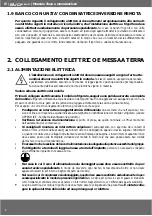
Страница 8: ...co procedere come segue Predisporre un interruttore magnetotermico differenziale ed accertarsi che la frequenza ten sione di linea corrisponda a quella indicata sulla targhetta di identificazione del mobile refrigerato vedere APPENDICE Targhetta identificazione prodotto Verificare la tensione di alimentazione al punto di presa sia quello nominale 10 al momento dell avviamento del compressore Si co...

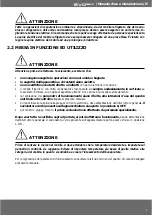
Страница 9: ...clinato si consiglia di aspettare almeno 8 ore prima di procedere all avviamento la regolazione dei parametri di funzionamento siano riferite alle istruzioni d uso del quadro elettronico di controllo allegate al presente manuale prima di inserire la spina nella presa di corrente elettrica o dare alimentazione dall interruttore generale il sezionatore verde presente sull apparecchiatura sia aperto ...

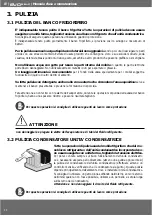
Страница 10: ...no l area espositiva serve a mantenere il banco presentabile e previene la formazione di sporcizia Fare attenzione a non ferirsi con le alette dell evaporatore durante le operazioni di pulizia della vasca del banco frigorifero hanno uno spessore ridotto e possono risultare taglienti Per queste operazioni si consiglia di utilizzare guanti da lavoro come protezione ATTENZIONE non danneggiare e piega...

Страница 11: ...i posteriori devono aprirsi solo per il tempo strettamente necessario per il carico e lo scarico dei prodotti in modo da evitare l aumento della temperatura interna del banco e successivamente ad un ulteriore consumo di energia per riportare il prodotto alla temperatura iniziale di conservazione I banchi sono adatti all esposizione di prodotto refrigerato che deve giungere ai magazzini ad una tem ...

Страница 12: ...tale vetro laterale lato spalla della vetrina recupe rare i frammenti di vetro evitando di disperderli nell ambiente Fare attenzione dopo la eventuale rottura del vetro di manovrando con cura evitando di tagliarsi La sostituzione deve essere effettuata da un tecnico specializzato 5 3 SOSTITUZIONE LAMPADE ILLUMINAZIONE Per la sostituzione delle lampade al neon è sempre necessario staccare la spina ...

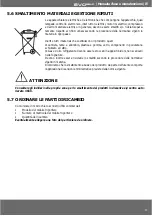
Страница 13: ...i in poliuretano schiumato ed altro Gas ed olio refrigerante devono essere stoccati in appositi bidoni non scaricarli nelle fognature Devono inoltre essere riciclati e o smaltiti secondo le procedure delle normative vigenti in materia Ricordiamo che lo smaltimento abusivo del prodotto da parte dell utente comporta l applicazione di sanzioni amministrative previste dalla norma vigente ATTENZIONE Co...

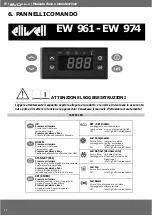
Страница 14: ... e rilasciare Scorre le voci del menu Decrementa i valori Premere per almeno 5 sec Funzione configurabile dall utente par H32 SET ENTER Premere e rilasciare Visualizza eventuali allarmi se presenti Accede al menu Comandi Base Premere per almeno 5 sec Accede al menu Programmazione Conferma i comandi SET SET Ridotto Lampeggiante set ridotto attivo Lamp veloce accesso ai parametri livello2 Off in tut...

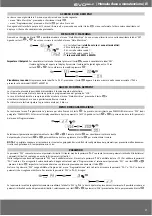
Страница 15: ...cedura usata per il blocco MENU DI PROGRAMMAZIONE Per entrare nel menu Programmazione premere per oltre 5 secondi il tasto Se previsto verrà richiesta una PASSWORD di accesso PA1 vedi paragrafo PASSWORD All accesso il display visualizzerà il primo parametro diF Agendo sui tasti e si possono scorrere tutti i parametri del menu di Programmazione 5 sec Selezionare il parametro desiderato mediante i t...

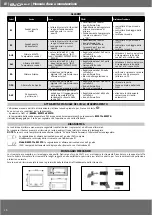
Страница 16: ...po maggiore di tdO Registrazione label Opd nella cartella AL Icona Allarme fissa Blocco del regolatore chiudere la porta funzione ritardo definita da OAO Ad2 Sbrinamento per time out fine sbrinamento per tempo anzichè per il raggiungimento della temperatura di fine sbrinamento rilevato dalla sonda Pb2 Registrazione label dAt nella cartella AL Icona Allarme fissa attendere lo sbrinamento successivo...

Страница 17: ...lizzando tutti i segmenti il display visualizzerà dLy per operazione eseguita e dLn per operazione fallita DOWNLOAD Copy Card strumento NOTE dopo le operazioni di Download lo strumento funzionerà con le impostazioni della nuova mappa appena caricata ALLARME DI TEMPERATURA MAX E MIN Setpoint LAL AFd Off Setpoint HAL AFd Setpoint LAL AFd Setpoint HAL AFd Setpoint LAL AFd HAL AFd LAL AFd HAL AFd Temp...

Страница 18: ...lettronico da incorporare secondo le caratteristiche del funzionamento automatico come dispositivo di comando ad azione di tipo 1 B come dispositivo di classe A in relazione alla classe e struttura del software dispositivo con grado di inquinamento 2 come dispositivo con grado di resistenza al fuoco D secondo la categoria di Sovratensione come dispositivo di classe II dispositivo costruito con mat...

Страница 19: ...to 2 sbrinamento con la modalità Free sbrinamento indipendente dal compressore dit 1 2 defrost interval time Tempo di intervallo fra l inizio di due sbrinamenti successivi dCt 2 defrost Counting type Selezione del modo di conteggio dell intervallo di sbrinamento 0 ore di funzionamento compressore metodo DIGIFROST Sbrinamento attivo SOLO a compressore acceso 1 Real Time ore di funzionamento apparec...

Страница 20: ...ino al successivo raggiungimento del valore di Setpoint 2 visualizza la label dEF durante lo sbrinamento e fino al successivo raggiungimento del valore di Setpoint dro 2 display read out Seleziona C o F per la visualizzazione temperatura letta dalla sonda 0 C 1 F NOTA BENE con la modifica da C a F o viceversa NON vengono però modificati i valori di setpoint differenziale ecc es set 10 C diventa 10...

Страница 21: ...0 1 250 30 min 1 2 dSt 50 0 150 8 0 C F 1 2 dPO n y n n y n flag 2 FPt 0 1 0 flag 2 FSt 50 0 150 50 0 C F 1 2 FAd 1 0 50 0 2 0 C F 2 Fdt 0 250 0 min 1 2 dt 0 250 0 min 1 2 dFd n y y flag 1 2 FCO n y y flag 2 Fod n y n flag 2 Att 0 1 1 0 1 1 flag 2 AFd 1 0 50 0 2 0 1 0 50 0 2 0 C F 2 PAR EW961 EW974 U M Level RANGE DEFAULT RANGE DEFAULT HAL LAL 150 0 50 0 LAL 150 0 50 0 C F 1 2 LAL 50 0 HAL 50 0 50...

Страница 22: ... 2003 108 CE concernant le traitement des déchets des appareillages électriques et électroniques DEUTSCH RAEE Umgang mit Abfällen elektrischer und elektronischer Geräte Das Symbol der durchkreuzten Mülltonne auf dem Produkt oder der Dokumentation der Gebrauchsanweisung gibt an dass das Produkt nach dem 13 August 2005 auf den Markt gebracht wurde Am Ende des Nutzungszyklus muss das Produkt entsprec...

Страница 23: ...RT UP AND USE PAG 29 3 CLEANING PAG 30 3 1 CLEANING OFTHE MULTIDECK DISPLAY PAG 30 3 2 CONDENSER S BUILT IN UNIT CLEANING PAG 30 4 GENERAL GUIDELINES PAG 31 4 1 MAX SHELF LOAD PAG 31 4 2 STORING PRODUCTS PAG 31 5 MAINTANANCE GARBAGE MANAGEMENT DISPOSAL OF MATERIALS PAG 32 5 1 PERIODICAL CHECKS PAG 32 5 2 GLASS REPLACEMENT PAG 32 5 3 REPLACE OFTOP CANOPY AND SHELVES LIGHTINGS PAG 32 5 4 MOTOR FAN R...

Страница 24: ...intact and in the safe place for the entire life of the appliance even if the appliance is transferred to another user or owner The manual must be easily consulted by operators and maintenance staff and must be placed nearby the unit The appliance includes all documentation required by regulations in force which are reached during the planning and manufacturing phase All the instructions prescribe...

Страница 25: ...hermophane glass on side walls lighting on the top canopy as standard electronic control panel As standard the Multideck Display is made entirelly in Stainless Steel with built in unit or predisposed for connection to the remote condensing unit Power supply 230V 1ph 50Hz The insulation of the basin is free of CFC in order to guarantee a low environmental impact ATTENTION All operations regarding t...

Страница 26: ...to comply with safety rules currently in force Before starting the unloading positioning and installation procedures of the Mul tideck Display inside the shop kitchen according to the model of the Multideck Display please read carefully the information in the technical data Appendix The manufacturer declines any responsibilities due to operations performed without adopting the abo ve safety precau...

Страница 27: ...nditioner Do not block or obstruct the air inlets of the built in refrigeration unit Do not place any objects on the unit including boxes or any other type of objects leave the entire perimeter of the unit completely free so that air can circulate properly Do not place the equipment inside areas with high relative humidity levels it may cause forma tion of condensation Do not place the equipment i...

Страница 28: ...s necessary to remember that higher room tempe rature and insufficient air circulation around the condensing unit imply higher energy costs and worse technical performances of the refrigerator with a possible waste of the exposed goods 2 ELECTRICAL CONNECTION AND EARTHING 2 1 ELECTRICAL POWER SUPPLY The installation and the electrical connections must be carried out in conformity with the electric...

Страница 29: ... to an extension cord or an adapter 2 2 START UP AND USE WARNING Before to proceed to the switch ON of the appliance you have to verify as follow the appliance fitted with built in condenser must be transported solely in vertical position if it is tilted make sure to wait at least 8 hours before starting the unit this time will allow the oil on the compressor to flow into all of its components lub...

Страница 30: ... clean the basin of counters in which there is dispersion of liquid or solid material The external parts must be cleaned daily with non aggressive detergents and tepid water not warm in order to keep the Multideck Display in perfect conditions The basins of counters used for the exposition of deep frozen products should be cleaned at least monthly Attention During cleaning operations it is high re...

Страница 31: ...nt for example not to obstruct the grid by attaching price stickers It is highly recommended to keep all ventilation outlets clear within the Multideck Display In the case of the expo sition of seasoned sausages or cheese it is better if they do not lay directly on the exposition top but on grids which let the products transpire This will prevent the formation of mould These precautions will preve...

Страница 32: ...cement of the front side doors glass pay attention manipulating it to avoid cutting yourself Glass replacement must be done by a technician 5 3 REPLACE OFTOP CANOPY AND SHELVES LIGHTINGS The fluorescent lamps include the information that the lamps have to be replace by identical lamps only See the max lamps power identification label stuck near the lamps The electric power supply must be switch of...

Страница 33: ...public dumps and or garbage authorized centre Be sure not to disperse Save the refrigerating gas and oil in special tanks do not dispose of them in the sewage system but dump them in according to your local laws 5 7 REQUESTING SPARE PARTS Requesting spare parts please report Model of the item Serial number of the item Number of pieces you need Eventually enclose a picture of the part you need ...

Страница 34: ...nd release Displays alarms if active Opens the Machine Status menu Press for at least 5 secs Opens the Programming menu Confirms commands SET Reduced SET LED Flashing reduced set active Quick flashing access to level 2 parameters Off otherwise Compressor LED Permanently on compressor active Flashing delay protection or blocked start up Off otherwise Defrost LED Permanently on defrost active Flashi...

Страница 35: ... To access the Programming menu press for at least 5 secs the key If specified the PA1 access PASSWORD will be requested see PASSWORD paragraph At the access the display will show the first parameter diF By pressing the and keys you can scroll all parameters in the Programming menu 5 sec Select the desired parameter using the and keys Press to see the current value of the selected parameter Press ...

Страница 36: ...reachingthedefrostendtemperature detectedbythePb2probe RegistrationAd2labelintheALfolder AlarmiconpermanentlyON waituntilthenextdefrostforautomaticreturn MANUAL DEFROST CYCLE ACTIVATION To manually activate the defrost cycle hold down the key for 5 seconds If the defrost conditions are not satisfied the parameter OdO 0 EW961 EW971 and EW974 the evaporator probe Pb2 temperature is higher than the d...

Страница 37: ... is switched on The device is equipped with screw or removable terminals for connecting electric cables with a diameter of 2 5mm2 one wire per terminal for power connections For the capacity of the terminals see the label on the instrument Do not exceed the maximum current allowed in case of higher loads use an appropriate contactor Make sure the power supply voltage complies with the one required...

Страница 38: ...ameter of 2 5mm2 Connectors TTL for connection to Copy Card Temperature Operating 5 55 C Storage 30 85 C Humidity Operating Storage 10 90 RH not condensing Electrical Caracteristics Power Supply 230Vac 10 10 50 60 Hz Consumption 4 5W max Display Range NTC 50 0 C 110 C on display with 3 digit sign Accuracy Better than 0 5 of full scale 1 digit Resolution 0 1 C Buzzer YES it depends from the model A...

Страница 39: ... on 2 compressor stop Each time the compressor stops a defrosting cycle is performed according to parameter dtY dOH 2 defrost Offset Hour Start of defrosting delay time from the call dEt 1 2 defrost Endurance time Defrosting time out determines duration of defrosting dSt 1 2 defrost Stop temperature Defrost stop temperature defined by the evaporator probe dPO 2 defrost at Power On Determines if at...

Страница 40: ...etpoint differential etc for example set 10 C become 10 F ddd 2 Selection of type of value to be displayed 0 Setpoint 1 cold room probe Pb1 2 evaporator probe Pb2 CONFIGURATION H08 2 Stand by operating mode 0 display switch off 1 display switch off loads and alarms stopped 2 display with OFF label loads and alarms stopped H11 2 Configuration of digital inputs polarity 0 disabled 1 defrosting 2 red...

Страница 41: ...50 30 min 1 2 dSt 50 0 150 8 0 C F 1 2 dPO n y n n y n flag 2 FPt 0 1 0 flag 2 FSt 50 0 150 50 0 C F 1 2 FAd 1 0 50 0 2 0 C F 2 Fdt 0 250 0 min 1 2 dt 0 250 0 min 1 2 dFd n y y flag 1 2 FCO n y y flag 2 Fod n y n flag 2 Att 0 1 1 0 1 1 flag 2 AFd 1 0 50 0 2 0 1 0 50 0 2 0 C F 2 PAR EW961 EW974 U M Level RANGE DEFAULT RANGE DEFAULT HAL LAL 150 0 50 0 LAL 150 0 50 0 C F 1 2 LAL 50 0 HAL 50 0 50 0 HA...

Страница 42: ...IT EN F DE ARABIC Appendici Manuale d uso e manutenzione 42 Note ...

Страница 43: ...Appendici Manuale d uso e manutenzione IT EN F DE ARABIC 43 EVO SELF ...

Страница 44: ...e plate defines all the technical data of the Multideck Display as showed on the table in the next page L étiquette définit toutes les donnes techniques sur le produit selon la tabelle page suivante Die Platte definiert die Produkt technischen Daten wie in der Legende auf der nächsten Seite beschrieben Dicha tarjeta define todos los datos técnicos del producto como se describe en la leyenda en la ...

Страница 45: ...wer Puissance total de la lumière Elektrische Leistung von licht Potencia electrica de iluminacion 11 Resistenza acqua di condensa Watt Electric heater condensation water Résistance eau Condensat Resistenz gegen Wasser Kondensation Resistencia agua Condensado 12 Resistenza sbrinamento elettrico Watt Electric defrost Heater Résistance dégivrage Électrique Widerstand Abtauung Elektrische Resistencia...

Страница 46: ...Appendici Manuale d uso e manutenzione 46 APPENDICE 2 Descrizione parti del mobile frigorifero Multideck Display parts description Description du meuble frigo Beschreibung derTeile der Kühlschrank 1 2 10 3 4 5 8 9 7 6 3 ...

Страница 47: ...Ripiano inferiore apribile Removable lower shelf Étagère inférieure ouvrable Unteren Regal öffnende 8 Pannello frontale Front panel Panneau frontal Frontpanel 9 Pannello inferiore Front panel Frontal inférieur Untere Blende 10 Controllo elettronico Electronic control panel Panneau de comande électronique Elektronisches Steuerpaneel 11 Unità condensatrice Built in condensing unit Groupe logé Aggreg...

Страница 48: ...04A Total absorbed power standard version built in unit R404A W A 1114 4 1445 5 1682 6 1992 7 Potenza assorbita totale dotazione standard senza gruppo Total absorbed power standard version remote condensing unit W 110 110 160 200 Potenza assorbita dall illuminazione dotazione standard con un neon nel cappello Power absorbed by lighting standard version with a neon in the canopy W 112 112 112 140 P...

Страница 49: ...Appendici Manuale d uso e manutenzione IT EN F DE ARABIC 49 APPENDICE 4 TEST DIELETTRICO DIELECTRICTEST TEST DIÉLECTRIQUE DIELEKTRISCHETEST ...

Страница 50: ...enzione 50 APPENDICE 5 SCHEMI ELETTRICI ELECTRICAL DIAGRAMS DIAGRAMMES ÉLECTRIQUES SCHALTPLÄNE 3 1 2 9 10 EW961 ROOM PROBE NTC 220 V ca Eliwell S1 11 D I 8 MC Comp RELE 220 V ca S2 3 1 2 9 10 EW961 ROOM PROBE NTC Eliwell 11 D I 8 M0 MARRONE G V BLU M2 ...

Страница 51: ...FANS SUPPLÉMENT CONDENSEUR MC MOTORE PER VENTOLE SU CONDENSATORE E RAF FREDDAMENTO COMPRESSORE FAN CONDENSER MOTOR MOTEUR POUR LES FANS DU CONDENSEUR M2 MOTORE VENTOLE EVAPORATORE FAN EVAPORATOR MOTOR MOTEUR POUR LES FANS DE L EVAPORATEUR RELE RELE ALIMENTEZIONE COMPRESSORE COMPRESSOR RELAY RELAI DU CONDENSEUR PROBE NTC CONDENSATORE SONDA NTC CONTROLLO CONDENSATORE CON DENSATORE NTC SONDE NTC DU C...

Страница 52: ...racteristics without notice All the details are provided as a rough guide and they do not commit the Manufacturer Les images du produit ont été réalisée au moment de l impression du Manuel et elles sont purement indicatives et passibles de modification Le Constructeur se réserve le droit de modifier modèles caractéristiques sans préavis Toutes les données sont fournies à titre indicatif et n engag...

Отзывы: