background image

English

   - 59 -

Speci

fi

 cations

TV BROADCASTING

PAL/SECAM B/G D/K K’ I/I’ L/L’

RECEIVING CHANNELS

VHF (BAND I/III)
UHF (BAND U)

HYPERBAND

NUMBER OF PRESET CHANNELS

1000

CHANNEL INDICATOR

On Screen Display

RF AERIAL INPUT

75 Ohm (unbalanced)

OPERATING VOLTAGE

220-240V AC, 50 Hz.

AUDIO

Nicam Stereo

AUDIO OUTPUT POWER (W

RMS.

) (10% THD) 

2 x 6

POWER CONSUMPTION (W)

90 W (max)
< 1 W (Standby)

PANEL

16:9 display, 26” Screen Size

DIMENSIONS (mm)

DxLxH (With foot): 165 x 652 x 480
Weight (Kg): 8,20
DxLxH (Without foot): 89 x 652 x 437
Weight (Kg): 7,75

Digital 

Reception

MHEG-5 ENGINE compliant with ISO/IEC 13522-5 UK engine Pro

fi

 le 1

for UK

Object carousel support compliant with ISO/IEC 135818-6 and UK DTT pro

fi

 le

Frequency range: 474-850 MHz  for UK  models

170-862 MHz for EU models

Transmission standard: DVB-T. MPEG-2, MPEG-4  

Demodulation: COFDM with 2K/8K FFT mode

FEC: all DVB modes

Video: MP@ML, PAL, 4:3/16:9

Audio: MPEG Layer I&II 32/44.148kHz.

woypbpr_A02_MB60_[GB]_3900UK_IDTV_NICKEL16_26900W_10070187_50176828.indd   59

woypbpr_A02_MB60_[GB]_3900UK_IDTV_NICKEL16_26900W_10070187_50176828.indd   59

21.10.2010   08:32:01

21.10.2010   08:32:01

Содержание TD26FTHW11

Страница 1: ...TD26FTHW11 MODE D EMPLOI OPERATING INSTRUCTIONS TELEVISEUR COULEUR A TELECOMMANDE COLOUR TELEVISION WITH REMOTE CONTROL ...

Страница 2: ...www vestel france fr ...

Страница 3: ...ouiller une chaîne 15 Gestion des chaînes Favoris 16 Fonctions des boutons 16 Gestion des chaînes Trier une liste de chaînes 16 Information à l écran 16 Lecture de medias via navigateur média 16 Affichage de vidéo via USB 17 Affichage de photos via USB 17 Afficher la musique via USB 18 Réglages du navigateur média 18 Changement de la taille d une image Formats d image 18 Configuration des réglages...

Страница 4: ...éception et l affichage des sources disponibles récepteur lecteur de DVD enregistreur de DVD magnétoscope PC etc Le fonctionnement de cet appareil doit se faire uniquement à l abri de l humidité Il a été fabriqué exclusivement pour être utilisé à titre privé et ne peut par conséquent être utilisé ni à titre commercial ni à titre industriel Toute utilisation non prévue ou toute modification non aut...

Страница 5: ...ise au rebut Instructions pour la mise au rebut L emballage et les éléments qui aident dans l emballage sont recyclables et doivent être recyclés Les matériaux d emballage comme le sac en feuille d aluminium doivent être tenus hors de portée des enfants Les piles même celles ne contenant pas de métal lourd ne doivent pas être jetées avec les déchets ménagers Veuillez éliminer les piles usagées de ...

Страница 6: ... télévision utilisant un câble coaxial peut dans certaines circonstances provoquer un incendie Le branchement à un système de distribution par câble doit donc être assuré à travers un dispositif fournissant l isolation électrique inférieure à une certaine plage de fréquence isolateur galvanique voir EN 60728 11 La notification de licence optionnelle est la marque de SRS Labs Inc La technologie de ...

Страница 7: ... précaution réduira également la consommation d énergie Débranchez le complètement au moment de vous y éloigner pendant une durée prolongée Remarquez qu en un an l utilisation du téléviseur en mode d économie d énergie est moins économique que son débranchement de la prise secteur contrairement au mode Veille Nous vous recommandons donc vivement d activer le mode d économie d énergie afin de rédui...

Страница 8: ...Sélection du mode image Change le mode 20 Image en mode vidéo du Navigateur média Ok Confirmer Retenir en mode TXT 21 Modifier la liste des chaînes Curseur Bas 22 Quitter Retour Page d index en mode TXT 23 Touche curseur vers la droite Souspage en 24 mode TXT Curseur vers le haut 25 Programme précédent 26 Touche jaune Pause Dans le navigateur 27 média Programme linéaire en mode EPG Touche bleue Mo...

Страница 9: ...phériques tels qu un récepteur de satellite haute définition ou un lecteur de DVD Ces périphériques doivent être connectés via les prises HDMI ou les prises en composantes Ces prises peuvent accepter les signaux 720p ou 1080p Aucun branchement audio n est nécessaire pour une connexion HDMI à HDMI HDMI 1 Entrée HDMI 2 L entrée RF 3 se connecte à un système d antenne Remarquez que si vous utilisez u...

Страница 10: ...r les signaux vidéo des 3 périphériques externes Branchez le câble vidéo entre l ENTREE VIDEO du téléviseur et la SORTIE Vidéo de votre appareil Les entrées audio Audio Inputs servent à brancher les signaux audio de 4 périphériques externes Branchez le câble audio entre les ENTRÉES AUDIO AUDIO INPUTS du téléviseur et les ports de SORTIE AUDIO AUDIO OUTPUT de votre appareil Remarque Si vous branche...

Страница 11: ... Remarque Il est possible que certains types de lecteurs de disque dur ne soient pas pris en charge Connexion du téléviseur LCD à un PC Afin d afficher l image de l écran de votre ordinateur sur votre téléviseur LCD vous pouvez connecter votre ordinateur au poste de télévision Débranchez l ordinateur et le téléviseur avant de faire les branchements Utilisez le câble de 15 broches pour brancher le ...

Страница 12: ...ni Câble HDMI Lorsque vous vous branchez au lecteur de DVD tel qu illustré ci dessus passez à la source HDMI connectée Reportez vous à la section Sélection d entrée pour de plus amples informations relatives au changement de sources Connexion du téléviseur à un lecteur de DVD Si vous voulez brancher un lecteur de DVD à votre téléviseur LCD vous pouvez utiliser les branchements qui se trouvent sur ...

Страница 13: ...le YPbPr pour PC Opérations de Base Vous pouvez faire fonctionner votre téléviseur en utilisant indifféremment les boutons de la télécommande et ceux du téléviseur Utilisation des boutons du téléviseur Réglage du volume Appuyez sur le bouton pour diminuer le volume ou sur le bouton pour l augmenter Lorsque vous procédez ainsi une échelle indiquant le niveau du volume curseur s affiche à l écran Sé...

Страница 14: ...détails Touche verte La liste des programmes s affiche Touche jaune Affiche les informations de l EPG en fonction du programme linéaire Touche bleue Filtrer Affiche les options de filtre Touche Rouge Intervalle de temps préc affiche les programmes du jour précédent Touche verte Intervalle de temps suiv Affiche les programmes de l intervalle de temps suivant Bouton jaune Jour affiche les programmes...

Страница 15: ...enue s affiche vous invitant à définir les options Pays Langue Télétexte et Recherche chaînes codées En appuyant sur le bouton ou sélectionnez le pays de votre choix et appuyez sur le bouton pour mettre l option Langue Télétexte en surbrillance Pressez le bouton ou pour sélectionner Langue télétexte Appuyez sur la touche après avoir défini l option Langue télétexte L option Recherche chaînes codée...

Страница 16: ...re choix à l aide de la touche ou Les options de recherche manuelle changeront en conséquence Appuyez sur la touche pour mettre un élément en surbrillance et appuyez sur la touche ou pour régler une option Vous pouvez appuyez sur la touche MENU pour annuler Recherche manuelle numérique Au cours de la recherche manuelle des chaînes le numéro du multiplex ou de la fréquence est entré manuellement et...

Страница 17: ...ne chaîne précédemment mémorisée à ce numéro un écran d avertissement s affichera Sélectionnez Oui si vous voulez déplacer la chaîne et appuyez sur OK Appuyez sur la touche OK pour continuer La chaîne sélectionnée est à présent déplacée Supprimer une chaîne Vous pouvez appuyer sur le bouton VERT pour sélectionner désélectionner toutes les chaînes appuyer sur le bouton JAUNE pour sélectionner désél...

Страница 18: ...tir de la liste en utilisant les boutons et OK Information à l écran Vous pouvez appuyer sur le bouton INFO pour afficher les informations à l écran Les détails de la station et du programme en cours seront affichés dans le bandeau d informations Le bandeau d informations donne des informations sur la chaîne sélectionnée ainsi que sur les programmes de cette dernière Le nom de la chaîne s affiche ...

Страница 19: ...iques saute le fichier sélectionné en utilisant les touches numériques OK affiche l image sélectionnée en plein écran Diaporama touche verte Démarre le diaporama en utilisant toutes les images Boucle Aléatoire touche Bleue Appuyez une fois pour activer l option Boucle Appuyez à nouveau pour activer les options Boucle et Aléatoire Appuyez une nouvelle fois pour activer uniquement la lecture aléatoi...

Страница 20: ...ctivation du sous titre Position du sous titre Définit la position du sous titre en tant que haut ou bas Taille de la police du sous titre Définit la taille de police du sous titre max 54pt Changement de la taille d une image Formats d image Les programmes peuvent être regardés dans différents formats d image en fonction de la transmission reçue Vous pouvez modifier le format de l image la taille ...

Страница 21: ...es configurations de paramètres d image dans les détails Appuyez sur la touche MENU et sélectionnez l icône Image grâce à la touche ou Appuyez sur OK pour afficher le menu Paramètres d image Fonctionnement des éléments du menu Réglages d image Appuyez sur le bouton ou pour sélectionner un élément du menu Utilisez le bouton ou pour sélectionner une rubrique Appuyez sur la touche MENU pour quitter E...

Страница 22: ...Image TV sous Système de principal Les paramètres Son Réglages et Source sont identiques aux paramètres expliqués dans le système de menu principal Position PC Sélectionnez cette option pour afficher les éléments du menu Position du PC Position Auto Optimise automatiquement l affichage Appuyez sur OK pour optimiser Position Hori Cette rubrique change l image horizontalement vers le côté droit ou g...

Страница 23: ...ramètres linguistiques Parental Configure les réglages parentaux Minuteries Règles les minuteries des programmes sélectionnés Date Heure Sélectionne la date et l heure Sources Active ou désactive les options sources sélectionnées Autres réglages Affiche les autres options de réglage du téléviseur Utilisation du module d accès conditionnel IMPORTANT Insérez ou effacez le module CI uniquement lorsqu...

Страница 24: ...ental Pour éviter que certains programmes soient regardés des chaînes et des menus peuvent être verrouillés grâce au système de contrôle parental Cette fonction active ou désactive le système de protection de menu et permet le changement du mot de passe Appuyez sur le bouton MENU et sélectionnez la deuxième icône en utilisant le bouton ou Appuyez sur OK pour afficher le menu Réglages Utilisez le b...

Страница 25: ...les minuteries sur un événement Les boutons de fonction de la minuterie du programme TV apparaîtront à l écran Ajout d une minuterie Pour ajouter un minuteur pressez le bouton JAUNE sur la télécommande Le menu suivant apparaît à l écran Chaîne Change la chaîne en utilisant ou Timer Type Type de minuterie Ce fonction n est pas disponible pour réglage Date Saisissez une date en appuyant sur les touc...

Страница 26: ...des autres réglages Pour afficher les préférences de configuration générale sélectionnez Autres réglages dans le menu Réglages et appuyez sur le bouton OK Fonctionnement Appuyez sur le bouton ou pour sélectionner une option Utilisez le bouton ou pour sélectionner une option Appuyez sur OK pour afficher un sous menu Temps effacement OSD Change la durée de temporisation des écrans de menu Recherche ...

Страница 27: ...L indicateur Muet s affiche dans la partie supérieure de l écran Pour annuler la coupure du son il existe deux alternatives la première consiste à appuyer sur le bouton et la seconde revient à augmenter le niveau de volume Sélection du mode image En pressant le bouton PRESETS vous pouvez modifier les paramètres du Mode Image selon vos besoins Les options disponibles sont Dynamique Naturel et Ciném...

Страница 28: ...nt être à l origine des images doubles et des images fantômes Parfois vous pouvez améliorer la qualité de l image en changeant la direction de l antenne Est ce que l image ou le télétexte sont méconnaissables Vérifiez si vous avez introduit la fréquence appropriée Veuillez régler à nouveau les chaînes La qualité de l image peut se dégrader lorsque deux périphériques sont connectés au téléviseur au...

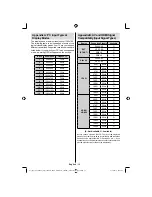
Страница 29: ...e signal d entrée Source Signaux pris en charge Disponible EXT SCART PAL 50 60 O NTSC 60 O RGB 50 O RGB 60 O AV latéral PAL 50 60 O NTSC 60 O YPbPr 480I 60Hz O 480P 60Hz O 576I 50Hz O 576P 50Hz O 720P 50Hz O 720P 60Hz O 1080I 50Hz O 1080I 60Hz O 1080P 50Hz O 1080P 60Hz O HDMI1 HDMI2 480I 60Hz O 480P 60Hz O 576I 50Hz O 576P 50Hz O 720P 50Hz O 720P 60Hz O 1080I 50Hz O 1080I 60Hz O 1080P 50Hz O 1080P...

Страница 30: ...tp MPEG1 MPEG Layer 1 2 3 20Mbit sec MPEG2 MPEG2 XviD 3ivx PCM MP3 Version XviD jusqu à 1 1 2 Mpeg2 TS H264 TS EAC3 AC3 20Mbit sec RMVB IMA LBR 10Mbit sec MPEG4 PCM MP3 avi MS ISO MPEG4 PCM MP3 Prend en charge SP et ASP MJPEG PCM 30fps VGA Musique m4a Fréquence de test 8K 48KHz Bit Rate 24kbps 384Kbps mp3 MPEG 1 2 Layer 1 2 3 MP3 Fréquence de test 8K 48KHz Bit Rate 128bps 320Kbps Photo jpg JPEG de...

Страница 31: ...enu Options de mise à jour est active le téléviseur se met automatiquement en marche à 3 heures du matin et lance la recherche de chaînes de diffusion pour la mise à jour du nouveau logiciel Si un nouveau logiciel est trouvé et téléchargé avec succès le téléviseur commence à fonctionner avec la nouvelle version du logiciel au prochain démarrage Remarque relative au redémarrage Le redémarrage est l...

Страница 32: ...x 652 x 480 Poids en Kg 8 20 PxLxH Sans pied 89 x 652 x 437 Poids en Kg 7 75 Réception numérique APPAREIL MHEG 5 conforme à l ISO IEC 13522 5 UK engine Profile 1 Pour le RU Support conforme à l ISO IEC 135818 6 et au profil UK DTT Gamme de fréquence 474 850 MHz pour les modèles du RU 170 862 MHz pour les modèles de l UE Normes de transmission DVB T MPEG 2 MPEG 4 Démodulation COFDM avec mode 2K 8K ...

Страница 33: ...5 Renaming a Channel 45 Locking a Channel 45 Managing Stations Favourites 45 Button Functions 45 Managing Stations Sorting Channel List 45 On Screen Information 46 Viewing Videos via USB 46 Viewing Photos via USB 46 Playing Music via USB 47 Media Browser Settings 47 Changing Image Size Picture Formats 48 Configuring Picture Settings 49 Operating Picture Settings Menu Items 49 Picture Settings Menu...

Страница 34: ...e device is not used as intended or unauthorized modifications have been made To operate your LCD TV in extreme ambient conditions may cause the damage of the device Preparation For ventilation leave a free space of at least 10 cm all around the set To prevent any fault and unsafe situations please do not place any objects on top of the set Use this device in moderate climates 10 cm 10 cm 10 cm Sa...

Страница 35: ...valent type This symbol on the product or on its packaging means that your electrical and electronic device should be disposed at the end of its service life separately from your household wastes There are separate collection systems for recycling in EU For more information please contact the local authority or the dealer where you purchased the product Disconnecting the Device The mains plug is u...

Страница 36: ...letely from mains the mains plug has to be pulled from the mains socket Because of that the device should be set up in a way that an unobstructed access to mains socket is guaranteed so that in case of emergency the mains plug can be pulled immediately To exclude the danger of fire the power cord should principally be separated from the mains socket prior to a longer period of non usage i e during...

Страница 37: ...ins plug This will also reduce energy consumption Disconnect power when going away for longer time Note that annually using the TV set in Power Save Mode has more power efficiency than disconnecting the TV from the mains plug instead of keeping stand by mode Therefore disconnect the TV from the mains plug to save energy when you do not use However it is highly recommended to activate Power Save Mo...

Страница 38: ...e mode 20 in Media Browser video mode Okay Confirm Hold in TXT mode Edit 21 Channel List Cursor Down 22 Exit Return Index page in TXT mode 23 Cursor Right Subpage in TXT mode 24 Cursor Up 25 Previous programme 26 Yellow button Pause in Media Browser 27 Timeline Schedule in EPG Blue button Edit Channel List Filter İn Favourite 28 List EPG Loop Shuffle in Media Browser No function 29 Subtitle on off...

Страница 39: ...n Satellite Receiver or DVD Player These devices must be connected via the HDMI sockets or Component Socket These sockets can accept either 720p or 1080p signals No sound connection is needed for an HDMI to HDMI connection HDMI 1 HDMI Input 2 RF Input 3 connects to an aerial antenna system Note that if you use a decoder or a media recorder you should connect the aerial cable through the device to ...

Страница 40: ...s used for connecting video signals of external devices Connect 3 the video cable between the VIDEO IN socket on the TV and the VIDEO OUT jack on your device Audio Inputs are used for connecting audio signals of external devices Connect 4 the audio cable between the AUDIO INPUTS on the TV and the AUDIO OUTPUT jacks on your device Note If you connect a device to the TV via the VIDEO INPUT you shoul...

Страница 41: ... connect a PC to the LCD TV When the connection is made switch to PC source See Input selection section Set the resolution that suits your viewing requirements Resolution information can be found in the appendix parts PC audio cable not supplied to AUDIO INPUTS on the TV PC RGB cable not supplied to PC input Audio Inputs PC Input Using Side AV Connectors You can connect a range of optional equipme...

Страница 42: ...n the TV so the TV will switch to standby mode To power down the TV completely unplug the power cord from the mains socket Note When the TV is switched to standby mode standby LED can blink to indicate that features such as Standby Search Over Air Download or Timer is active Connecting to a DVD Player If you want to connect a DVD player to your LCD TV you can use connectors of the TV set DVD playe...

Страница 43: ...e A volume level scale slider will be displayed on the screen Programme Selection Previous or Next Programme Press P button to select the previous programme Press P button to select the next programme Programme Selection Direct Access Press numeric buttons on the remote control to select programmesbetween0and9 TheTVwillswitchtothe selected programme To select programmes between press the numeric b...

Страница 44: ...de database in accordance with the genre Info available in the programme guide will be searched and results matching your criteria will be listed Now Shows the current programme First Time Installation IMPORTANT Ensure that the aerial is connected before switching on the TV for the first time installation First you will be asked to set and confirm a PIN number Selected PIN number cannot be 0000 En...

Страница 45: ... displayed You can select Digital Aerial Analogue or Digital Aerial Analogue tuning using and OK buttons Auto Channel Scan Retune Menu Operation Digital Searches and stores aerial DVB stations Analogue Searches and stores analogue stations Full Searches and stores both analogue and aerial DVB stations Whenever you select an automatic search type and press OK button a confirmation screen will appea...

Страница 46: ... time installation If the correct PIN number is entered installation process will start See the section First Time Installation at the beginning of instruction book for more information on the process Clear Service List This setting is visible only when the Country option is set to Denmark Sweden Norway or Finland Use this setting to clear channels stored Press or button to select Clear Service Li...

Страница 47: ... to tag untag a single channel Select the channel that you want to lock and select Lock option Press OK button to continue You will be asked to enter parental control PIN that you have previously defined during the first time installation Enter the PIN number Press OK button when the desired channel is highlighted to lock unlock the channel Lock symbol will be displayed next to the selected channe...

Страница 48: ... button Press OK button to continue Media Browser menu options will be displayed Also when you plug USB devices media browser screen will be displayed automatically You can play music picture and video files from the connected USB memory stick Use or button to select Videos Photos Music or Settings Viewing Videos via USB When you select Videos from the main options available video files will be fi...

Страница 49: ...ns available audio files will be filtered and listed on this screen 0 9 Numeric buttons Jumps to the selected file Play This OK button Plays the selected file Play GREEN button Plays all media files starting with the selected one Stop RED button Stops playback Pause YELLOW button Pauses the selected playback Previous Next Left Right buttons Jumps to previous or next file to play FAV Sorts files by...

Страница 50: ... ratio pictures that have been squeezed into a normal picture 4 3 aspect ratio use the 16 9 mode to restore the picture to its original shape Subtitle This zooms up the wide picture 16 9 aspect ratio with subtitles to the full screen Note You can shift to screen up or down by pressing buttons while picture zoom is selected as panaromic 14 9 Zoom Cinema or Subtitle 14 9 This zooms up the wide pictu...

Страница 51: ...will be unavailable to be set Picture Zoom Sets the picture size to Auto 16 9 Subtitle 14 9 14 9 Zoom 4 3 Panoramic or Cinema Reset Resets the picture settings to factory default settings While in VGA PC mode some items in Picture menu will be unavailable Instead VGA mode settings will be added to the Picture Settings while in PC mode PC Picture Settings For adjusting PC picture items do the follo...

Страница 52: ...l between programmes For instance volume level of advertisements tend to be louder than programmes Dynamic Bass Dynamic Bass is used to increase bass effect of the TV set Digital Out Sets digital out audio type Configuring Your TV s Settings Detailed settings can be configured to suit your personal preferences Press MENU button and select Settings icon by using or button Press OK button to view Se...

Страница 53: ...his menu Press MENU button and select the Settings icon by using or button Press OK button to view Settings menu Use or button to highlight Language and press OK to continue Use or button to set an item Settings are stored automatically Menu displays the system language Preferred These settings will be used if available Otherwise the current settings will be used Audio Sets the preferred audio lan...

Страница 54: ... not visible Set PIN Defines a new PIN number Use numeric buttons to enter a new pin number You will need to code your new pin a second time for verification purposes IMPORTANT The factory default pin number is 4725 if you change the pin number make sure you write it down and keep it safe Timers To view Timers menu press MENU button and select Settings icon by using or button Press OK button to vi...

Страница 55: ...12 Date Time on the top of the menu list will then change according to the selected Time Zone Changes are automatically stored Press MENU to exit Configuring Source Settings You can enables or disable selected source options The TV will not switch to the disabled source options when SOURCE button is pressed Select Sources in the Settings menu and press OK button Press or buttons to select a source...

Страница 56: ...if the broadcaster supports that additional narration track Auto TV Off You can set the timeout value of auto off feature After the timeout value is reached and the Tv is not operated for selected time the TV will go off Standby Search optional Use or button to select Standby Search and then press or button to set this setting as On or Off If you change Standby Search to Off this function will be ...

Страница 57: ...when cleaning the set When moving the TV hold it properly from the bottom part Image Persistence Please note that ghosting may occur while displaying a persistent image LCD TVs image persistence may disappear after a short time Try turning off the TV for a while To avoid this do not leave the screen in still picture for extended periods No Power If your TV system has no power please check the main...

Страница 58: ...ignals Available EXT SCART PAL 50 60 O NTSC 60 O RGB 50 O RGB 60 O Side AV PAL 50 60 O NTSC 60 O YPbPr 480I 60Hz O 480P 60Hz O 576I 50Hz O 576P 50Hz O 720P 50Hz O 720P 60Hz O 1080I 50Hz O 1080I 60Hz O 1080P 50Hz O 1080P 60Hz O HDMI1 HDMI2 480I 60Hz O 480P 60Hz O 576I 50Hz O 576P 50Hz O 720P 50Hz O 720P 60Hz O 1080I 50Hz O 1080I 60Hz O 1080P 50Hz O 1080P 60Hz O 1080P 24Hz O X Not Available O Availa...

Страница 59: ...p MPEG1 MPEG Layer 1 2 3 20Mbit sec MPEG2 MPEG2 XviD 3ivx PCM MP3 XviD Verson up to 1 1 2 Mpeg2 TS H264 TS EAC3 AC3 20Mbit sec RMVB IMA LBR 10Mbit sec MPEG4 PCM MP3 avi MS ISO MPEG4 PCM MP3 Support SP and ASP MJPEG PCM 30fps VGA Music m4a Sample Rate 8K 48KHz Bit Rate 24kbps 384Kbps mp3 MPEG 1 2 Layer 1 2 3 MP3 Sample Rate 8K 48KHz Bit Rate 128bps 320Kbps Photo jpg Baseline JPEG WxH 15360x8640 Pro...

Страница 60: ...de Options menu is enabled TV wakes up at 03 00 and searches broadcast channels for new software upgrade If new software is found and downloaded successfully with next power up TV opens with new software version Note on reboot operation Reboot is the last step in software upgrade operation if download of new software is finished successfully During reboot TV makes final initializations In reboot s...

Страница 61: ...Weight Kg 8 20 DxLxH Without foot 89 x 652 x 437 Weight Kg 7 75 Digital Reception MHEG 5 ENGINE compliant with ISO IEC 13522 5 UK engine Profile 1 for UK Object carousel support compliant with ISO IEC 135818 6 and UK DTT profile Frequency range 474 850 MHz for UK models 170 862 MHz for EU models Transmission standard DVB T MPEG 2 MPEG 4 Demodulation COFDM with 2K 8K FFT mode FEC all DVB modes Vide...

Страница 62: ...50176828 ...
Отзывы: