


134
Item
Note
0 to 100. The default value is 50.
The larger the number, the strong the color is. This value has
no effect on the general brightness of the whole video. The
video color may become too strong if the value is too high. For
the grey part of the video, the distortion may occur if the white
balance is not accurate. Please note the video may not be
attractive if the value is too low. The recommended value
ranges from 40 to 60.
Gain
The gain adjust is to set the gain value. The default value may
vary due to different device models. The smaller the value, the
low the noise. But the brightness is also too low in the dark
environments. It can enhance the video brightness if the value
is high. But the video noise may become too clear.
Color mode
It includes several modes such as standard, color, bright,
gentle. Select a color mode, the sharpness, brightness,
contrast and etc can automatically switch to corresponding
setup.
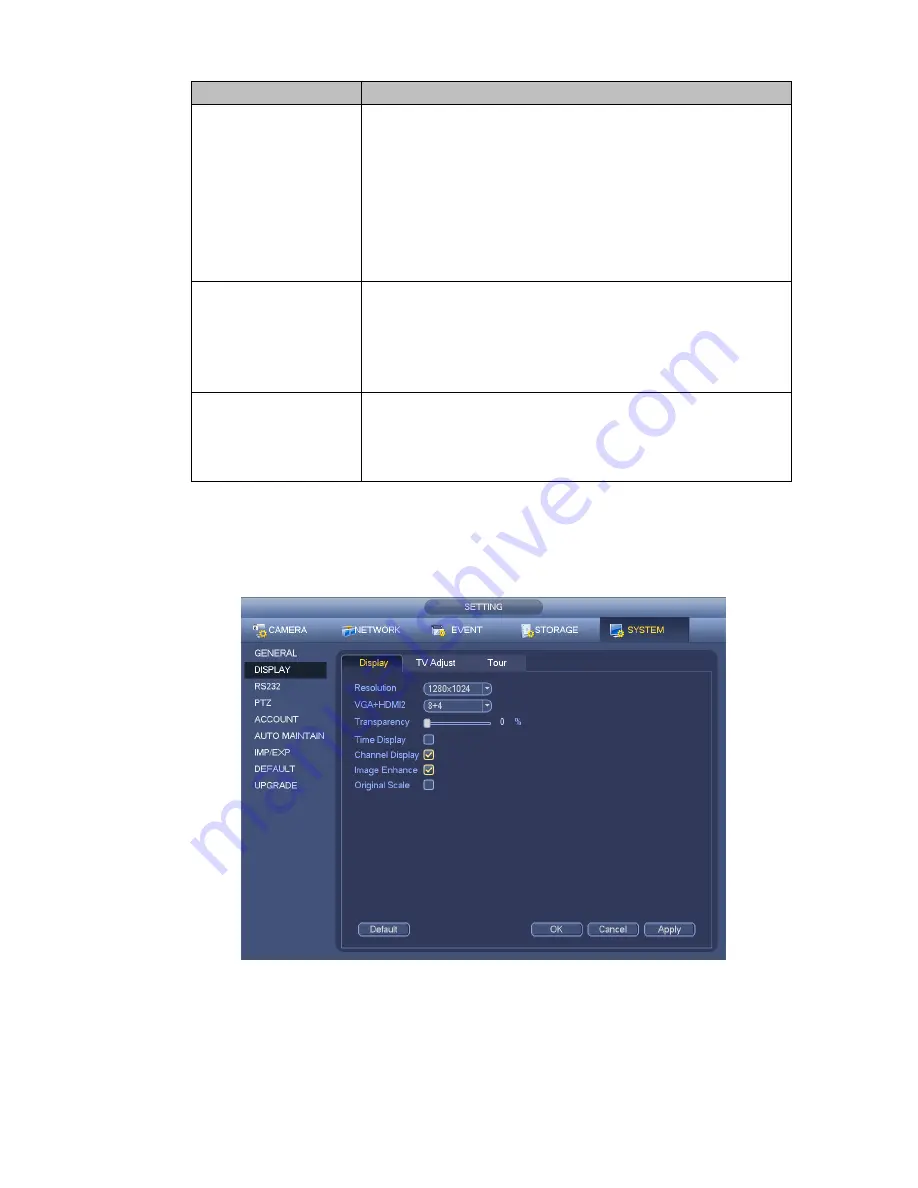
4.6.4.2 Display
From Main Menu->Setting->System->Display, you can go to the following interface. See Figure 4-33.
Here you can set menu and video preview effect. All you operation here does not affect the record file and
playback effect.
Figure 4-33
Now you can set corresponding information.
Resolution: There are five options: 1280×1024 (Default), 1280×720, 1920×1080, 1024×768 and
3840×2160. Please note the system needs to reboot to activate current setup.
Please note
3840×2160 is for some series only.
Содержание NVR-ELE8M-4K
Страница 16: ...2 Front Panel and Rear Panel 2 1 Front Panel 2 1 1 The front panel is shown as in Figure...
Страница 28: ...100 3 5 6 Please refer to Figure 3 6 for connection sample Figure 3 6...
Страница 87: ...172 Figure 4 81 Figure 4 82...
Страница 88: ...173 Figure 4 83 Figure 4 84...
Страница 94: ...179 Figure 4 89 Figure 4 90...
Страница 95: ...180 Figure 4 91 Figure 4 92...
Страница 96: ...181 Figure 4 93 Figure 4 94...
Страница 98: ...183 Figure 4 96 Figure 4 97...
Страница 124: ...209 Figure 4 125 In Figure 4 125 click one HDD item the S M A R T interface is shown as in Figure 4 126 Figure 4 126...
Страница 185: ...270 The motion detect interface is shown as in Figure 5 54 Figure 5 54 Figure 5 55...
Страница 186: ...271 Figure 5 56 Figure 5 57 Figure 5 58...
Страница 190: ...275 Figure 5 62 Figure 5 63...


