background image

7

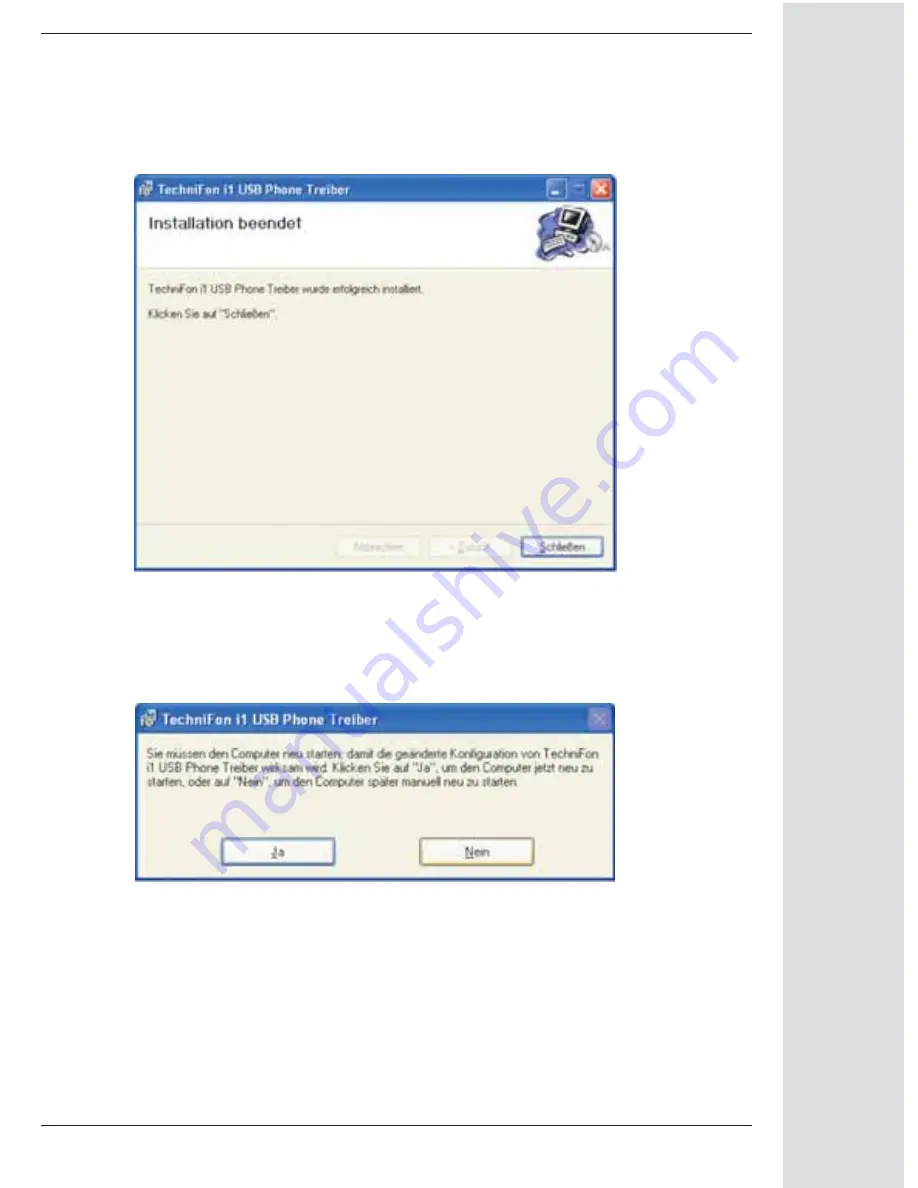
If you see Figure 5, the installation process has been successfully completed. Click
the “Schließen” button.

Choose “Ja” to restart your computer now or “Nein” to restart later manually.
Note that the computer needs to be restarted before you can start using your Tech-
niFon i1.After restarting your computer you can connect the TechniFon i1 to a USB-
Port of your computer.

Figure 5

Figure 6

Содержание TechniFon i1

Страница 1: ...iFon i1 USB Phone integrated soundcard driver Phoning via the internet for free1 WWW VoIP phone 1 Phoning via the internet for free To use Technisat TechniFon i1 you need to have access to the interne...

Страница 2: ...our new device The manufacturer is not liable to damage caused by improper handling or by disregarding the safety instructions Do not use the device near radiators stoves or other heat sources Protect...

Страница 3: ...or the provider Skype 9 Configuration of the TechniFon i1 for Skype 10 Using TechniFon i1 with Skype 12 14 Troubleshooting 15 Disposal notes 16 System requirements Pentium III 800 MHz 256 MB Ram Windo...

Страница 4: ...Connecting the cables 4 1 2 3 Connect the USB plug with your laptop or PC USB plug USB handset USB base station handset cable USB cable handset cable USB cable USB base station USB handset...

Страница 5: ...he manual If this window does not start automatically you can start the setup file manually from the folder TechniFon i1 on the CD Clicking the button Weiter in Figure 2 takes you to Figure 3 There yo...

Страница 6: ...choose whether the drivers should be instal led for all users on your computer Alle Benutzer or only for you Aktueller Benut zer Figure 3 Confirm your inputs choices by clicking the Weiter button Figu...

Страница 7: ...hlie en button Choose Ja to restart your computer now or Nein to restart later manually Note that the computer needs to be restarted before you can start using your Tech niFon i1 After restarting your...

Страница 8: ...e visit the websites of the providers Skype http www skype com MSN Messenger http messenger msn com SJPhone http www sjlabs com X Lite http www globalipphones com Net2phone http web net2phone com eyeB...

Страница 9: ...d your TechniFon i1 USB Phone is activated An icon will appear on the bar at the right bottom of the screen By double click the red marked icon on Figure 7 the following program window pops up As soon...

Страница 10: ...or Skype To telephone with your TechniFon i1 you have to ensure that the phone is installed as I O device in your Skype audio device settings Please follow these steps 1 Click on Aktionen and select O...

Страница 11: ...11 4 Now Click on Tastatur on the left side of the menu 5 Activate the shortcuts as shown in figure 11 red marked 6 Save configuration by clicking the Speichern button Figure 10 Figure 11...

Страница 12: ...chniFon i1 with Skype If you want to make a call your contact list will appear automatically Press the Down button to scroll the contact list To get back to the top press the Down button for 2 seconds...

Страница 13: ...e on the contact list Select the name you want to call and press the OK button The call will be initia ted To terminate the call just ring off 2 How to answer the phone To answer the phone lift up the...

Страница 14: ...tion at http www skype com int de Lift up the receiver handset and press the Start button to move to the tab W hl tasten Enter the number by pressing the buttons on the phone or clicking on the button...

Страница 15: ...provider No telephone connection possi ble but USB drivers and software work correctly Firewall or proxy server setup Change your firewall or proxy ser ver set up as recommended by your soft phone pro...

Страница 16: ...you help saving our environment Please contact your local government to find out nearest collecting point This device is approved for the CE signet and complies with all corresponding EU qualificatio...

Отзывы: