•
Insert the circuit board into the upper locking point and
position it between it and the lower installation point
as far as it will go. Screw it down tight with 2 cross slot
screws:
•
Close the lid.
•
Check the function by pressing the push button.
•
Seal the calculator.
Operation
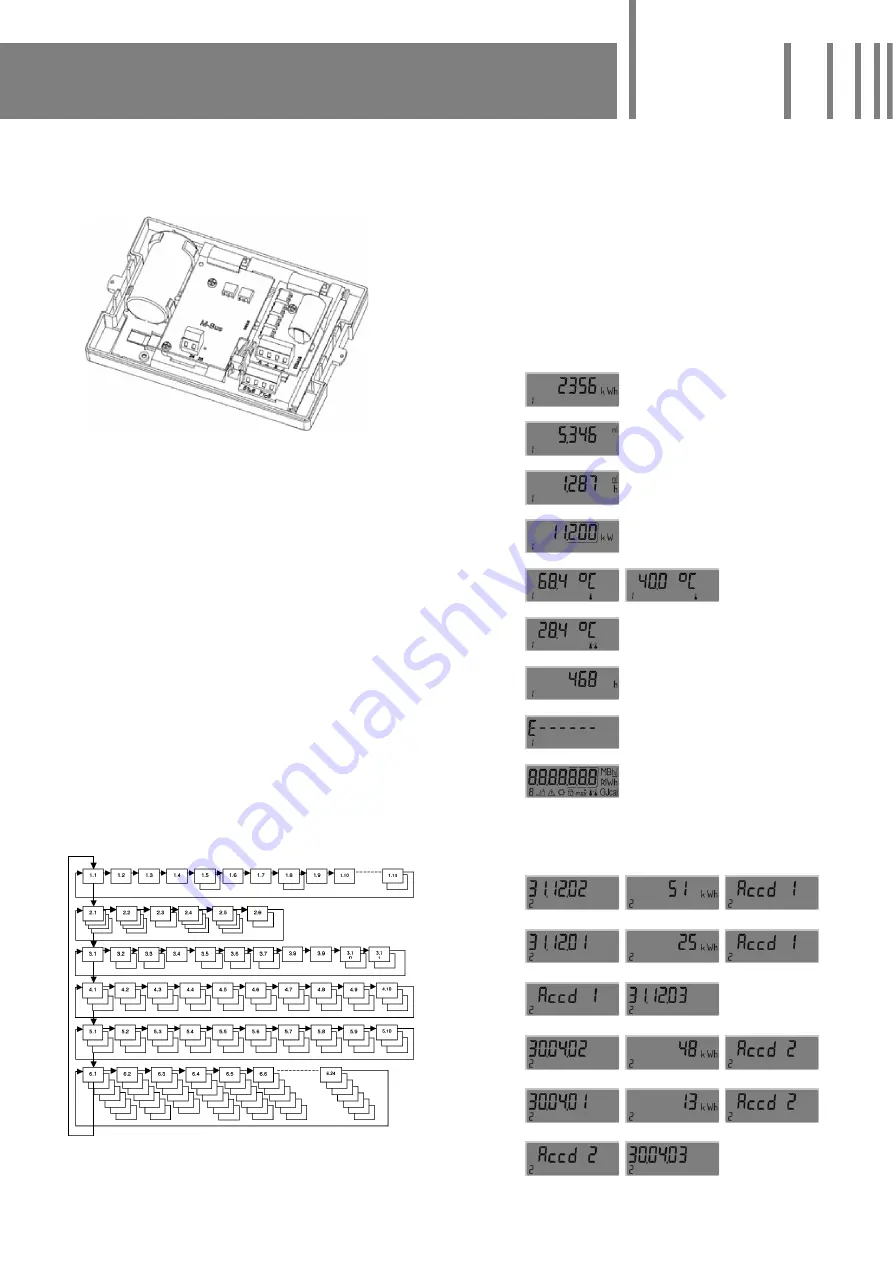
A push button is located on the meter‘s front panel. You can
use this button to switch between the individual displays.
In this case, we distinguish between pressing the button
quickly and pressing it for longer. If you press the button
quickly (< 3 seconds) switching takes place within a loop,
if you press for longer (> 3 seconds), it switches to the next
display loop. The „Energy“ window (sequence 1.1) for the
major loop is the basic display. If the button is not activated
for approx. 4 minutes, the meter automatically switches
the display off in order to save electricity. If the button is
pressed again, the meter reverts to the basic display. You
can use the HYDRO-SET software to program the loop
settings specifi cally for customers.
The heat meter has 6 display loops:
1 Major loop
2 Due date loop
3 Information loop
4 Pulse input loop
5 Tariff loop
6 Monthly loop
The loops are marked in the display with the numbers 1
to 6 in order to enable quick visual recording. The major
loop is programmed with the current data, e.g. for energy,
volume and fl ow. You cannot change the order of the data
available. Normally, loops 1-3 and 6 are active. As an opti-
on, you can add: the pulse input loop (4) when connecting
additional meters or the tariff loop (5) if making threshold
settings for monitoring the system.
Heat meter standard settings
The heat meter is works confi gured. This transforms the
read-off data to a preset „form“ and sets the readout win-
dows in the calculator. These settings can be changed using
the HYDRO-SET software.
Major loop
Sequence Window 1
Window 2
Window 3
1.1
Accumulated energy
1.2
Volume
1.3
Flow
1.4
Output
1.5
Flow temperature Return temperature
1.6
Differential temperature
1.7
Operating hours
1.8
Error code
1.9
Display test
Due date (DD) loop
Sequence Window 1
Window 2
Window 3
2.1
Due date 1 (DD 1)
DD 1 Energy „Accd
1“
2.2
DD 1 prev. year
DD 1 prev. year En. „Accd 1“
2.3
„Accd 1“
Future due date 1
2.4
Due date 2 (DD 2)
DD 2 Energy „Accd
2“
2.5
DD 2 prev. year
DD 2 prev. year En. „Accd 2“
2.6
„Accd 2“
Future due date 2


