background image

IMPORTANT

TEC 3000X 3 tonne screw hoist

A simple daily visual check will ensure this hoist is 
operationally safe

The hoist is operationally safe while a gap exists between the lift 
nut and the safety nut.

If the lift nut is allowed to wear to the extent that the two nuts 
completely close up, then the safety nut becomes the lifting nut.

This will allow the hoist to be lowered, but a back-up safety 
interlock device will prevent further use of the hoist until the lift 
nut is replaced.

Daily: 

Carry out a simple visual check to ensure the nuts have 

not completely closed up.

Every 3 months:  

Measure the gap between the nuts. If it has 

decreased by 1.5 mm or more from the initial setting, then 
arrange for replacement of the lift nut.

TEC4000 4-Post, 4 Tonne Hoist

Tecalemit Australasia 
Adelaide

6 Shefield Street
Woodville North
South Australia 5012
Phone (08) 8243 5200
Fax (08) 8445 9815
Australia Free Call  1800 685 577
Australia Free Fax   1800 685 533

V20096  Issue 1

Notes:

Содержание TEC 3000X

Страница 1: ...Installation Operation and Maintenance instructions 3000X Screw Hoist...

Страница 2: ...ate the hoist and protect the operator should the electrics be damaged in any way In an emergency or when servicing turn the isolating switch to O and padlock it Do not directly spray or hose the hois...

Страница 3: ...um permissible gap between the base frame and shims is 0 5 mm 5 Drill and fit four hold down bolts The bolts must be 16 mm thread diameter and fitted in accordance with the manufacturer s instructions...

Страница 4: ...nd check the arm is locked 20 Fit the cover over the bottom limit switch and tee piece using two M6 x 10 mm long socket head cap screws Fit the motor cover over the vee belts and secure with the M4 x1...

Страница 5: ...5 Safety Interlock Mechanism Three Phase Electrical Circuit Single Phase Electrical Circuit...

Страница 6: ...ves 2 Check the vee belt tension Individual belt deflection must be less than 10 mm when pressed firmly in mid span with your thumb Every 3 months 1 Measure the gap between the lift and safety nuts in...

Страница 7: ...mn 1 Thoroughly clean the inside of the column where the rollers and sliders travel then smear with grease 2 Refit the carriage and position it about 500 mm up from the bottom 3 Check the plastic key...

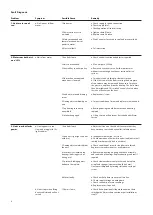
Страница 8: ...earing incorrectly assembled a Bearing housing should be removed and bearing replaced 8 Interlock engaged a Lift nut worn out Replace as described under Major Service 3 Hoist runs but lacks power a Ho...

Страница 9: ...nd nuts Drive pulley a Clattering sound coming from drive cover 1 Grub screw retaining motor pulley is loose allowing play a Tighten grub screw using Allen key Base frame a Chain noise 1 Chain not run...

Страница 10: ...ing washer 4 24a V18663 Wire circlip 4 70a WWA1006 3 8 flat washer 4 24b V19268 Lift pad bush 4 71 SWA106 10 Screw 3 8 BSW x 1 1 4 L 6 25 V19274 Footguard spring 8 72 V18346 V18646 Motor mounting 1 25...

Страница 11: ...11...

Страница 12: ...back up safety interlock device will prevent further use of the hoist until the lift nut is replaced Daily Carry out a simple visual check to ensure the nuts have not completely closed up Every 3 mont...

Отзывы: