background image

14

Desert buggy xl-e • INstructIoN maNual

ENGLISH

gEarINg

rIdE hEIghT

Set the vehicle on a flat surface and turn the threaded collars on the shocks evenly so both the front and rear suspension arms are level.

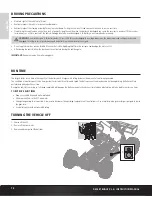
PRecAutiOns

•  Never touch moving parts.
•  Never disassemble while the batteries are installed.
•  Always let parts cool before touching.

geARing 

Your vehicle has been equipped with the optimal gearing for the stock platform. 
It offers an ideal balance between speed, power and efficiency. Should you 
decide to customize your vehicle with optional batteries or motors, it may be 
necessary for you to change the pinion or spur gear. 
Installing a pinion gear with fewer teeth or a spur gear with more teeth will pro-
vide greater torque but will reduce top speed. Likewise, a pinion gear with more 
teeth or a spur gear with fewer teeth will reduce torque and increase top speed. 
Care should be taken when installing larger pinion gears as this can “overgear” 
the vehicle, resulting in overheating of the motor and ESC. When testing differ-
ent gearing options, pay close attention to the temperature of the motor and 
speed control to ensure you are operating within the temperature range of the 
components. The motor or ESC should never be so hot that it cannot be touched. 
If temperatures are too hot, a different gearing combination with a lower pinion 
gear and/or higher spur gear is suggested.

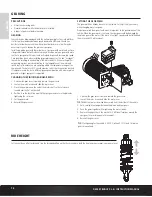
chAnging the PiniOn geAR/geAR RAtiO

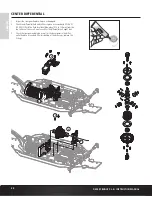
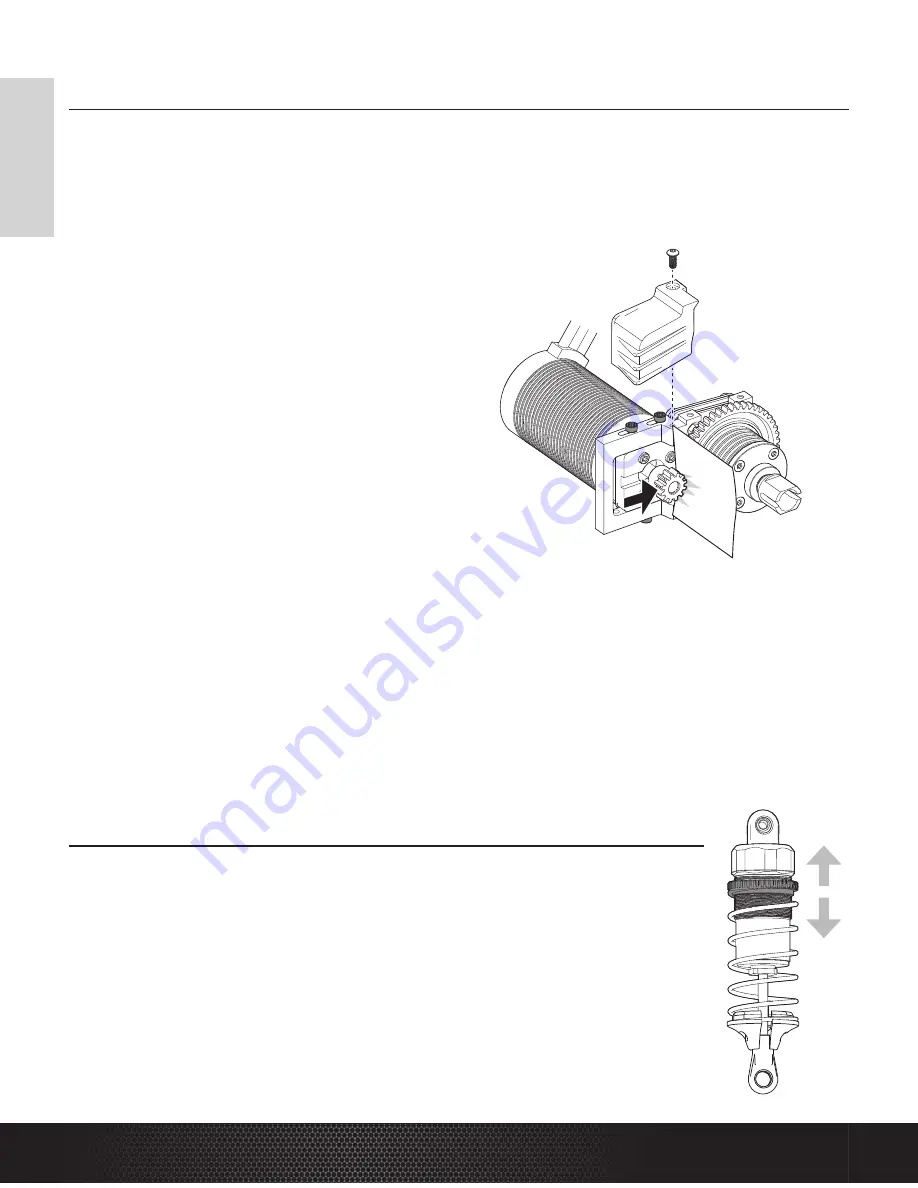
1.  Unscrew the gear cover screw and remove the gear cover. 
2.  Loosen the motor screws and slide the motor over.
3.  Place the new pinion on the end of the motor shaft so the set screw is 

located over the flat on the shaft. 

4.  Position it so the teeth line up with the spur gear and secure the pinion by 

tightening the set screw.

5.  Set the gear mesh.
6.  Reinstall the gear cover.

setting the geAR mesh

The gear mesh has already been set at the factory. Setting it is only necessary 
when changing motors or gears.
Proper gear mesh (how gear teeth meet) is important to the performance of the 
vehicle. When the gear mesh is too loose, the spur gear could be damaged by 
the pinion gear of the motor. If the mesh is too tight, speed could be limited and 
the motor and ESC will overheat.

1.  Unscrew the gear cover screw and remove the gear cover.
2.  Loosen the motor screws and slide the motor over.

tiP:

 The bottom motor screw can be accessed from the bottom of the vehicle.

3.  Put a small piece of paper between the pinion and spur gears.
4.  Push the gears together while tightening the motor screws.
5.  Remove the paper. Check the mesh at 3–5 different locations around the 

spur gear for a small amount of movement.

6.  Reinstall the gear cover.

tiP:

 Stock gearing for the vehicle is 50/13. Optional 11t, 12t and 14t pinion 

gears are available.

Содержание Desert Buggy XL-E

Страница 1: ...Instruction Manual Bedienungsanleitung Manuel d utilisation Manuale di Istruzioni...

Страница 2: ...of superficial injury WARNING This vehicle is only intended for advanced RC drivers capable of operating large scale model vehicles WARNING Failure to follow all instructions can lead to damage to yo...

Страница 3: ...salt covered roads contaminated or polluted water Salt water is very conductive and highly corrosive so use caution Even minimal water contact can reduce the life of your motor if it has not been cer...

Страница 4: ...rove Run Times 10 Turning the vehicle OFF 10 C Vehicle Tuning 11 camber 11 Droop 12 shock oil 12 shock springs 12 shock mounting positions 12 front toe 13 sway bars 13 differentials 13 Gearing 14 Prec...

Страница 5: ...o with an EC5 connector 2 11 1V 5000mAh 3S 50C LiPo with EC5 connector or 2 14 8V 5000mAh 4S 50C LiPo with EC5 connector TLR Lok Threadlock Blue TLR76004 Dynamite Prophet Sport Quad 4 X 100W AC DC Cha...

Страница 6: ...a Transmits the signal to the model SRS4220 AVC Technology Receiver 12 BIND 13 DISABLE 14 DATA 15 AUX 2 16 AUX 1 17 THR 18 STR Installing the Transmitter Batteries 1 Push in the battery cover a small...

Страница 7: ...ntrols the steering dual rate Binding Binding is the process of programming the receiver to recognize the GUID Globally Unique Identifier code of a single specific transmitter When a receiver is bound...

Страница 8: ...MUST remain on a flat level surface and motionless for at least 5 seconds 2 1 Installing the Batteries 1 Remove the 2 body clips from the vehicle as shown 2 Pivot body back to access the chassis 3 Ins...

Страница 9: ...y stop 1 Hold the trigger in the full brake position and turn the steering wheel to Full Right while powering on the transmitter The LED flashes rapidly indicating the programming mode is active 2 Thr...

Страница 10: ...motor or ESC After driving the vehicle allow the electronics to cool before driving the vehicle again IMPORTANT Keep wires away from all moving parts The largest factor in run time is the capacity of...

Страница 11: ...er Links Characteristics Lowering the Link Front Increases off power steering and makes the vehicle more responsive Handling consistency may decrease as off power steering increases Rear Increases off...

Страница 12: ...Shock Oil Characteristics Lighter Responds quicker and creates more chassis roll Use lighter oil as it gets colder Heavier Reacts slower and creates less chassis roll Use heavier oil as it gets warmer...

Страница 13: ...ther steering entering the turn but has more on power steering Rear Increases stability in turns and on power steering Differential Light Weight Oil Heavier Weight Oil Front Increases off power steeri...

Страница 14: ...emperatures are too hot a different gearing combination with a lower pinion gear and or higher spur gear is suggested CHANGING THE PINION GEAR GEAR RATIO 1 Unscrew the gear cover screw and remove the...

Страница 15: ...he throttle trim is neutral and the throttle travel range is at 100 Disable any special functions such as ABS etc 3 Press the SET button while powering ON the ESC Release the button as soon as the red...

Страница 16: ...ols To engage reverse while moving forward apply the brake until the vehicle has come to a complete stop release brake then apply the brake again While braking or in reverse engaging the throttle will...

Страница 17: ...rom out of the shock 3 Hold the shaft with a multi wrench and remove the shock end Push the shaft into the shock body and remove through the top Remove the lower shock cap dust cover O rings and space...

Страница 18: ...spring cup 1 Remove the front clip 2 Remove the cover and differential 3 Check the differential fluid and refill or replace as needed with DYN2656 30 000CS fluid The fluid level should be about 0 12...

Страница 19: ...56 30 000CS fluid The fluid level should be about 0 12 in 3 0mm from the top surface of the case Do not overfill or the differential unit might leak 4 Check the ring and pinion as well as the bevel ge...

Страница 20: ...needed with DYN2657 50 000CS fluid The fluid level should be about 0 12 in 3 0mm from the top surface of the case Do not overfill or the differential unit might leak 3 Check the spur gear and pinion...

Страница 21: ...el not ing proper polarity Servo gears or motor damaged Replace or repair servo Will not turn one direction Servo gears damaged Replace or repair servo Motor does not run Motor wire solder joint is da...

Страница 22: ...rvice you in the event that you may need any assistance For questions or assistance please visit our website at www horizonhobby com submit a Product Support Inquiry or call the toll free telephone nu...

Страница 23: ...e essential requirements and other relevant provisions of the R TTE and EMC Directive A copy of the EU Declaration of Conformity is available online at http www horizonhobby com content support render...

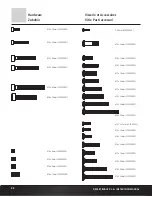
Страница 24: ...LOS255003 M5 x 20mm LOS255003 M5 x 14mm LOS255003 M5 x 32mm LOS255003 M5 x 40mm LOS255003 M4 x 4mm LOS255000 M5 x 5mm LOS255000 M6 x 5mm LOS255000 M6 x 12mm LOS255000 3 x 8mm LOS255002 M4 x 12mm LOS25...

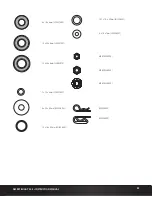
Страница 25: ...x 6mm LOS257000 10 x 22 x 6mm LOS257001 12 x 24 x 6mm LOSB5972 7 x 10 x 4mm LOS257002 8 x 22 x 0 2mm LOS256001 13 x 16 x 0 3mm LOS256001 10 1 x 14 x 25mm LOS256001 M4 LOS256000 M5 LOS256000 M5 LOS256...

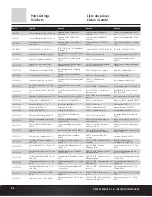
Страница 26: ...y 2 DBXL E Akkuhalter 2 DBXL E DBXL E Support batterie 2 Supporto batteria 2 DBXL E LOS251048 Battery Strap 6 DBXL E Akkulasche 6 DBXL E DBXL E Sangle batterie 6 Fascetta batteria 6 DBXL E LOS251049 B...

Страница 27: ...m Welle Pignon 14 dents m1 5 axe 8mm Pignone 14 denti 1 5 m albero 8 mm LOS252066 Diff Housing Set Aluminum 1 DBXL E Differential Geh use Set Aluminium 1 DBXL E DBXL E Corps de diff rentiel aluminium...

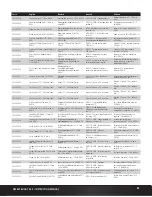
Страница 28: ...Bushing 10x7x4mm 4 1 5 4wd DB XL Buchse 10x7x4mm 4 1 5 4wd DB XL 1 5 4WD Paliers 10x7x4mm 4 Boccola 10x7x4 mm 4 1 5 4wd DB XL LOS45015 Wheel Black Beadlock Silver 2 DBXL E Rad schwarz Beadlock silbern...

Страница 29: ...meccanico completo DBXL E LOS354001 Front Spindle Set Aluminum DBXL DBXL E Spindelset vorne Aluminium DBXL DBXL E DBXL DBXL E Fus es avant en aluminium Set fusello anteriore alluminio DBXL DBXL E LOS...

Страница 30: ...51051 LOS251047 LOS251012 LOS254011 LOS255002 LOSB0884 LOS251020 SPMSR4220 LOS255003 LOS251048 6 LOS252059 LOS252058 LOS255002 LOS255002 LOS251064 LOS251010 LOS256005 LOSB5972 LOS252017 DYNS1665 LOS25...

Страница 31: ...0 LOS254005 LOS255002 LOSB5972 LOSB5972 LOS251016 LOS252005 LOS252004 LOS252068 LOS256001 LOS252054 LOS257001 LOS255002 LOS252017 LOS251008 LOS255001 LOS256000 LOS256000 LOS254009 LOS252050 LOS252051...

Страница 32: ...LOS251053 LOS254012 LOS255002 LOS251016 LOS251016 LOS256001 LOS257001 LOS252054 LOS252005 LOS252004 LOS252068 LOS252017 LOS252017 LOS252050 LOS254005 LOSB5972 LOSB252011 LOS24010 LOS254006 LOS254013 L...

Страница 33: ...manual LOS254015 LOS254018 LOS454017 LOS254015 LOS2500016 LOS2500017 LOS2500016 LOS2500017 LOS2500016 LOS2500017 LOS2500019 LOS2500020 LOS251053 LOS2500021 LOS2500020 LOS2500016 LOS2500017 LOS2500020...

Страница 34: ...High Bite Other Wet Dusty Blue Groove Dry Hard Packed Loose Loamy Smooth Rough Tight Open Indoor Outdoor Track Conditions Front Suspension Differentials Setup Sheet Stock Rear Suspension Radio Servo...

Страница 35: ...sty Blue Groove Dry Hard Packed Loose Loamy Smooth Rough Tight Open Indoor Outdoor Track Conditions Front Suspension Differentials Setup Sheet Rear Suspension Radio Servo ESC Motor Pinion Spur Battery...

Страница 36: ...eaction TLR Lok and the Horizon Hobby logoare trademarks or registered trademarks of Horizon Hobby LLC The Spektrum trademark is used with permission of Bachmann Industries Inc US 9 320 977 Other pate...

Отзывы: