


- 8 -
Basic Operation
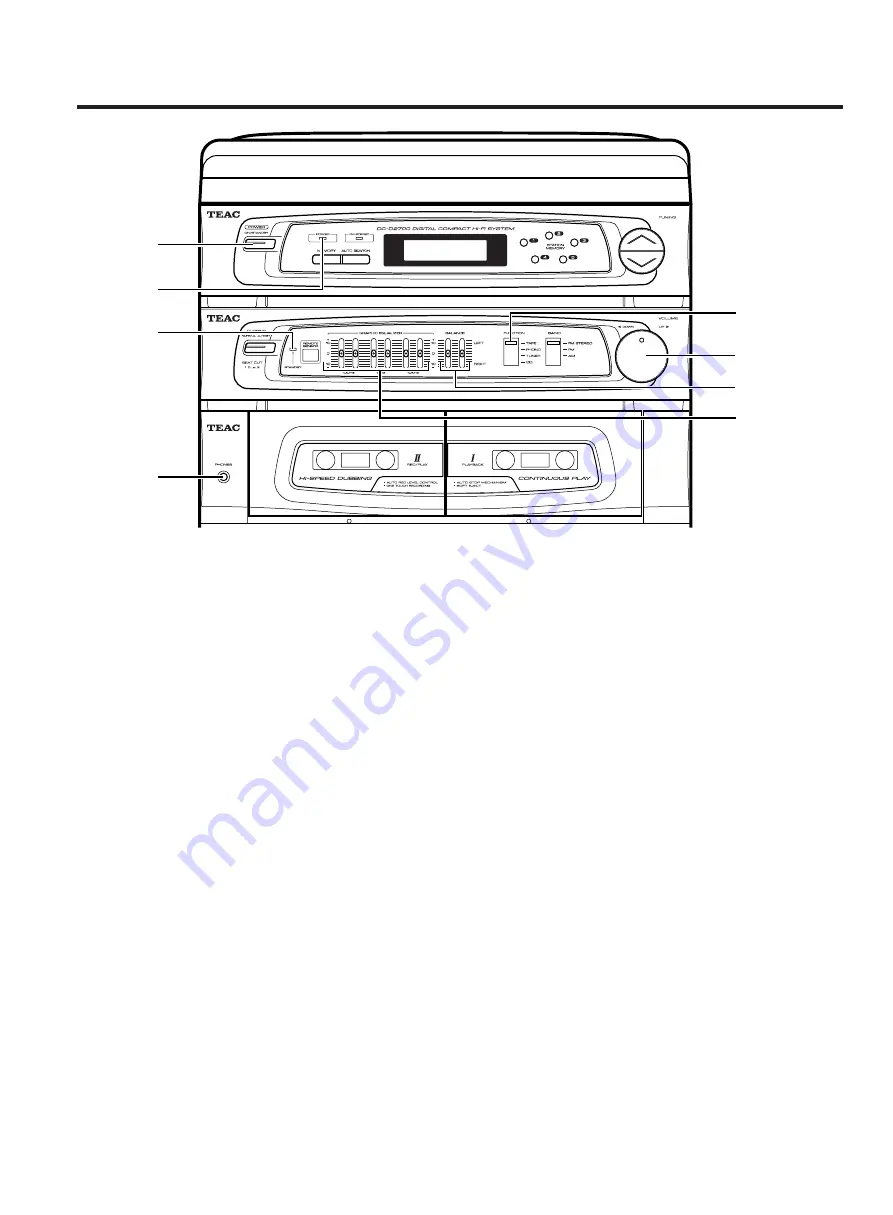
POWER
POWER
indicator
STANDBY
indicator
PHONES
FUNCTION
VOLUME
BALANCE
GRAPHIC
EQUALIZER
ª
Power On and Off
To turn the power on, press the POWER (ON/STANDBY)
button.
The STANDBY indicator will turn off and the POWER
indicator will light.
To turn the power off, press the POWER (ON/STANDBY)
button again.
The STANDBY indicator will light and the POWER indi-
cator will turn off.
To switch off the unit completely:
Unplug the AC power cord from the AC outlet.
ª
Amplifier operation
1. Select the desired source with the FUNCTION selec-
tor; then the selected source appears in the display.
2. Operate the selected source component for playback.
(See the following pages for the detailed informa-
tion.)
3. Adjust the volume to a comfortable listening level
with VOLUME UP/DOWN (a knob on the panel or but-
tons on the remote control unit).
ª
Other functions
ª
Graphic equalizer
You can alter the sound character using the 3-band
GRAPHIC EQUALIZER if you want. The "100 Hz" knob
controls boost/cut of low frequency range, the "1 kHz"
knob controls mid range, and the "10 kHz" knob controls
high range.
Note that the graphic equalizer works on the monitor
sound in playback, but does not affect for recording on
cassette tapes.
ª
Headphones monitor
For private listening, connect a pair of headphones
with 3.5 mm diameter stereo plug (stereo mini plug) to
the PHONES jack. When headphones are plugged in, no
sound comes out of the speakers.
Be sure to turn down the volume before connecting or
putting on headphones.
ª
Balance control
The BALANCE control knob changes the stereo balance
between left and right.


