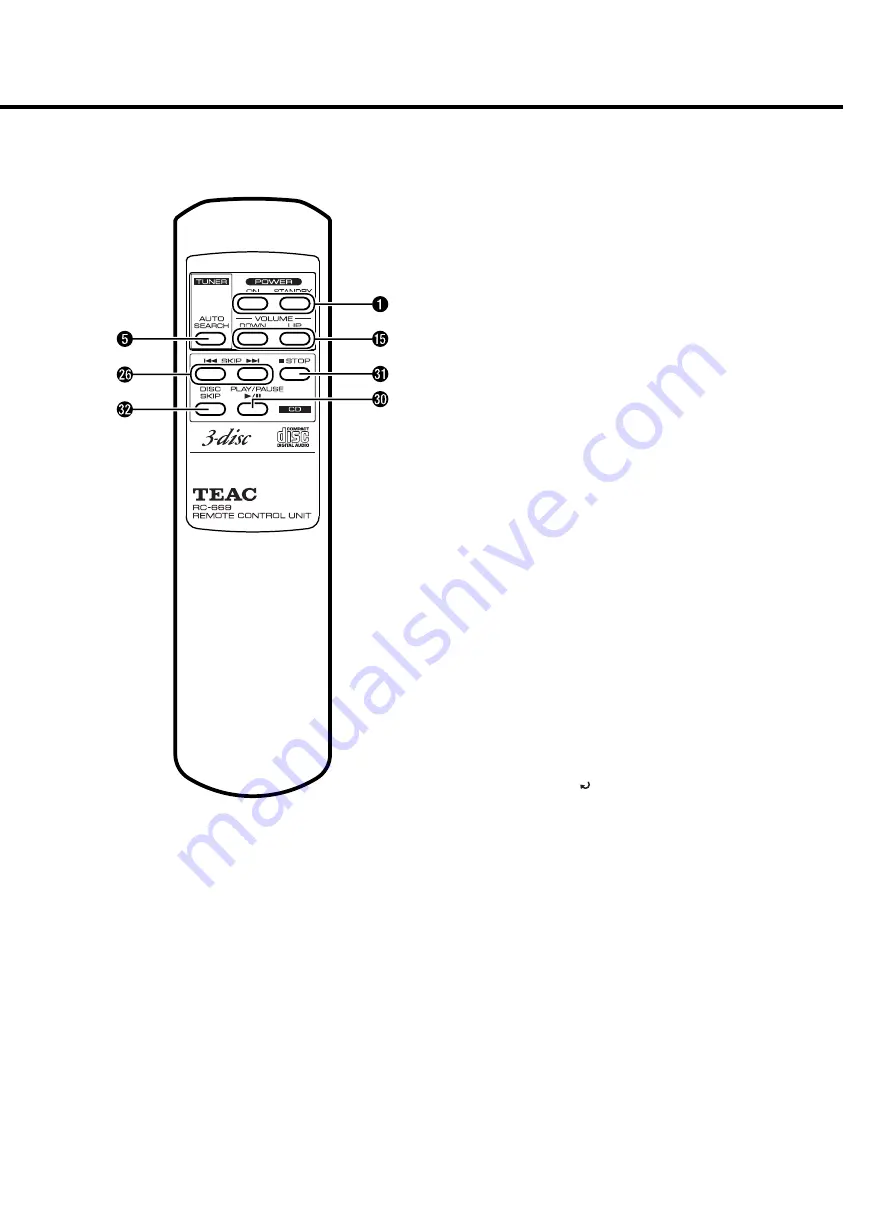
background image

- 7 -

1

POWER-ON/STANDBY switch

2

MEMORY button

3

POWER indicator

4

FM STEREO indicator

5

AUTO SEARCH button (TUNER)

6

Tuner display

7

STATION MEMORY buttons

8

TUNING (Up/Down) buttons

9

DUBBING/BEAT CUT switch

0

Power STANDBY indicator

q

REMOTE SENSOR

w

GRAPHIC EQUALIZER control

e

BALANCE control

r

FUNCTION selector

t

VOLUME (UP/DOWN) control

y

BAND selector

u

PHONES jack

i

Deck II Cassette Door

o

Deck II Control buttons

p

Deck I Cassette Door

a

Deck I Control buttons

s

Disc tray (CD)

d

Display (CD)

f

INTRO button (CD)

g

SEARCH (

Ô

/

) buttons (CD)

h

SKIP (

Â

/

¯

) buttons (CD)

j

SHUFFLE (RANDOM) button (CD)

k

REPEAT button (CD)

l

PROGRAM button (CD)

;

PLAY/PAUSE (

Áπ

) button (CD)

z

STOP (

ª

) button (CD)

x

DISC SKIP (

) button (CD)

c

OPEN/CLOSE (

ø

) button (CD)

v

Center Spindle

b

Turntable Platter

n

7" (17 cm) EP Record Adaptor

m

Tonearm

,

Speed Select switch

.

Tonearm Rest/Clamp

/

Headshell

!

FM Antenna

@

Transit Screw

#

Battery Compartment

$

Speaker Terminal

%

AC Cord

Remote Control Unit

Certain buttons on the remote control unit and on the
front panel of the DC-D2700 have the same or similar
functions and have the same reference numbers.

Содержание DC-D2700

Страница 1: ...1900 This appliance has a serial number located on the rear panel Please record the model number and serial number and retain them for your records Model number Serial number WARNING TO PREVENT FIRE O...

Страница 2: ...l 20 Damage Requiring Service Unplug this product from the wall outlet and refer servicing to qualified service personnel under the following conditions a when the power supply cord or plug is damaged...

Страница 3: ...ation is shown 1 CAUTION DO NOT REMOVE THE PROTECTIVE HOUSING USING SCREWDRIVER USE OF CONTROLS OR ADJUSTMENTS OR PERFORMANCE OF PROCEDURES OTHER THAN THOSE SPECIFIED HEREIN MAY RESULT IN HAZ ARDOUS R...

Страница 4: ...e disc out holding it carefully by the edges How to remove the disc How to hold the disc Fingermarks and dust should be carefully wiped off the disc s recorded surface with a soft cloth Wipe radially...

Страница 5: ...rted with their positive and negative poles positioned correctly 3 Close the cover until it clicks Battery Replacement If the distance required between the remote control unit and main unit decreases...

Страница 6: ...6 Locations of Buttons and Controls Front Panel Turntable Rear Panel...

Страница 7: ...te Door a Deck I Control buttons s Disc tray CD d Display CD f INTRO button CD g SEARCH buttons CD h SKIP buttons CD j SHUFFLE RANDOM button CD k REPEAT button CD l PROGRAM button CD PLAY PAUSE button...

Страница 8: ...forma tion 3 Adjust the volume to a comfortable listening level with VOLUME UP DOWN a knob on the panel or but tons on the remote control unit Other functions Graphic equalizer You can alter the sound...

Страница 9: ...H button once The unit will search the station automatically and the search stops at the first strong station being received Repeat until your desired station is being received Notes To terminate Auto...

Страница 10: ...ckward Pressing the SKIP forward button causes the player to jump to the next track Pressing the SKIP backward button causes the player to jump to the beginning of the current track Press the either o...

Страница 11: ...ss INTRO again Cautions Ensure all the disc are removed and the carousel is stilled before tuning off the unit If a malfunction occurs during operation reload the disc Keep all foreign objects out of...

Страница 12: ...it Basic Playback You can choose either Deck I or Deck II for playback as you like 1 Set FUNCTION toTAPE position 2 Load a cassette tape in Deck I or II 3 Press PLAY The playback starts To stop playba...

Страница 13: ...CORD to start recording 5 Press STOP EJECT to stop recording Recording from a CD 1 Set FUNCTION to CD position 2 Set a desired CD 3 Load a cassette tape in Deck II 4 Press RECORD of Deck II then press...

Страница 14: ...attempt to stop the platter by hand Moving the unit without securing the tonearm may damage the needle Tonearm 7 EP Record adaptor Speed Select switch Tonearm Rest Clamp Headshell Center Spindle Turnt...

Страница 15: ...ume is set to minimum Adjust the volume properly RECORD button cannot Erase prevention tab is Cover the slot with adhesive tape be pressed removed Low volume or weak sound Head is dirty Clean the head...

Страница 16: ...t has been tested and found to comply with the limits for a Class B digital device pursuant to Part 15 of the FCC Rules These limits are designed to provide reasonable protection against interference...

Отзывы: