31
CONNECTING TO A COMPUTER
If you want to watch, play, share, edit, … the videos and photos you made you can do so
by connecting the Guardo Action Cam to your computer!
•
Connect the micro USB cable to the Micro USB Port of the Guardo Action Cam.
Connect the other end of the micro USB cable to the USB port of your computer.
•
The Guardo Action Cam will turn ON automatically. If not, turn it on manually.
will now appear on the display.
•
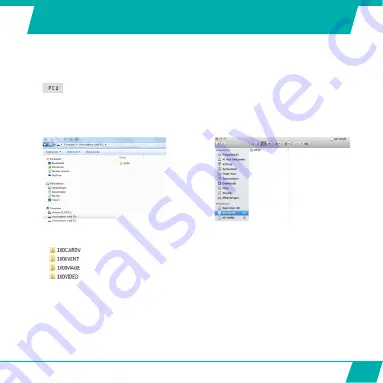
On your pc a pop-up “removable disk window” (e.g. ‘D:’,‘E:’, …) will appear or you will
find an “extra disk” (e.g. ‘D:’,‘E:’, …) under ‘My Computer’ or ‘Explorer’ in case you have
a Windows pc or in ‘Finder’ in case you have a Mac:
Windows PC
Apple Mac:
•
Click on the ‘DCIM’ folder to open it
•
The following folders will be shown:
Contains videos/photos made in dashcam mode
no function
contains your photos
contains your videos
•
Copy/move the files to your hard disk or external disk to open, play, share or edit them!
Format Micro SD card
: you can use your computer to format your Micro SD card inside the
camera! On a Windows computer: Right-click the removable disk and choose ‘format’.
Format Micro SD card on Mac:
Open the ‘Disk Utility’ program: you can now format your Micro
SD card by clicking it in the left-hand pane and then clicking the ‘Erase’ tab.
Note:
the SSID_pw.CFG file cannot be deleted
Содержание Guardo
Страница 1: ...1 USER S MANUAL GB NL D More languages available on www guardo be FR ...
Страница 5: ...5 2 3 4 5 6 7 8 9 10 11 12 1 2 3 13 14 15 16 25 20 1 ILLUSTRATIONS Illustration I ...
Страница 6: ...6 17 19 21 18 22 23 24 2X 2X ...
Страница 36: ...36 ...
Страница 39: ...39 2 3 4 5 6 7 8 9 10 11 12 1 2 3 13 14 15 16 25 20 1 ILLUSTRATIES Illustratie I ...
Страница 40: ...40 17 19 21 18 22 23 24 2X 2X ...
Страница 41: ...41 Illustratie II Illustratie III Illustratie IV 1 4 3 5 6 7 9 2 4 3 5 6 8 9 0 0 Verwijder de beschermfolie ...
Страница 70: ...70 ...
Страница 73: ...73 2 3 4 5 6 7 8 9 10 11 12 1 2 3 13 14 15 16 25 20 1 ABBILDUNGEN Abbildung I ...
Страница 74: ...74 17 19 21 18 22 23 24 2X 2X ...
Страница 75: ...75 Abbildung II Abbildung III Abbildung IV 1 4 3 5 6 7 9 2 4 3 5 6 8 9 0 0 Displayschutzfolie wegziehen ...
Страница 104: ...104 ...
Страница 107: ...107 2 3 4 5 6 7 8 9 10 11 12 1 2 3 13 14 15 16 25 20 1 ILLUSTRATIONS ILLUSTRATION I ...
Страница 108: ...108 17 19 21 18 22 23 24 2X 2X ...
Страница 109: ...109 ILLUSTRATION II ILLUSTRATION III ILLUSTRATION IV 1 4 3 5 6 7 9 2 4 3 5 6 8 9 0 0 Enlevez le film protecteur ...


