


29
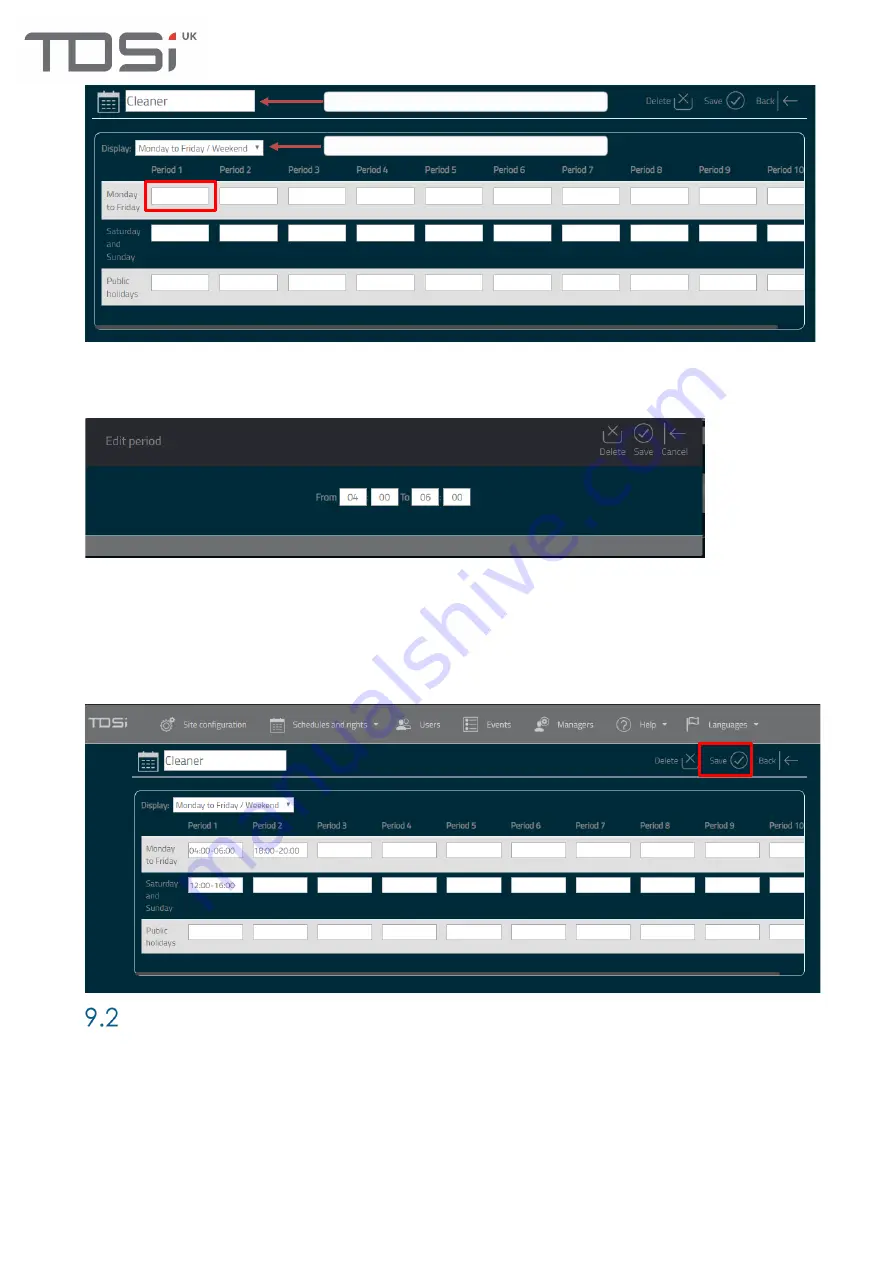
A new window is displayed. This allows the entry of a start and end time. The below example is setting
a schedule period of 4am to 6am. Enter the required values into the boxes (hour and minutes in 24-
hour format) Click
Save
.
NOTE: To have an all day 24/7 schedule, enter 00:00 to 00:00.
This will enter the values into the Period 1 text box. Continue to enter required schedule periods. The
below example is set to allow entry 4am-6am and 6pm to 8pm during the week. At weekends entry is
set to 12pm to 4pm. On public holidays there is no allowed entry. Click
Save
when complete. This
schedule is now available to use on objects such as Access Groups.
Assigning a schedule to an access group
To assign a schedule to an access group, click
Schedules
and rights and then click
Access Groups
.
Configure the access group as required i.e. set the name etc. Click
Permissions
tab and select the
required schedule per reader from the
Permissions
dropdown.
Enter the name here.
Select the frequency period
Содержание GARDiS Series
Страница 1: ...GARDiS Controller Embedded Web Server User Manual UM0121 Issue 3...
Страница 4: ...Timed Anti passback 46 Troubleshooting 47 Restoring from backup 47...
Страница 8: ...8 Step 3 Click GARDiS Master Unit from menu Step 4 Enter the required IP settings Step 5 Click Save...
Страница 14: ...14 Step 14 Enter details for the new user i e last name...
Страница 19: ...19 Once selected click open This will initiate the restore process A message box will display once completed...
Страница 25: ...25...
Страница 30: ...30 This will set the selected schedule within the dropdown...
Страница 34: ...34 Step 1 Step 2 Step 3 Step 4...
Страница 49: ...49 Because everyone deserves peace of mind...


