Model LR-26C, LR-623, LR-28A, & LR-2355 Hoist Installation and Operation Manual
Stock No. 036268
Page 14 of 27
12.
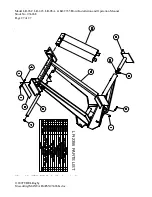
Install all grease fittings. For grease fitting locations in the hoist, refer to Figure 12. Torque
each grease fitting to 70 in-lb. Grease all grease fittings on both the hoist and the rear hinge.
13.
Install the body prop. Refer to the
“BODY PROP”
section of this manual.
14.
Install the hydraulic system. Cycle the hoist several times to rid the hydraulic circuit of air.
IMPORTANT:
Several different types of hydraulic components are used to power this hoist. All
hydraulic systems supplied by TBEI-Rugby have an installation and operation manual
included with them. For installation and operation information, refer to the Installation
and Operation Manual for your particular hydraulic components.
BE SURE
to read
and understand this manual and the installation and operating instructions included with
the hydraulic system before you attempt to operate this hoist.
WARNING:
Installing or operating this hoist without first understanding the proper installation and
operation procedures can lead to serious injury or death. Always read and understand
fully all installation and operation manuals before installing or operating this
equipment.
NOTE:
Before operating the hoist, read the
"OPERATION"
section of this manual
WARNING:
If it is necessary to work on the hoist or body while in the raised position,
ALWAYS
block the unloaded body up securely with the body prop or body props.
15.
Place a complete operation manual in the glove compartment of the truck. This manual MUST
BE available for reference by the operator when needed.
WARNING:
If the hydraulic system used to power this hoist was supplied by TBEI-Rugby, an
operation manual will be included with the hydraulic components. The operation
manual for this hydraulic system
MUST BE
supplied to the operator.
WARNING:
If the hydraulic system used to power this hoist was supplied by someone other than
TBEI-Rugby, an operation manual for this hydraulic system
MUST BE
obtained and
supplied to the operator.
16.
Install all decals. Refer to
"DECAL LOCATION"
section of this manual.


