background image

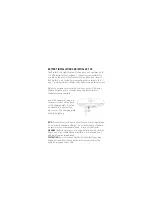
Place the base station onto the designated position on the 
charging plate. The Weather Station will be powered from the DC 
terminal of the charging plate. 

WARNING:

 Do not allow metal and other conductive objects to 

contact two power supply terminals (5) at the same time. There 
is a magnetic field in the DC terminal supply area (6) of the 
charging plate. Do not put the magnetic stripe of a card (credit 
card, telephone card, bank card, boarding card, etc.) on it. 

CLOCK SETTING

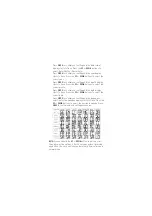
Press and hold the 

MODE

 button for 2 seconds and the 12/24Hr 

starts to flash. Press the 

UP

 or 

DOWN

 buttons to select the 

desired time format. 

NOTE: 

When choosing 12hr format, if “PM” is displayed before the 

hour, this indicates the hour is post meridiem. 

• Press 

MODE

 to confirm your setting and the hour display 

starts to flash. Press the 

UP

 or 

DOWN

 buttons to select the 

correct hour.

• Press 

MODE

 to confirm your setting and the minutes display 

starts to flash. Press the 

UP

 or 

DOWN

 buttons to select the 

correct minute.

Содержание 5287333

Страница 1: ...lor digital weather station This weather instrument is an example of superior design and craftsmanship Please read instructions thoroughly to ensure that you have the full benefit of all the unit s fe...

Страница 2: ...and humidity NOTE Please recycle or dispose of batteries per local regulations Do not mix old and new batteries Do not mix alkaline standard carbon zinc or rechargeable nicad ni mh etc batteries WARNI...

Страница 3: ...F or C C Backlight snooze button D Month and date E Day of week F Indoor humidity 1 Wireless charging status indicator 2 Mood light emitting area 3 Anti skid pad of mobile device wireless charger 4 M...

Страница 4: ...rd credit card telephone card bank card boarding card etc on it CLOCK SETTING Press and hold the MODE button for 2 seconds and the 12 24Hr starts to flash Press the UP or DOWN buttons to select the de...

Страница 5: ...uttons to select the correct month Press MODE to confirm your setting and the date display starts to flash Press the UP or DOWN buttons to select the correct date Press MODE to confirm your setting an...

Страница 6: ...irm and end setting procedures NOTE After 20 seconds without pressing any buttons the clock automatically switches from alarm setting mode to normal clock mode The alarm will sound for 2 minutes if it...

Страница 7: ...backlight will be powered on for 8 seconds MOOD LIGHT MODE Press and hold the MOOD LIGHT button on the charging plate for 2 seconds to turn on the mood light and enter mode A While in mode A press th...

Страница 8: ...ged simultaneously one device on the charging plate and one device using the USB cord SPECIFICATIONS Indoor temperature measurement ranges 14 F to 122 F 10 C to 50 C Indoor humidity measurement ranges...

Страница 9: ...electronic life span damaged batteries or distorted parts 6 Do not tamper with the units internal components Doing so will invalidate the warranty on this product and may cause damage The units contai...

Страница 10: ...trong electromagnetic wave strong static electricity and easy condensation 14 Do not place the magnetic stripe card credit card telephone card bank card boarding card etc near the product otherwise it...

Страница 11: ...y to correct the interference by one or more of the following measures Reorient or relocate the receiving antenna Increase the separation between the equipment and receiver Connect the equipment into...

Страница 12: ...and return it prepaid along with store receipt showing date of purchase and a note explaining reason for return to TAYLOR 2220 Entrada Del Sol Suite A Las Cruces New Mexico 88001 USA Email taylorusa...

Отзывы: