25
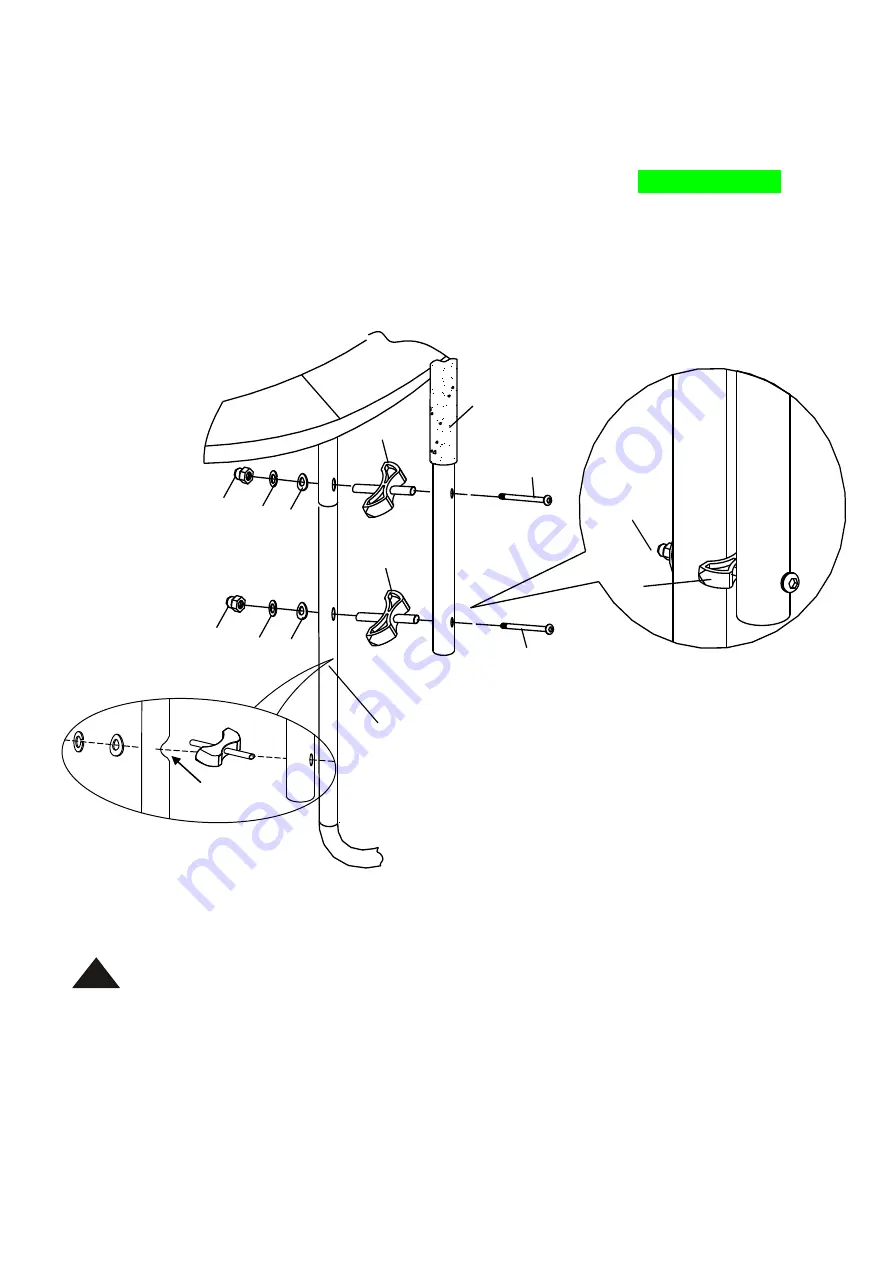
C. Connect the Lower Frame Tube with Foam (# B) to the trampoline Leg Frame as shown in FIGURE 19.
One person will need to hold the Leg Frame steadily while another installs the Frame Tube.
1. Align the holes on the Lower Frame Tube with Foam (# B) with the Leg Frame.
2. Insert Screw (# F) through the Lower Frame Tube with Foam (# B), then the Gap Spacer (# E), and
finally the Leg Frame of the trampoline. Secure using Arc Washer (# J), Spring Lock Washer (# G)
and Cap Nut (# H) as shown in FIGURE 18. Repeat this step for all six (6) frame tubes.
NOTE: Please make sure the side of Gap Spacer (# E) with the plastic tube is inserted into the hole of the
Lower Frame Tube with Foam (# B). This is an important safety feature to the structure. Also, the smaller arc
of the Gap Spacer (# E) needs to face the Lower Frame Tube with Foam (# B).
!
IMPORTANT NOTICE:
Please ensure all the three holes on the Lower Frame Tube with Foam (# B) are facing outward. The two
holes not covered by the foam tube are used for attachment to the Leg Frame. The other hole located at the
opposite end (may be covered by the foam) is for connection to the Upper Frame Tube with Foam (# A) at a
later step.
Leg Frame
FIGURE 19
Indented hole
ENLARGED DIAGRAM
# J
# H
# G
# J
# H
# G
# E
# B
# F
#E
# F
# E
#H


