−47−
TASCAM MD-CD1 & LA-MC1
7. Connect the cables removed in Step 3 to the following
connectors on the LA-MC1 PCBA.
Connect the cable removed from P106 to P301 (9-pin).
Connect the cable removed from P105 to P302 (5-pin).
Connect the cable removed from P101 to P303 (7-pin).
8. Push the flat cable from the CD drive to the front. Turn the
cables from the PHONES PCBA at the harness clip and pull
them to the left (viewed from the front).
9. Tilt the LA-MC1 and align the jacks with the holes in the rear
panel. When the jacks are in the holes, hold the LA-MC1
horizontally.
7. 手順3で抜いたケーブルをLA-MC1のコネクターに差し込
みます。
P301(9ピン)にP106から抜いたケーブルを接続します。
P302(5ピン)にP105から抜いたケーブルを接続します。
P303(7ピン)にP101から抜いたケーブルを接続します。
8. CDドライブのフラットケーブルをフロント側に寄せ、
PHONES PCBAからの線材をハーネスクリップ部で折り
返し、左側(フロントから見て)に寄せます。
9. LA-MC1を傾けてリアパネルの穴に合わせ、ジャックが穴
に入ったら水平にします。
Содержание MDD-CCDD1
Страница 33: ...9 EXPLODED VIEWS AND PARTS LIST EXPLODED VIEW 1 33 TASCAM MD CD1 LA MC1...
Страница 34: ...EXPLODED VIEW 2 34 TASCAM MD CD1 LA MC1...
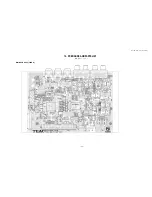
Страница 38: ...38 TASCAM MD CD1 LA MC1 MAIN PCB ASSY SIDE A 10 PC BOARDS AND PARTS LIST...
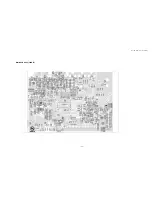
Страница 39: ...39 TASCAM MD CD1 LA MC1 MAIN PCB ASSY SIDE B...
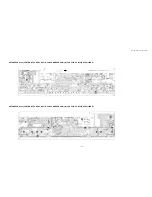
Страница 50: ...50 TASCAM MD CD1 LA MC1 XLR PCB ASSY SIDE 1 XLR PCB ASSY SIDE 2 14 PC BOARDS AND PARTS LIST LA MC1 LA MC1...


