TASCAM M-3500 MIXING CONSOLE
6
The following controls only change the listening sources/environment, without effecting the output
signal(s).
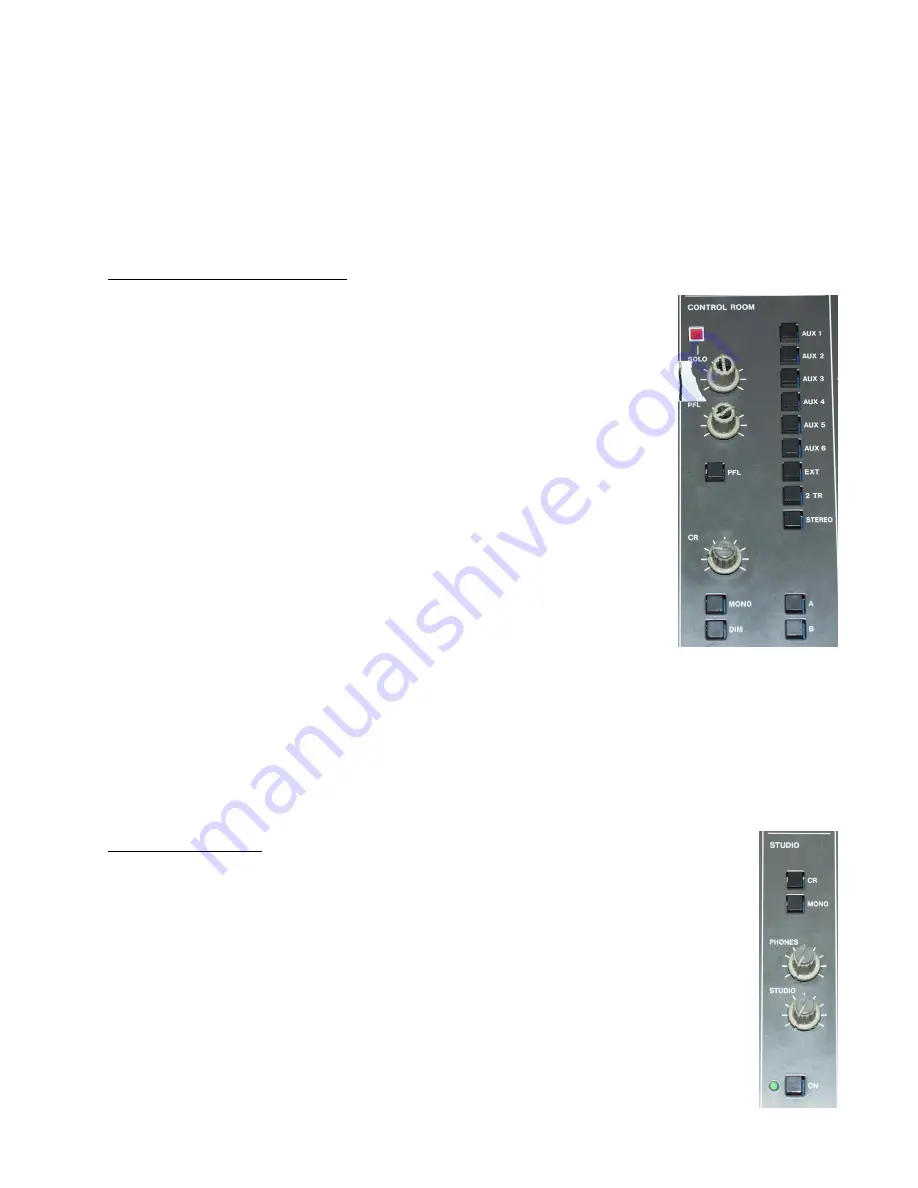
CONTROL ROOM SECTION
This section allows the engineer to change what is being heard in the CON-
TROL ROOM. The buttons select the signal being heard. The first six (6)
buttons allow the engineer to hear what is being sent to any of the six (6) AUX
SENDS. The “EXT” button selects an external source, not used at AIC, as is
the “2 TR” button, which monitors the external tape return signal. The “STE-
REO” button selects the MAIN STEREO OUTPUT, being sent to the output
rack. This is the button that is mainly used.
The “CR” knob adjusts the volume of the CONTROL ROOM speakers. This
is the control to use to turn the listening environment up and down. Pressing
the “MONO” button will mix the STEREO OUTPUTS together, allowing the
engineer to hear a non-stereo mix of the program. The “A” and “B” buttons
allow the engineer to select the large, reversed speakers, A, or the smaller
studio monitors, B. Pressing both buttons allows the sound to be monitored
through both sets of speakers. The “DIM” button will cut the volume to the
control room by -60 dB, without effecting the STEREO OUTPUT, for com-
munication with control room occupants.
The “SOLO” knob adjusts the volume level of all soloed channels to the CONTROL ROOM. When
this control is active, as based upon a soloed channel, the “SOLO” light will be lit. The “PFL” knob
adjusts the level of the CONTROL ROOM signal, as monitored at the headphone jack when the
“PFL”, or PERSONNAL FEEDBACK LOOP button is depressed. If the “PFL” button is not
pressed, the output to the headphone jack is the STEREO OUTPUT.
Figure 14
STUDIO SECTION
This section selects what is heard in the STUDIO. If the “CR” button is depressed, the
STUDIO will hear the same thing as the CONTROL ROOM, otherwise, it will hear the
signals sent by the MONITOR section. If the “MONO” control is depressed, the signal
will be mixed, evenly, to both Studio channels, left and right.
The “PHONES” knob and “STUDIO” knob must be adjusted to a comfortable listening
level within the STUDIO.
To activate the STUDIO sound, the “ON” button must be depressed and the green LED
must be lit.


