background image

2–Quick Start Guides

TASCAM  DP-004


21

  TIP

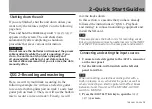
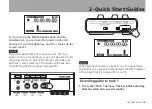
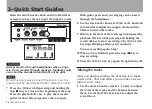
Use the track 1 PAN knob to set the stereo position of 

• 

the track signal.
If you are not satisfied with the recorded sound, 

• 

follow the procedures above again from the 

beginning. If you are satisfied with this recording 

continue to the next section.

Adding another recording (1)—record guitar 

to track 2

Now, you will record lead guitar on track 2 while 

listening to the rhythm guitar on track 1. This time, 

you will need to change the track 2 record source.

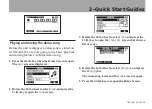
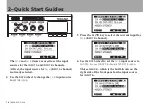
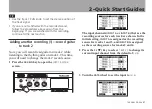
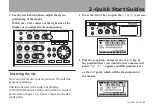
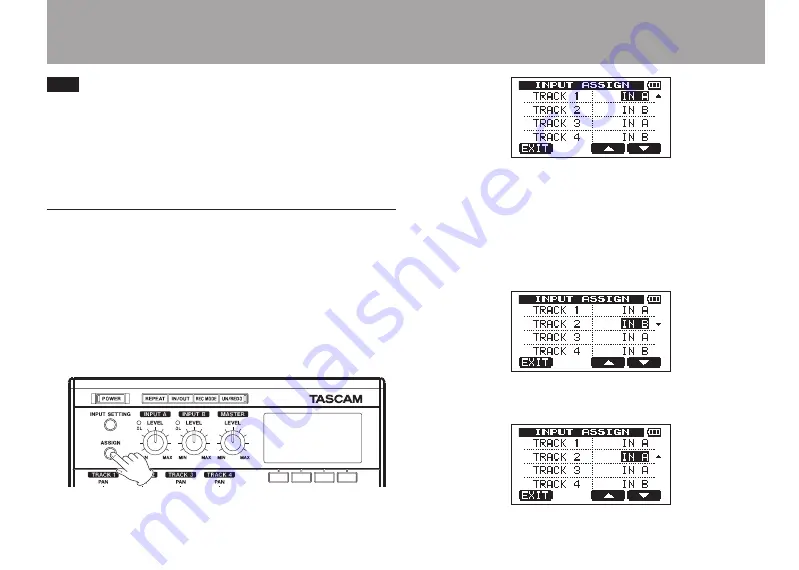
1  Press the 

ASSIGN

 key to open the 

INPUT ASSIGN


screen. 

  The input channels (

INPUT A

 or 

INPUT B

) that are the 

recording sources for each track are shown. In the 

initial setting, 

INPUT A

 is assigned as the recording 

source for tracks 1 and 3, and 

INPUT B

 is assigned 

as the recording source for tracks 2 and 4. 

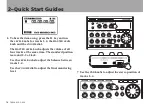
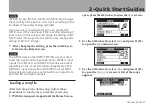
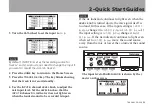
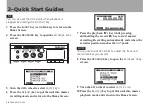
2  Press the 

F4

 (

) key to select  

TRACK 2

 to change its 

current input channel from the default of 

IN B

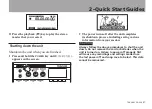
3  Turn the 

DATA

 wheel to set the input to 

IN A

.

Содержание DP-004

Страница 1: ...Portable 4 Track Digital Pocketstudio D01054920B OWNER S MANUAL This device has a serial number located on the bottom panel Please record it and retain it for your records Serial number _____________...

Страница 2: ...uld be located close enough to the AC outlet so that you can easily grasp the power cord plug at any time The main plug is used as the disconnect device the disconnect device should remain readily ope...

Страница 3: ...pment does cause harmful interference to radio or television reception which can be determined by turning the equipment off and on the user is encouraged to try to correct the interference by one or m...

Страница 4: ...esources and prevent any potential negative effects on human health and the environment which could otherwise arise from inappropriate waste handling For more information about collection and recyclin...

Страница 5: ...recording 20 Adding another recording 1 record guitar to track 2 21 Adding another recording 2 record vocals on track 3 22 Mixing the tracks 24 Mastering the mix 25 Shutting down the unit 27 3 Names a...

Страница 6: ...ing operations undo 66 Undoing the last operation single undo 66 Undoing a previous operation multi undo 66 Erasing the operation history 68 7 Recorder Functions 69 Punching in and out 69 Bouncing tra...

Страница 7: ...pported operating systems 92 Connecting with a computer 92 Disconnecting 93 Song backup and restoration 94 Backing up songs 94 Restoring songs 96 Track import and export 97 Importing tracks 97 Exporti...

Страница 8: ...back ups About this manual Please read chapter 2 Quick Start Guides first and follow the instructions in it to learn about and practice using this unit s functions Chapter 3 explains the functions of...

Страница 9: ...y They describe situations which can cause injury or damage to the equipment if you do not follow the instructions This manual cannot begin to be a full guide to multitrack recording techniques Howeve...

Страница 10: ...when handling them Do not leave them in extremely hot or cold places Do not leave them in extremely humid places Do not let them get wet Do not put things on top of them or twist them Do not hit them...

Страница 11: ...e This could damage the slot or card Do not remove the SD card when the unit s power is ON Make sure the unit power is OFF before you remove the card If you remove the SD card while the power is ON al...

Страница 12: ...ttery compartment cover after install ing the SD card and batteries 4 Connect headphones to the LINE OUT connector Headphones CAUTION The volume adjustment dial is small and does not have any indicati...

Страница 13: ...NU key when the Home Screen is open The MENU screen is displayed 2 Rotate the DATA wheel to select SONG and press the F4 key to open the SONG screen 3 Rotate the DATA wheel to select LOAD and press th...

Страница 14: ...L knob and the VOLUME dial The MASTER LEVEL knob adjusts the volume of all four tracks at the same time The standard position is around 2 3 o clock Use the LEVEL knobs to adjust the balance between tr...

Страница 15: ...guitar part on track 1 and a lead guitar part on track 2 Then we will use the built in mic to record a voice on track 3 Finally we will mix the tracks down In this section we assume that you have alre...

Страница 16: ...hannel is already selected 4 Use the DATA wheel to change the IN A input source to GUITAR LINE 5 Press the F4 key to select the current input for IN B INPUT B channel 6 Use the DATA wheel to set the I...

Страница 17: ...DE item on the INPUT SETTING screen is used to set the input monitoring mode Set to STEREO input signals from INPUT A and INPUT B channels are output separately on the L and R channels respectively Se...

Страница 18: ...re the guitar is already set to record to tracks 1 and 3 and MIC B is ready to record to tracks 2 and 4 As a result there is no need to change the input channel assignments to record the guitar to tra...

Страница 19: ...mode MONOx2 you will be able to hear the guitar sound on both left and right channels and both the L and R meters on the screen will move see Monitoring the input signal on page 55 NOTE When the inpu...

Страница 20: ...press the stop key to stop recording 4 Press the TRACK 1 REC key again Its light turns off Listening to your recording 1 To go to the beginning of the song press the key while pressing and holding the...

Страница 21: ...r on track 2 while listening to the rhythm guitar on track 1 This time you will need to change the track 2 record source 1 Press the ASSIGN key to open the INPUT ASSIGN screen The input channels INPUT...

Страница 22: ...ough the headphones 7 Use the track LEVEL knobs MASTER LEVEL knob and VOLUME dial to adjust the output volume and the balance between the tracks 8 Return to the start of the track again and press the...

Страница 23: ...t level Set the LEVEL knob so that the INPUT B channel OL indicator does not light even when the loudest sound to be recorded is input NOTE If the OL indicator continues to light even when the LEVEL k...

Страница 24: ...d your singing can be heard through the headphones 8 Use the track LEVEL knobs MASTER LEVEL knob and VOLUME dial to adjust the output volume and the balance between the tracks 9 Return to the start of...

Страница 25: ...tereo mix We call this process mastering The time between the song s beginning 00 00 00 00 and the OUT point will be recorded as the stereo master So first we must set the OUT end point 1 Press the IN...

Страница 26: ...he unit into master recording mode and return to the Home Screen 7 Press the playback key while pressing and holding the record key to start master recording Recording automatically ends when the reco...

Страница 27: ...s on the screen 2 The power turns off after the unit completes its shutdown process including saving various information from your session CAUTION Always follow the above procedures to shut the unit d...

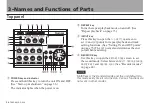
Страница 28: ...y to open the I O SETTING screen to set IN and OUT points for repeat playback and track editing functions See Setting IN and OUT points on page 73 The OUT point also determines the end point when mast...

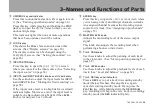
Страница 29: ...e level is too high its OL overload indicator lights Moreover even if the input level is suitable the OL indicator might light if the LEVEL knob is turned past 2 or 3 o clock 9 ASSIGN key Press this k...

Страница 30: ...on page 72 i STOP key Press this key alone to stop recording playback fast forward and fast rewind If you press the or key at the same time the transport will also locate to the head of the song RTZ o...

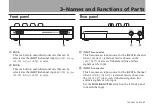
Страница 31: ...B Low INT MIC B Mid INT MIC B Hi gh Rear panel g INPUT B connector This becomes an input source for the INPUT B channel when LINE or MIC external mic is chosen on the INPUT SETTING screen Unbalanced l...

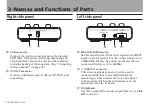
Страница 32: ...sold separately Left side panel l MIC LINE GUITAR switch Set this switch to match the input signal to the INPUT A jack on the rear panel For mic or line signals set it to MIC LINE For electric guitar...

Страница 33: ...it in the direction of the arrow until it stops to minimize the volume Sudden bursts of loud sounds can cause hearing damage and speaker damage for example Bottom x Battery cover v c c Battery compar...

Страница 34: ...his unit can be found on the TASCAM web site www tascam com Insert the SD card into the SD card slot inside the battery compartment on the bottom of the unit 1 Make sure the unit power is OFF Open the...

Страница 35: ...ill not be able to record or edit files Unprotected Protected Preparing the power This unit can be powered either by AA batteries or a power adapter sold separately Alkaline or NiMH batteries can be u...

Страница 36: ...plugging it into an outlet TASCAM PS P520 sold separately DC plug AC outlet NOTE The adapter powers the unit if the adapter is connected even if batteries are installed Start up shutdown Starting up t...

Страница 37: ...y proce dures on the computer to unmount the unit After making these preparations press and hold the POWER key until the following screen appears or the key indicator light begins to blink The power t...

Страница 38: ...unit a screen prompting you to format it appears NOTE The screen prompting you to format it also appears if you put in an SD card that has been formatted by any device other than this unit CAUTION If...

Страница 39: ...t always starts up in the multitrack recorder mode See Recorder modes on page 44 Press the HOME key when any other screen is open to return to the Home Screen 1 Recorder mode Shows the current recorde...

Страница 40: ...and B q Level meters for tracks 1 4 Shows the input level when recording and the playback signal level when playing back w Level meter for stereo outputs L R Shows the output signal level from the LIN...

Страница 41: ...items selected items appear as light letters on a dark background A appears to the right side of items with sub menu screens To open the sub menu screen press the function key that corresponds to the...

Страница 42: ...he function press the function key that corresponds to EXEC To return to the Home Screen from a menu screen immediately press the HOME key Always return to the Home Screen after you are finished using...

Страница 43: ...of song and files for export for example can be edited In the following cases screens where names can be edited appear When saving creating or editing the name of a song From the SONG menu select SAV...

Страница 44: ...rsor position When finished editing press the F2 EXEC key to save the new name Recorder modes This unit has four recorder modes The ordinary mode is Multitrack mode In this mode this unit functions as...

Страница 45: ...basses to INPUT A Connect keyboards to INPUT A or INPUT B Connect mics to INPUT A or INPUT B TASCAM PS P520 sold separately AC outlet DC plug Computer USB Rear panel connections Right side panel conn...

Страница 46: ...urn the DATA wheel to select PREFERENCE and press the F4 key to open the PREFERENCE screen 3 Use the F3 and F4 keys to select the CONTRAST value and turn the DATA wheel to adjust the display contrast...

Страница 47: ...rtitions MTR partitions are for the recording of data and FAT partitions can be read by a personal computer SD cards with high capacities are formatted with multiple MTR partitions When you want to re...

Страница 48: ...st used song on that partition Loading a saved song Follow these procedures to load a song from the active partition 1 With the transport stopped and the Home Screen open press the MENU key to open th...

Страница 49: ...ONG002 4 Change the song name as necessary see Editing names on page 43 TIP You can rename a song later by selecting NAME EDIT from the SONG menu You can also edit the song name when saving it 5 Press...

Страница 50: ...u can check the name partition and remaining recording time of the currently loaded song 1 When the Home Screen is open press the MENU key to open the MENU screen 2 Turn the DATA wheel to select INFOR...

Страница 51: ...ns the SONG COPY screen which shows a list of songs in the active partition 4 Turn the DATA wheel to select a song that you want to copy and press the F4 key The song is selected as a copy source and...

Страница 52: ...MENU screen 2 Turn the DATA wheel to select SONG and press the F4 key to open the SONG menu screen 3 Turn the DATA wheel to select ERASE and press the F4 key This opens the SONG ERASE screen which sh...

Страница 53: ...reen 2 Turn the DATA wheel to select SONG and press the F4 key to open the SONG menu screen 3 Turn the DATA wheel to select PROTECT and press the F4 key The SONG PROTECT screen that allows you to turn...

Страница 54: ...Use the IN A and IN B items to set the input sources for the INPUT A and INPUT B channels 2 Use the F3 and F4 keys to select the IN A or IN B setting and turn the DATA wheel to select the input sourc...

Страница 55: ...tor the input signal When an input source is set to a front panel built in mic the input signal is sent to the stereo bus and can be monitored only when the REC indicator light for the track that is s...

Страница 56: ...nput meters are moving a signal is being input into the unit even if you cannot hear anything when you are monitoring As shown below if a appears at the top of a meter the level is too high when a app...

Страница 57: ...s shown the level of the recorded signal of the track is shown so the level shown by the meters cannot be changed When the input signal is being shown the input levels and thus the meters can be chang...

Страница 58: ...aking settings press the HOME key to return to the Home Screen Making the first recording Before following recording procedures below confirm that the source that you want to record is connected and t...

Страница 59: ...ed to moves simultaneously with the corresponding input meter A or B OL indicator The OL indicator lights if the input is too loud If the OL indicator stays lit even when you lower the LEVEL knob lowe...

Страница 60: ...he left and right speakers There is an indent at the center positions of the PAN knobs If you are not satisfied with the recorded sound follow the procedures above again from the beginning Press the k...

Страница 61: ...playing back as recording starts on the overdub track Track pan and level settings Use the LEVEL and PAN knobs of already recorded tracks to adjust their level and stereo positions for monitoring duri...

Страница 62: ...e sound will be distorted NOTE The track meters on the Home Screen show the recorded signal levels on the tracks Therefore these meters do not change even when the LEVEL knobs are adjusted TIP You do...

Страница 63: ...song is set as the OUT point In this case the time at the OUT point is the length of the song Use the following procedures to set the OUT end point 1 Press the IN OUT key to open the I O SETTING scre...

Страница 64: ...play back functions and other functions do not work If you try to use these functions the In Master Mode pop up message appears 4 Press the playback key while pressing and holding the record key to s...

Страница 65: ...g again The new stereo master replaces the previous stereo master NOTE To listen to the recorded stereo master in a saved song load the song set the recorder mode to MASTER PLAY and press the playback...

Страница 66: ...last editing or recording operation conducted when undo has been used Cancelling an undo operation redo Press the UN REDO key when it is lit to return to the state of the last operation The UN REDO i...

Страница 67: ...ng multi undo UN REDO indicator lit the event history after the current event is cleared and the last operation conducted becomes the most recent event NOTE When the HISTORY screen is open the UN REDO...

Страница 68: ...STORY screen 2 Press the F4 CLEAR key A confirmation message appears 3 Press the F3 YES key A confirmation message appears again 4 Press the F3 YES key to clear the operation history and erase unused...

Страница 69: ...ing punch in when you reach the part Play or sing what you want to record 5 Press the playback key to switch to playback punch out when you finish the replacement recording TIP You can also press the...

Страница 70: ...age 66 Using the bounce function 1 Press REC MODE to open the RECORDER MODE screen 2 Turn the DATA wheel to select BOUNCE 3 Press the F4 EXEC key to put the unit in bounce mode and return to the Home...

Страница 71: ...ult press the REC MODE key to open the RECORDER MODE screen and select MUL TI TRACK then press the HOME key to return to the Home Screen After bouncing tracks you can make new recordings over the othe...

Страница 72: ...IGIT key to move to a different time division and turn the DATA wheel to change the value 4 After setting the desired time value press the playback key to start playback from that position RTZ and LR...

Страница 73: ...g them for setting the repeat playback passage the IN and OUT points are also used for interval setting for track editing Moreover the OUT point is used as the end point of the master track when maste...

Страница 74: ...following guidelines Use the F3 and F4 keys to move the cursor underline between the IN and OUT points Use the keys to move the cursor underline between time fields Turn the DATA wheel to change the...

Страница 75: ...AT key again to stop repeat playback The repeat icon on the Home Screen disappears The next section explains how to set the repeat interval that determines the amount of time until playback starts aga...

Страница 76: ...REC ONL Y functions only during recording TEMPO Set speed from 20 to 250 beats per minute BPM BEAT Set the frequency of the accent from 1 to 12 for different time signatures LEVEL Set the metronome v...

Страница 77: ...n page 54 3 When the transport is stopped and the Home Screen is open press MENU to open the MENU screen 4 Turn the DATA wheel to select TUNER and press the F4 key to open the TUNER screen The value o...

Страница 78: ...y to open the MENU screen 2 Select PREFERENCE and press the F4 key to open the PREFERENCE screen 3 Use the F3 and F4 keys to select the Auto Off setting value and turn the DATA wheel to choose from th...

Страница 79: ...2 EXEC to open a confirmation screen Press F3 YES to initialize the unit The PREFERENCE screen reopens when the process finishes NOTE Press the F4 NO key to cancel initialization 5 When finished press...

Страница 80: ...Use the F3 PREV and F4 NEXT keys to change the page The pages contain the following information SONG page name and partition of currently loaded song remaining recording time on partition CARD page MT...

Страница 81: ...allow this unit to import audio files into songs for example For this reason two steps are necessary to copy from a MTR partition and a computer You can also format an entire card or individual parti...

Страница 82: ...to select CARD and press the F4 key to open the CARD menu screen 3 Turn the DATA wheel to select FORMAT and press the F4 key The FORMAT screen opens MTR partition size FAT partition size Total card s...

Страница 83: ...re 4 GB and the last one is 3 GB Since 1GB is actually 1024 MB the total size of the partitions does not always match the card size When formatting finishes the CARD menu screen reopens After formatti...

Страница 84: ...ormatting finishes the CARD menu reopens After reformatting one song is automatically creat ed in the MTR partition To cancel reformatting press the F4 NO key instead of the F3 YES key Reformatting th...

Страница 85: ...that you initialize it When you initialize an SD card the entire card is formatted as FAT32 1 With the transport stopped and the Home Screen open press the MENU key to open the MENU screen 2 Turn the...

Страница 86: ...T remove part of a track OPEN insert a silent section Edit points Among track editing functions SILENT CUT and OPEN use the IN and OUT points for editing These are the same IN and OUT points used for...

Страница 87: ...his copies the entire track so the IN and OUT points have no effect The two parameters are as follows SOURCE TRK Select the track or tracks to duplicate The choices are 1 to 4 single track 1 2 3 4 tra...

Страница 88: ...e no effect There is only one parameter CLEAN OUT TRK Select the track or tracks to erase The choices are 1 to 4 single track 1 2 3 4 track pairs and 1 4 all tracks After setting the parameter press t...

Страница 89: ...press the F2 EXEC key to execute the edit Press the F1 BACK key to return to the TRACK ED IT menu screen without editing TIP This function can be used to remove short noises for example CUT remove pa...

Страница 90: ...points on a selected track This operation splits a track at the IN point and the beginning of the part after the IN point is shifted to the OUT point As a result the length of the track becomes longe...

Страница 91: ...ectively just as a computer for example transfer to the computer The FAT partition has three directories folders BACKUP WAVE and UTILITY NOTE Do not erase or change the names of these directo ries The...

Страница 92: ...correctly data on the FAT partition could be damaged see Connecting with a computer below NOTE Data transfer between this unit and a computer occurs at USB 2 0 speed maximum Data can still be transfe...

Страница 93: ...iles that you want to transfer to a computer to the FAT partition before connecting the unit and the computer by USB Disconnecting Use the following procedures to disconnect the USB connection correct...

Страница 94: ...e OS version or OS settings you might also be able to eject the DP 004 icon by clicking an eject button next to it in the Finder window or by using a control key 2 After the icon disappears from the d...

Страница 95: ...ong maximum of 8 char acters see Editing names on page 43 5 After setting the name press the F2 EXEC key A backup copy of the song on the active partition is made on the FAT partition 001 is added as...

Страница 96: ...e You can also restore a backed up song file to a differ ent DP 004 unit Since files can be shared freely between DP 004 units you can easily conduct over dubbing or mixdown at different locations Res...

Страница 97: ...n import and export individual tracks between a computer and this unit s FAT partition Files that can be imported and exported as tracks must be 16 bit 44 1 kHz mono WAV files with the wav extension I...

Страница 98: ...on the FAT partition but those spaces are not included in the actual file name 6 Turn the DATA wheel to select the WAV file that you want to import and press the F2 NEXT key The amount of open space...

Страница 99: ...audio recordings are not displayed in the file list 3 Turn the DATA wheel to select a track for export and press the F4 key to put a check in the checkbox By checking multiple checkboxes you can expo...

Страница 100: ...ported track file on the computer If you do so use no more than eight characters and always follow them with the WAV extension Furthermore do not use special symbols for example You can import the tra...

Страница 101: ...kHz stereo WAV file to the FAT partition The file name of the exported file is the name set in step 3 above plus the WAV extension NOTE To cancel exporting press the F1 BACK key 5 Connect this unit t...

Страница 102: ...the LINE OUT jack to your monitoring system properly and is your monitoring system set up correctly Is the VOLUME control set to high enough Why does the sound I m recording sound distorted Are the L...

Страница 103: ...nal 3 5 mm mini phone jack stereo When line is connected Standard output level 16 dBV Maximum output level 0 dBV When headphone is connected Maximum output level 15 mW 15 mW when 32 headphone is conne...

Страница 104: ...ccessories AC adapter PS P520 Computer requirements Windows Pentium 300 MHz or faster 128 MB or more memory USB USB 2 0 recommended Macintosh Power PC iMac G3 G4 266 MHz or faster 64 MB or more memory...

Страница 105: ...13 Specifications Messages TASCAM DP 004 105 Block diagram...

Страница 106: ...Importing tracks on page 97 Connect the unit to a PC and transfer some files to the FAT partition for import Import F i le T oo Large You are trying to import a WAV file from the FAT partition that i...

Страница 107: ...e T rack You cannot clone a track to itself CLONE TRACK on page 87 Song Protected The song is protected Protecting songs on page 53 and you are trying to change it record or edit etc Unprotect the son...

Страница 108: ...a lot You may be able to continue the work if you clear the history Erasing the operation history on page 68 which may increase the open work memory You may also be able to continue work by turning th...

Страница 109: ...e 73 Edit or trim the IN and OUT points IN OUT F2 See Setting IN and OUT points on page 73 Use the USB connection Connect the unit and a PC with the USB cable See Connecting with a computer on page 92...

Страница 110: ...50 Copy a song MENU SONG COPY See Copying songs on page 51 Delete a song MENU SONG ERASE See Erasing songs on page 52 Back up a song to a PC MENU BACKUP SONG BACKUP See Backing up songs on page 94 Pro...

Страница 111: ...t how much time is left for recording MENU INFORMATION See Viewing song information on page 50 Playback a created stereo master track REC MODE MASTER PLAY See Mastering on page 62 Use the built in mic...

Страница 112: ...9 Wallace Street Mississauga Ontario L4Z 1Z8 Canada TEAC MEXICO S A de C V Phone 52 55 5010 6000 www teacmexico net R o Churubusco 364 Colonia Del Carmen Delegaci n Coyoac n CP 04100 M xico DF M xico...

Отзывы: