


TASCAM US-2x2/US-4x4
7
3 – Installation
6.
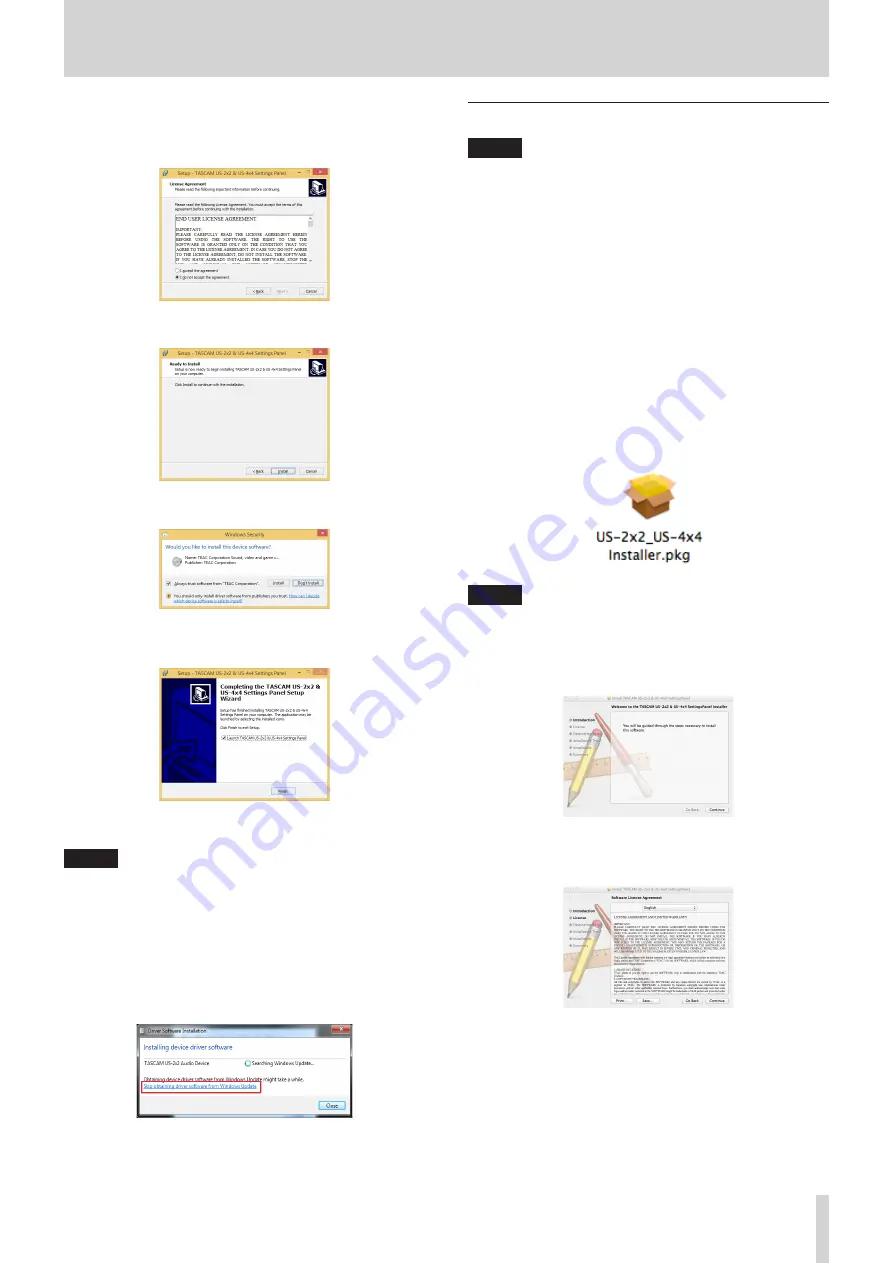
Read the contents of the License Agreement, and select “I
accept the agreement” if you agree to the terms. Then, click
the “Next” button.
7.
Next, click the “Install” button.
8.
Next, click the “Install” button to start installation.
The following screen appears when installation has
completed. Click the “Finish” button.
This quits the installer and launches the Windows Settings
Panel.
NOTE
The first time you connect the unit by USB to the computer
after installing the software, installation of the device driver
will be executed. Some time might be necessary before
the unit is recognized because Windows Update will be
automatically searched at this time. If the unit is still not
recognized after a while, open the software installation
screen from the notification area at the bottom right of the
computer display, and click “Skip obtaining driver software
from Windows Update” to stop the search.
Installing the Mac dedicated software
NOTE
• Before starting to install the Mac dedicated software, quit
other applications.
• While installing the Mac dedicated software, a warning
message like this might appear: “US-2x2_US-4x4 Installer.
dmg” can't be opened because it was not downloaded from
the Mac App Store.If a message like this appears, follow the
instructions in “Working with Gatekeeper” on page 8
and then proceed with the installation.
8
Mac dedicated software installation procedures
1.
Download the Mac dedicated software for the operating
system you are using from the TEAC Global Site (
http://
teac-global.com/
) and save it on the computer to be used
with the unit.
2.
Double-click “US-2x2_US-4x4 Installer.dmg”, which is the
saved disk image file for the Mac dedicated software, and
double-click “US-2x2_US-4x4 Installer.pkg” inside the folder
that opens.
NOTE
Depending on the computer’s settings, the downloaded zip
file might not have opened automatically. In this case, open
the zip file first and then double-click the disk image file.
3.
When the installer starts, click the “Continue” button.
4.
Next, select the desired language and click the “Continue”
button.


